
Refinishing secondhand furniture
More often than not, the secondhand furniture you come across will need a bit of work. Over the years, furniture gets scratched, has water rings, layers of polish or other minor defects that can easily be put right if you are prepared to put in the time and effort to refinish or restore secondhand furniture.
diynetwork.com
Step 1
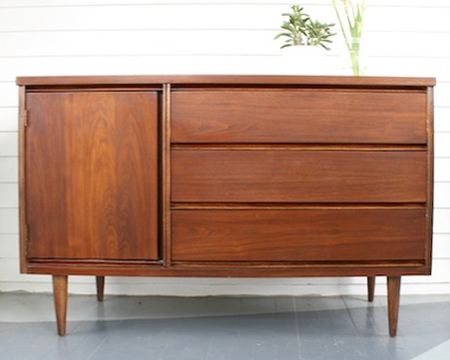
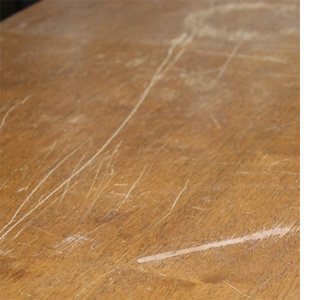
When shopping for secondhand furniture, assess the repairs that needs to be done before you buy. The frame should be solid but dents, dings and scratches can be fixed up easily. Is anything warped, splintered, or water-damaged? This vintage sideboard was in great shape, save for deep scratches and some signs of water damage on the finish.
Step 2
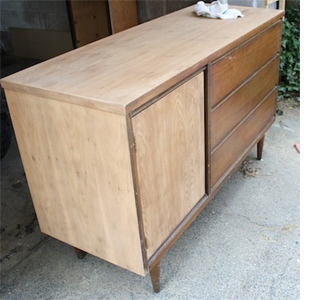
One many pieces of secondhand furniture marks might be purely cosmetic. Try wiping down with mineral turpentine and a rag before you start sanding. You may find that this does the job! Wiping with mineral turpentine and Woodoc steel wool - fine - will also allow you to start removing layers of built up wax polish.
Step 3
Sand, sand and sand again. Start with 80-grit and then 120-grit if the piece is varnished or painted. Finish off the sanding with 240-grit sanding pads. The best way to do your sanding is with an Orbital or Random Orbit Sander.
GOOD TO KNOW
It is always better to start with a rough-grit sandpaper for a varnished or painted finish, as the gaps in the sandpaper don't clog up as quickly. Sand with rough, medium and then fine sanding pads, as each level of sanding repairs the scratches from the previous step.
Step 4
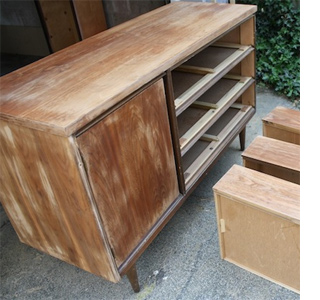
Once sanded, wipe down with a cloth lightly dampened with mineral turpentine to remove all traces of dust. As you wipe down you will be able to see any areas that still require sanding, as well as cracks to be filled with wood filler. Fill and sand again, wiping clean before you continue.
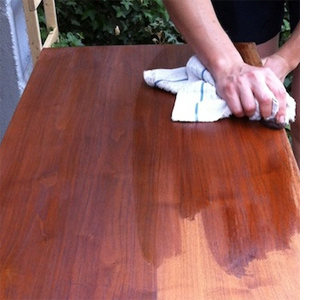
Step 5
Staining is the fun part! Use a rag that you’re willing to throw out when you’re done, and apply the stain to the surface in long, even strokes. Rub the stain into the wood lightly so that you don’t miss any spots. After it’s dry, you may decide to add a second or third coat to darken the stain.
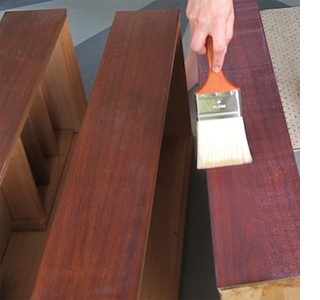
Step 6
When the stain has dried, add 2 coats of Interior Varnish to seal and protect. I find application easiest and more even when I use a small foam roller to apply, and then follow up with a brush over the wet surface. With the finished piece dry, reassemble the drawers and enjoy your restored vintage furniture.