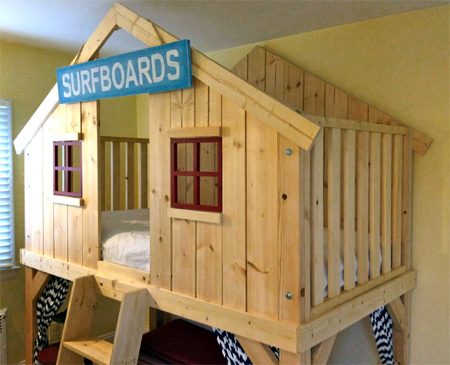
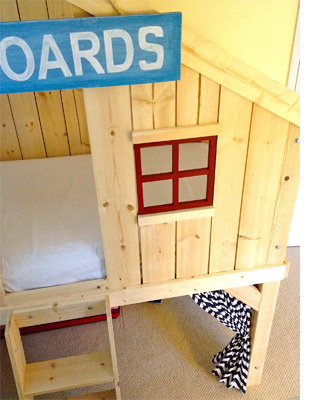
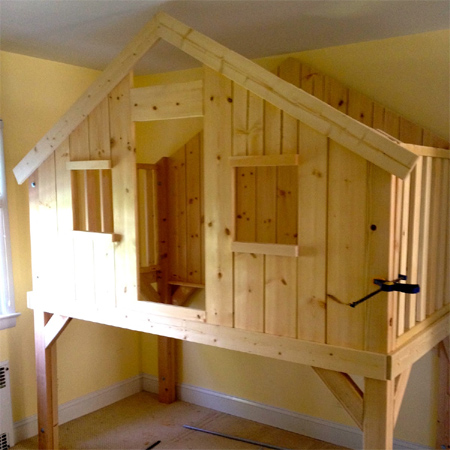
DIY loft bed playhouse or clubhouse
This loft bed is ideal for a little boy or girl. The raised design means that kids still have plenty of space to play on the floor. Perfect for a small bedroom, the loft bed takes up the same amount of space as a standard single bed. Buy everything you need for this project at your local Builders Warehouse.
thatsmyletter.blogspot.com
This loft bed is ideal for a little boy or girl. The raised design means that kids still have plenty of space to play on the floor. Perfect for a small bedroom, the loft bed takes up the same amount of space as a standard single bed. It might look difficult, but once you have all the pieces cut and start laying everything out - it's easier than you think! You will find diagrams to take you step-by-step through the project at the bottom of this page.
woodshop-plans.com
YOU WILL NEED:
All sections are PAR pine and can be found in the timber section at your local Builders Warehouse. You can have all the pieces cut to size, but bear in mind that angled and bevel cuts you will need to do yourself.
SIDE WALLS (x 2)
4 - 44 x 44 x 914mm
14 - 20 x 77 x 650mm
4 - 50 x 100 x 1730mm (top end cut 30°)
4 - 50 x 100 x 430mm (both ends cut at 45° - NOT parallel)
2 - 20 x 100 x 1100mm
BACK WALL
2 - 50 x 100 x 1730mm (top end cut at 30°)
2 - 20 x 150 x 946mm (top end cut at 30°)
2 - 20 x 120 x 1025mm (top end cut at 30°)
2 - 20 x 150 x 1100mm (top end cut at 30°)
2 - 20 x 150mm 1188mm (top end cut at 30°)
2 - 20 x 150 x 1270mm (top end cut at 30°)
2 - 20 x 150 x 1350mm (top end cut at 30°)
1 - 20 x 150 x 1385mm (top end cut to dogeared 30°)
1 - 20 x 100 x 1980mm
2 - 20 x 100 x 1245mm (one end cut at 30°)
1 - 20 x 50 x 1800mm(slat rail ledge)
2 - 50 x 100 x 300mm (both ends cut at 45° - NOT parallel)
FRONT WALL
2 - 50 x 100 x 1730mm (top end cut at 30°)
2 - 20 x 150 x 946mm (top end cut at 30°)
2 - 20 x 150 x 1025mm (top end cut at 30°)
2 - 20 x 150 x 350mm (top end cut at 30°)
2 - 20 x 150 x 435mm (top end cut at 30°)
4 - 20 x 150 x 450mm (under windows)
2 - 20 x 150 x 1270mm (top end cut at 30°)
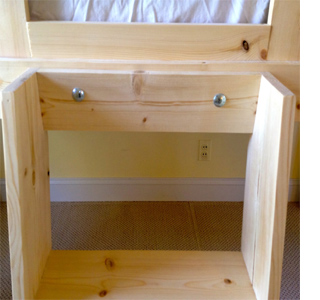
2 - 20 x 150 x 400mm (doorway)
1 - 20 x 100 x 1980mm
2 - 20 x 100 x 1245mm (one end cut at 30°)
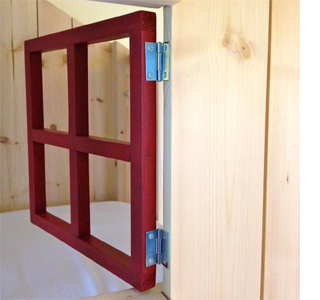
4 - 20 x 50 x 330mm (window trim - recommend cutting to fit)
1 - 20 x 50 x 1800mm (slat rail ledge)
2 - 50 x 100 x 300mm (both ends cut at 45° - NOT parallel)
2 - 20 x 50 x 370mm (lower window trim interior - add to inside of windows)
LADDER
2 - 20 x 150 x 965mm (both ends cut at 15° off square)
3 - 20 x 150 x 370mm
1 - 20 x 100 x 370mm
SLATS
Recommend cutting 20 x 77 x 1030mm
Wood filler
Wood glue
Pockethole screws, dowels or biscuits
20 x 9mm hex screws, washers and buts
3.5 x 30mm wood screws
TOOLS:
Pockethole jig, dowel centres or Biscuit Joiner
Jigsaw, circular saw or tablesaw
Drill/Driver and assorted bits
Orbital sander plus 120- and 240-grit sanding pads
Quick clamps
HERE'S HOW:
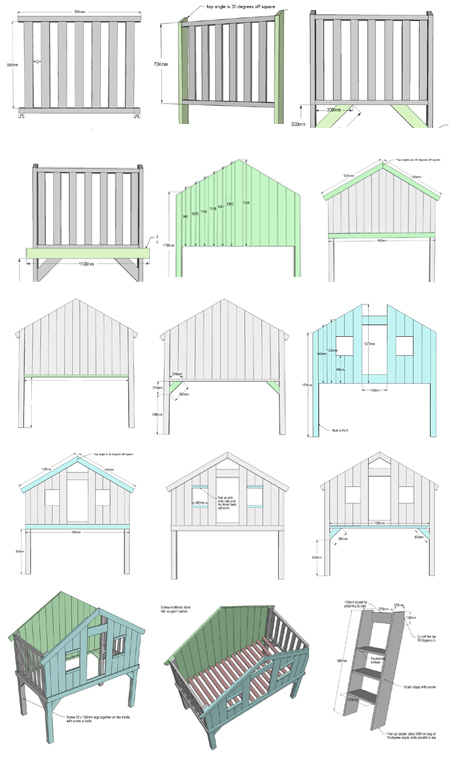
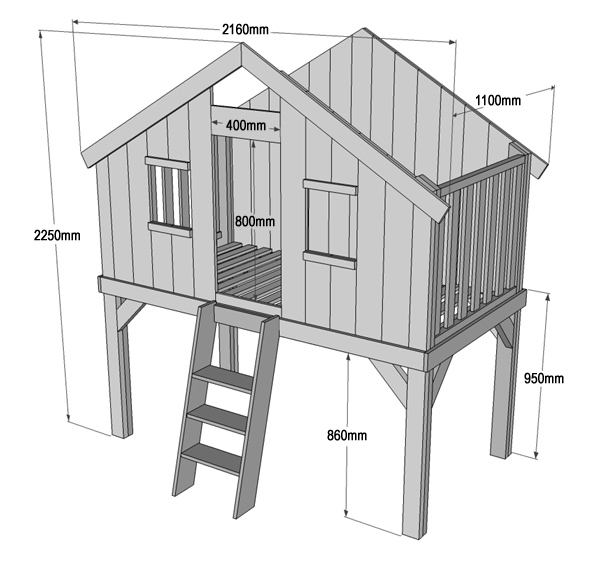
Before starting, read through the instructions beforehand to better understand the process. As with any project, apply safety first procedures and wear safety gear when required. You will find detailed diagrams at the bottom of this page, with enlarged views. Print out the diagrams beforehand, so that you can see the cutting, layout and assembly procedure.
This project was originally designed by that's my letter for her kids. She finished off the design to make it look like a beach-side surf clubhouse, but you can dress up the finished designed any way you wish. The measurements have been converted into metric and all materials used for the project can be sourced locally at your local Builders Warehouse.
Preparation
Sand all the cut pieces smooth before assembly.
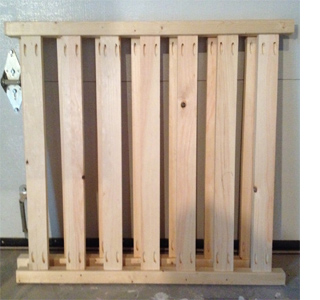
Assemble side walls
Use the diagrams below to cut all the pieces to length for quick and easy assembly. The joining method shown here uses pocketholes, but you can substitute with dowels or biscuit joins.
Finish the side walls
Add the legs, stretchers and finally the front trim piece. Again, you can use pocketholes, dowels or biscuits to assemble this section, or angle screws to join the stretchers. While the latter is more visible, use pine wood filler to fill in the holes once assembly is complete.
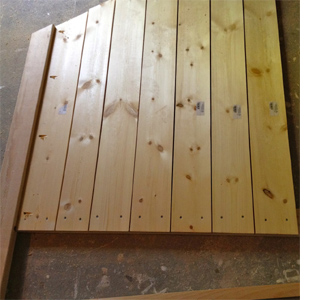
Assemble the back wall
Attach the first slat to the legs with pocketholes and then find the middle; secure slats from the inside to the trim piece. Flip over the and secure the top trim from the outside, that way your screws and pine wood filler will be on the outside and hidden from view.
Front wall
Build the front wall in the same way, except screw the top trim from the inside this time. Add a small 20 x 50mm piece at the top seam to keep the trim piece steady and also provides a good hook for hanging signs across the front.
Add a lower interior trim piece to the window sill, securing it to the side slats:
Assemble sections
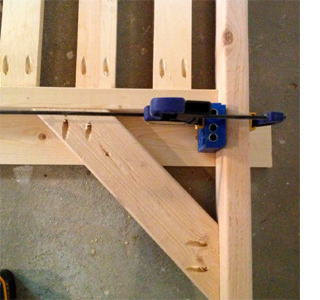
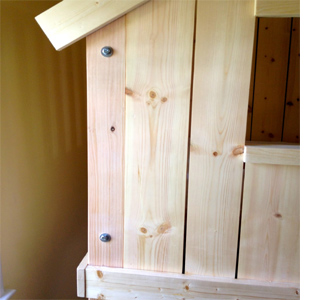
I used 9mm hex screws with washers and nuts in 3 places on each leg to secure both 50 x 100mm PAR pine.
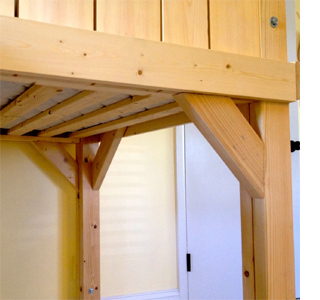
Attach bottom supports and stretchers
Assemble and attach ladder
Build the ladder and attach to the side of the frame.
Install bed support slats.
Alternatively, have a sheet of PG Bison BisonBord cut to fit the space.
Add trim and detailing
To finish off, add a canopy to the top of the new clubhouse bed.
CLICK IN DIAGRAM FOR ENLARGED VIEW