
Understanding pilot holes
Unless you're doing rough construction with soft woods, a pilot hole is generally required when inserting a wood screw.
A pilot hole makes it easier to install the screw in hardwoods and hard board products - such as supawood - and also prevents the wood from splitting - especially when the screw is near the end or edge of the board.
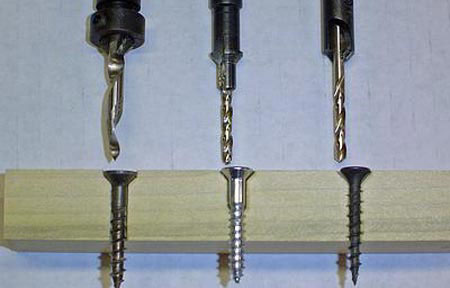
The harder the wood, the longer and thicker the screw, the more important it is to drill a pilot hole. The ideal pilot hole allows the wood screw to freely slide into the top board while securely gripping the wood in the bottom board. It should also have a conical-shaped countersink at the top so the wood screw lies flat on the wood surface.
Specialty countersink-pilot hole bits are available that drill pilot holes and countersinks in one step. With these bits, creating the proper size pilot hole should be a simple enough undertaking. If using 4mm screws, use a 4mm countersink bit. If using 6mm screws, use a 6mm countersink bit.
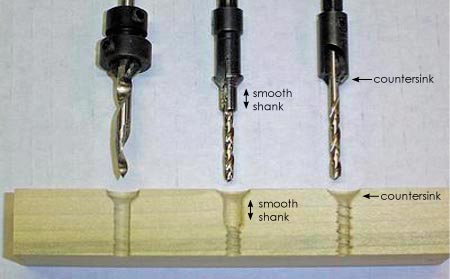
But what if you don't have ready access to countersink-pilot hole bits and need to drill some pilot holes? Work on the principle that a pilot hole should be two-thirds the thread diameter for hardwoods and one-third the thread diameter for softwoods. Once you've figured out the appropriate bit sizes, you're ready to create the pilot hole. This requires three separate bits - one for the countersink, one for the screw shank, and one for the pilot hole (threaded portion of the screw).
I prefer to start with the largest bit first and work down to the smallest. In other words, countersink first, followed by shank hole, followed by pilot hole. Once you've done this procedure a few times, you'll be ready to invest in a good set of countersink bits.
A note on terminology: technically, the term 'pilot hole' refers to the guide hole for the threaded portion of the screw but it's commonly used to refer to the entire hole including the shank or clearance hole.