
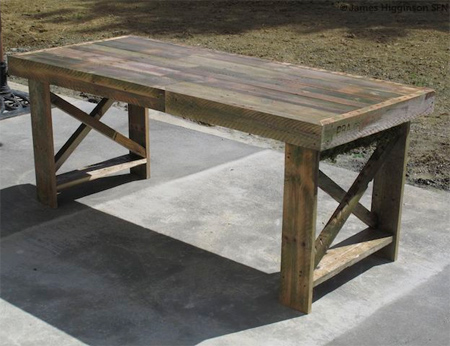
Garden table from reclaimed timber pallets
Using reclaimed timber for projects is probably the hottest recycling project on the planet, and there seems to be no end to the ideas popping up for projects that use reclaimed timber.
While there are quite a few tables made from timber pallets, this is one of the best I have seen to date.
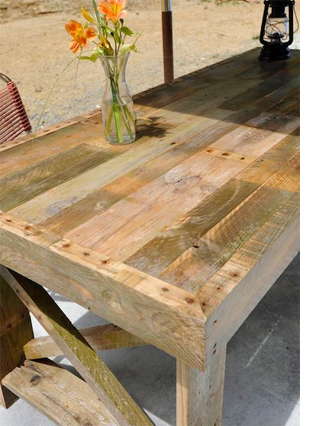
Neat finish and a square frame, as well as crossbeam ends make this an attractive table that costs almost nothing to make.
survivefrance.com
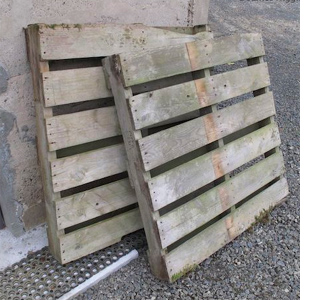
All you need to make this garden table are some decent timber pallets. The older the better, as this means they have had time to 'gas off' any preser-vatives added to the wood, but also make sure there is no sign of woodworm and treat any signs of rot with Woodoc Wood Restorer.
Before cutting the timber down to size you need to remove all the old nails. It's not always easy, as the nails are so rusty they sometimes just break as you try to pull them out.
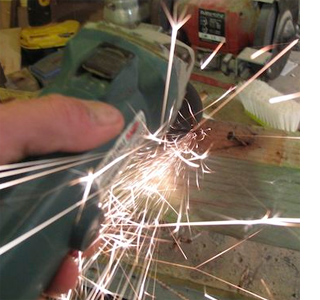
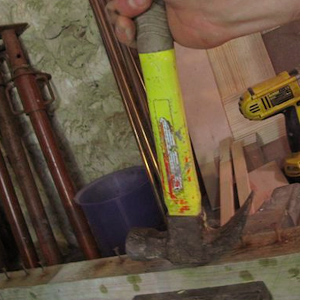
According to James, who designed this table, the easiest way to get rid of any nails is to cut them off.
NOTE: If there are any nails left behind, make a mark of the location so you can avoid these later on.
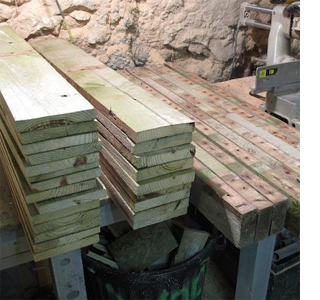
Take the time to trim the edges of all the sections, so that all the boards are exactly the same length. This step could be skipped if you don't have a table saw or mitre saw, but will result in a more rustic finish. With no initial design, James wanted to have a look at what he had to work with before making and style decisions.
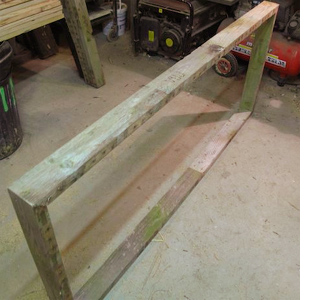
After making a rough sketch to work out dimensions that would suit the size of the timber available the frame was assembled. The table has an inner frame 20mm lower, which will hold the boards in place for the top.

Still having not decided on how the legs would look, James screwed some on anyway to make working on the table top easier. An inner frame and cross-supports fitted to add to the design and allow for fitting the top boards.
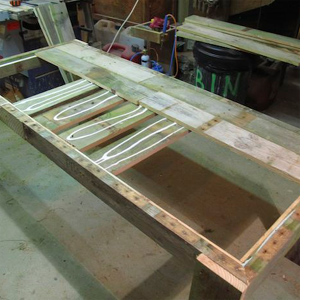
The top planks were glued and nailed within the frame and onto the cross-supports. Additional screws were driven through the base and into the top planks.
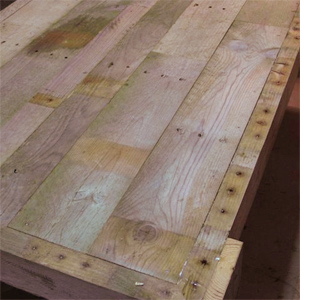
It was necessary to cut a few of the centre planks thinner to fit neatly into the frame. Otherwise you will end up with thin planks at the end and the table won't look as balanced.
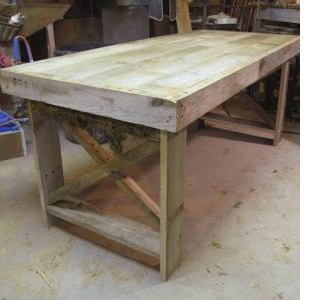
To finish off, the legs were moved to the inside of the frame and horizontal and diagonal braces were added. They do offer some strength to the table but they are mainly cosmetic. Before being put in use, the table was given a good sanding with 120- and then 180-grit sandpaper. Three coats of Woodoc Exterior Sealer will protect and ensure a long life for the table, or leave untreated and let the wood continue to age naturally.