
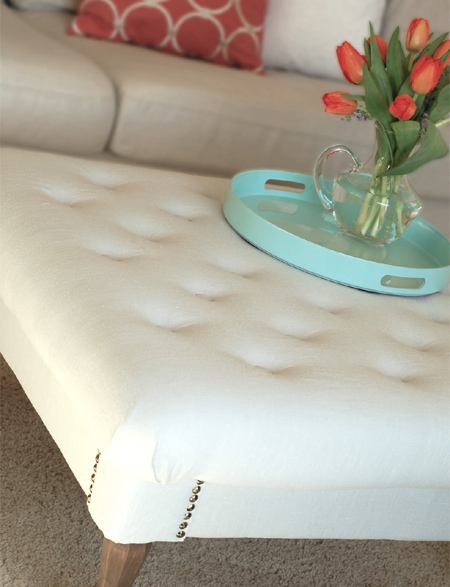
DIY ottoman table
Sarah at sarah m dorsey designs has been wanting to make an ottoman table. There are varied designs for this table on the Internet, but I do love the design that she has made. Spray the fabric with Scotch Guard once finished, to prevent future stains and keep the fabric looking good for longer. Or add a layer of upholstery plastic.
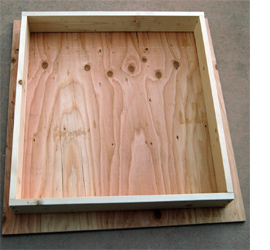
1. Start with an 800 x 800mm piece of plywood or BisonBord - or have the wood cut to the size you want to make the table. You also need to have 4 of 77mm wide boards for the side aprons.
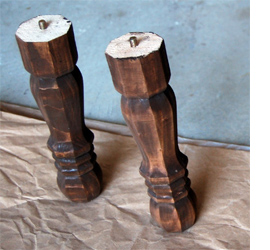
There are various places to buy legs for DIY furniture projects - try www.cabinetfittings.co.za, or www.gelmar.co.za. You may also find a small selection at your local fabric store.
2. Use Woodoc Gel Stain to stain in your choice of colour and then rub down with Woodoc Antique Wax.
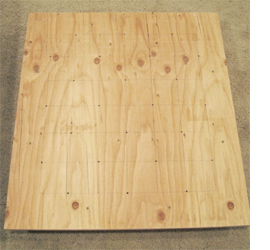
3. Using a tape measure or ruler, measure and mark for tufting the tabletop. Use a 3mm wood bit to drill holes for the tufting pattern.
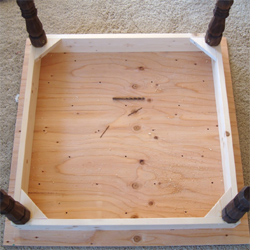
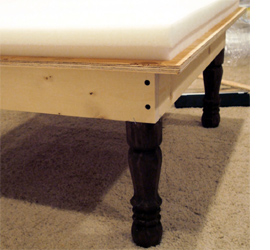
4. To attach the legs cut 4 corner sections and screw these to the side aprons. To attach the top to the frame, screw through the top into the side aprons.
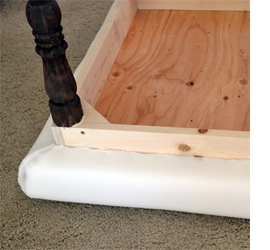
You can buy cut foam from www.foamfactory.co.za, or buy small pieces at your local fabric store. Making the bottom piece of 2cm-thick foam slightly smaller helped to make the corners round on the finished product.
5. Apply spray adhesive to attach foam to avoid sliding during tufting
6. We stapled a layer of batting and then the fabric - medium-weight light grey linen.
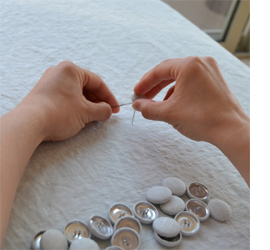
Use upholstery buttons that can be covered in the same fabric - and heavy duty thread doubled up (or nylon line) and a long needle
7. Make sure the buttons go in straight. Starting from the middle - the needle was guided through the hole already drilled in the board. Between each button the fabric was pulled tight to get rid of any wrinkles.
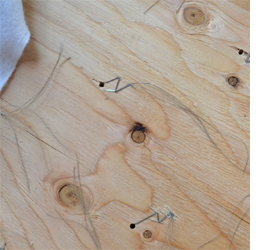
8. Use a staple gun to fasten the loose threads to the underside of the board. Make a zig-zag pattern with the thread so that it won't come lose.
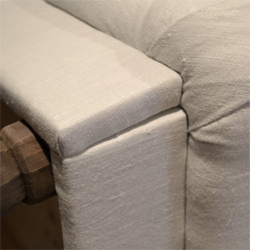
9. Four 100mm wide boards were cut and wrapped in batting and fabric and then stapled. The fabric was stapled to the back of the boards and excess cut off. These boards were then placed on top of the apron and screwed in place from the back of the apron.
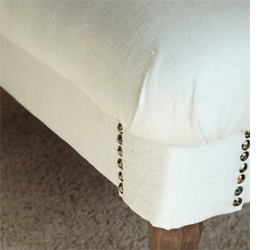
To finish off, vintage-style upholstery pins were added for detail.