
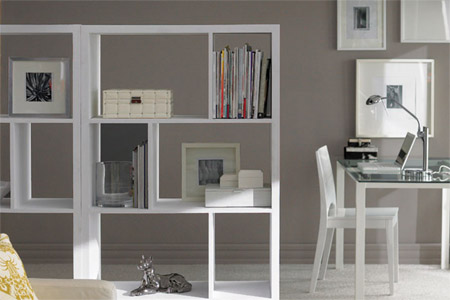
Make this open shelf bookcase
With their open backs, two or three units together can also be used as a room divider. You can make one unit or more – this is an easy-to-build project.
YOU WILL NEED:
12mm Supawood cut to size
16mm wood screws
Wood filler
Wood glue
180-grit sandpaper
Drill-driver and assorted drill and screwdriver bits
Sander and 180-grit sanding pads
Countersink bit
Tape measure
Pencil
Acrylic PVA* or enamel paint
Primer (water or oil based depending upon paint used)
*Acrylic sealer
Paintbrush
Drop cloth
Clamps
HERE'S HOW:
1. Create a box with [2] sides at 1500mm length and [2] pieces at 800mm length for the top and bottom. These will form the outer box for your bookcase. Predrill and countersink screw holes. Apply wood glue to the top edges of the top and bottom and butt joint them onto the top and bottom edges of the side pieces.
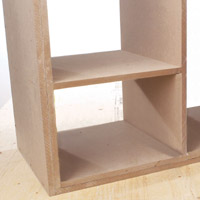
2. You can insert as many cross and upright shelf sections as you wish. Predrill and countersink all holes, using wood glue and wood screws to attach through the horizontal sections for uprights, and through the sides for horizontals.
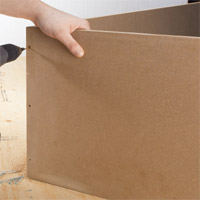
3. The thicker outer frame is achieved by gluing additional supawood boards around the existing box. Add glue to one side of each board – a roller makes the job easy. Clamp the boards together until dry.

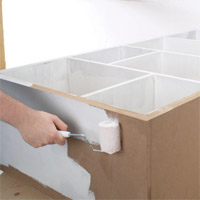
4. Fill all screw holes and visual gaps with wood filler. Sand all surfaces with 180-grit sandpaper.
5.
Prime and paint your bookcase as desired. Use a wood primer and a foam roller and apply 2 to 3 coats of paint, allowing each coat of paint to dry completely before applying the next coat. You can use acrylic or enamel paint - remember to choose the correct primer for the paint you will be using.
DIY Tip:
If you use acrylic PVA, apply at least 2 coats of acrylic sealer for additional protection.