
Mobile bar using SupaWood
This mobile bar is practical and easy to make and perfect to wheel out for when you are entertaining or special events. Made using 16mm SupaWood and painted in your choice of colours, you can make in a day and party the same evening!

timbercity.co.za
YOU WILL NEED:
2 of 60 x 412mm - base frame sides
2 of 60 x 1426mm - base frame front / back
1 x 550 x 1458mm
(with cut-ins 69 x 69mm at corners) - base
2 of 550 x 920mm - sides
2 of 550 x 873mm
(with cut-ins 69 x 69mm on one side) - shelves
1 of 550 x 829mm - divider
1 of 920 x 1490mm - front
3 of 60 x 1490mm - foot rail
2 of 60 x 1458mm - top supports
1 of 650 x 1500mm - top
4 of 69 x 69 x 1000mm - legs
3 x 25mm cut screws
4 x 35mm cut screws
Wood glue
Wood filler
Plascon Sure Coat acrylic in your choice of colours
120- and 240-grit sandpaper
TOOLS:
Drill/Driver + assorted bits
Countersink bit
Tape measure and pencil
Spirit level
Paintbrush and foam roller or Bosch PFS spray system
HERE'S HOW:
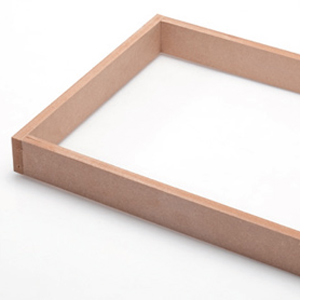
1. To build the bottom frame connect the sides to the front and back. . Drill 3mm pilot holes, countersink and apply wood glue before fastening with screws.
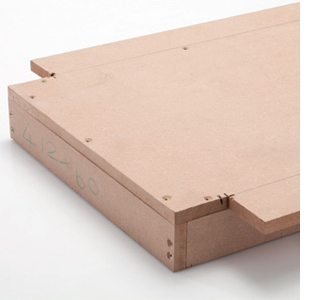
2. Place the base on top of the made frame, making sure that it is flush with the frame on both short sides. Draw two lines (one on each side) along the length of the base, 69mm from the sides. Each line should now connect the corner of the two cut-outs on either side. The lines will act as a guide when you drill pilot holes to secure the base to the frame with screws. Drill 3mm pilot holes, countersink and apply wood glue to secure the base to the frame with screws from the top.
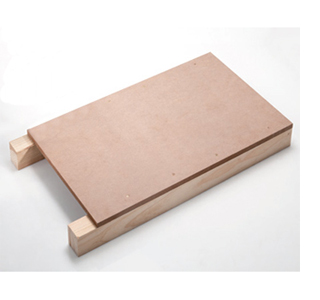
3. Attach the sides of the unit by placing each side on two legs - as shown left. Make sure the legs are flush against the side and top. This will ensure that the legs are attached at 90-degrees. Drill pilot holes, countersink and apply wood glue before securing the sides to the legs.
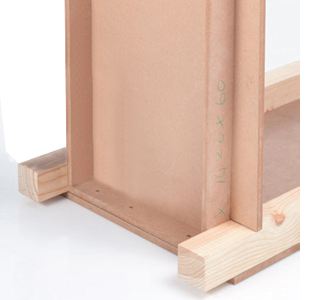
4. You are now ready to secure the two sides to the base of the bar unit. Put the base on top of the one side (in a vertical position), making sure the bottom of the side (with legs attached), is flush with the bottom of the base frame. Drill pilot holes through the base frame and into the legs, countersink and apply wood glue before attaching. Repeat for the other side.
GOOD TO KNOW
Be careful not to drill all the way through the side, and use
3 x 25mm screws.
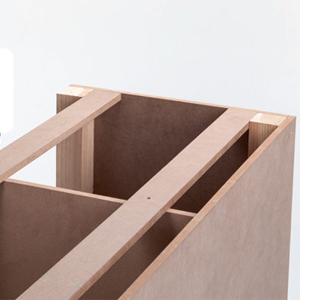
5. To insert the divider and shelves, measure the sides and mark where you wish to place the two shelves. Use a spirit level to ensure that shelves are level. Secure the shelves one by one, first to the side and then to the divider. Drill pilot holes, countersink, apply wood glue and secure with screws.
GOOD TO KNOW
It is
advisable to draw a line along the outside of the side to act as a guide when drilling pilot holes.
6. Pre-drill, countersink and screw on the front.
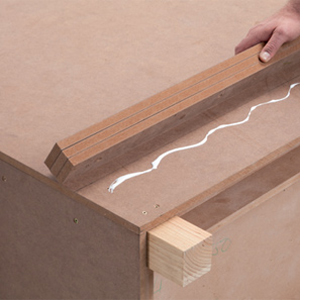
7. To make the foot rail, glue together the three pieces. Attach the foot rail 150mm from the bottom - on the back of the bar unit. Use wood glue and screws to secure. Drill pilot holes and countersink holes before fastening to ensure the screws penetrate the back-board.
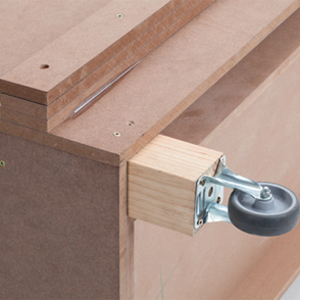
8. Connect the castors to the unit. Doing this at this point will enable you to move and complete the unit with greater ease.
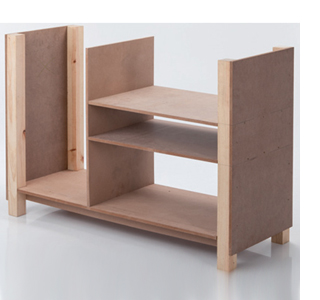
9. Attach the two top supports by securing them with screws from both the top and the sides. Finally, secure the top to these supports, as well as to the sides and to the back of the unit, with screws - or with corner brackets, from the bottom. Here is how the completed unit should look before painting. Use 120-grit sandpaper to sand away any rough sections and then sand the edges with 240-grit sandpaper until smooth and polished.
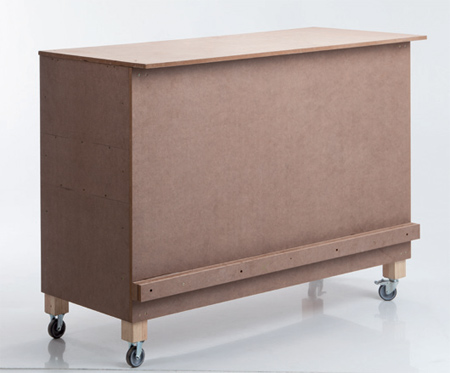
Finish off your new mobile bar by painting with either a paintbrush and foam roller or using a Bosch PFS spray system.
For added protection, have a piece of 4mm glass cut to fit on top. Use silicone bumpers between the glass and the painted surface. You can have glass cut to size at your local
Builders Warehouse.