
DIY kiddies craft table
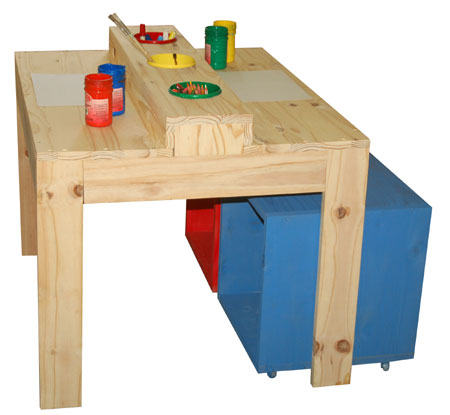
Our kiddies craft table is perfect for a playroom, or make it smaller to fit into a bedroom. We based the design for this table on our garden table, but modified the top to allow for paint pots to hold crayons, pens, pencils, paintbrushes, and even water for painting.
YOU WILL NEED:
4 of 400 x 400mm laminated pine – seat sides
1 of 80 x 380mm laminated pine – front panel
2 of 285 x 900mm laminated pine – tabletop sides
2 of 50 x 900mm laminated pine – raised panel sides
1 of 190 x 900mm laminated pine – raised panel top
1 of 70 x 150mm laminated pine – raised panel insert
4 of 100 x 600mm laminated pine – table legs
2 of 100 x 520mm laminate pine – side aprons
2 of 100 x 860mm laminated pine – front/back aprons
3,5 x 30mm wood screws
16mm screws for castors
Wood glue
Rust-Oleum 2X spray paint in your choice of colours
TOOLS
Drill/Driver and assorted bits
Orbital sander plus 120- and 240-grit sanding pads
HERE'S HOW:
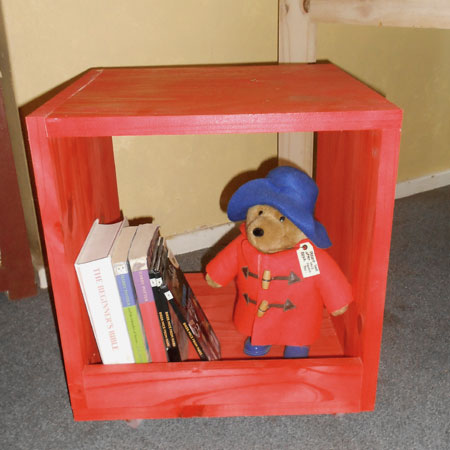
Making the storage cubbies
The storage cubbies are simple to assemble if you have all the pieces cut to size at your local Builders Warehouse. Attach the sides and front panel. Use 3,5 x 30mm wood screws and wood glue to attach all the sections.
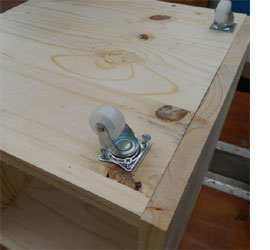
Turn the boxes upside down and screw the castors onto the base with 16mm screws. Use your thumb as a guide for the mounting distance from the edges.
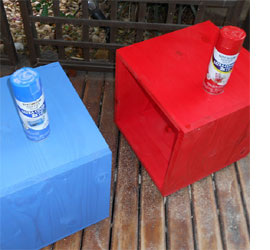
Sand the boxes with 180- or 240-grit sandpaper until nice and smooth and then take outdoors to paint. Apply two light, even coats of Rust-Oleum 2X in your choice of colours. Be sure to allow drying time between coats.
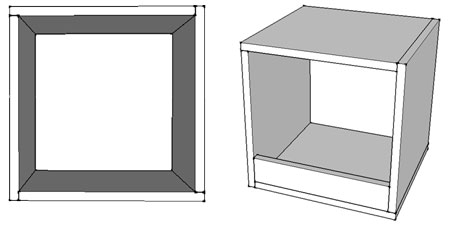
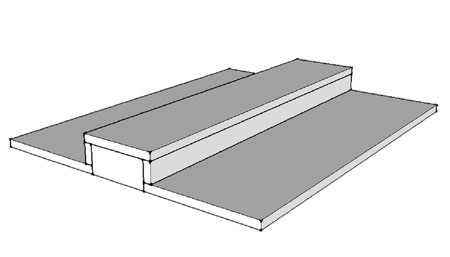
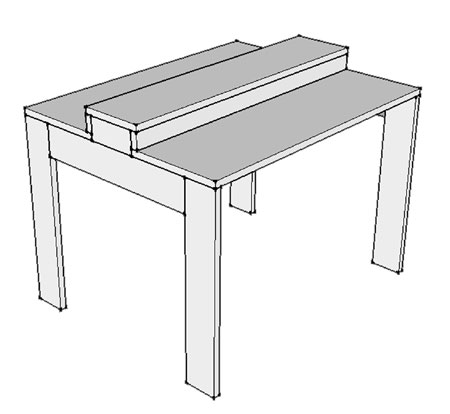
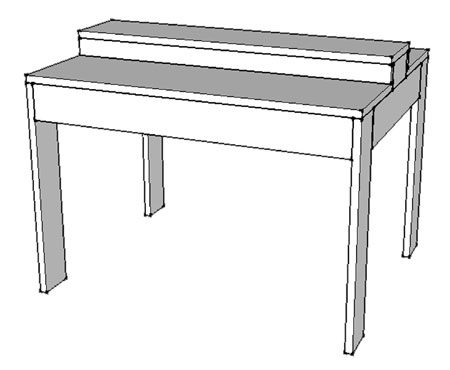
Assemble the tabletop
Assemble all the pieces for the tabletop. All the sections are glued and screwed together. Use the drawing below to join all the pieces in the correct order.
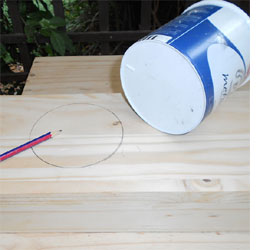
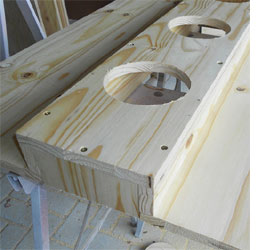
Use one of your empty paint pots as a template for the circles on top of the raised panel. The paint pots you use need to have a rim around the top, so that this can rest on top of the board to hold the pots in place.
GOOD TO KNOW
When drawing around the pots, make sure that you draw the narrowest diameter, so that the rim at the top of the pots will hold them firmly in place.
Spray the paint pots
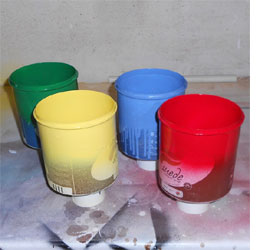
The table has three recycled paint pots in the top that can be used for storing paintbrushes, crayons and pencils.
They are also handy for holding water when the kids want to paint.
Assemble the table
Join the side aprons to the legs. For this you can use dowels, biscuits, pocketholes or add steel braces at the back. Repeat for both side sections. Add both side sections to the table by driving screws through the top of the table and into the legs and apron.
Finish off the table by adding the front and back aprons in the same was as described above.
We left the table as untreated pine, but you can finish off the table with
Woodoc 5 or 10 interior sealer, or
Woodoc 30 or 50 exterior sealer. Woodoc have a wide selection of
stain colours as well, that can be added to the clear sealer.