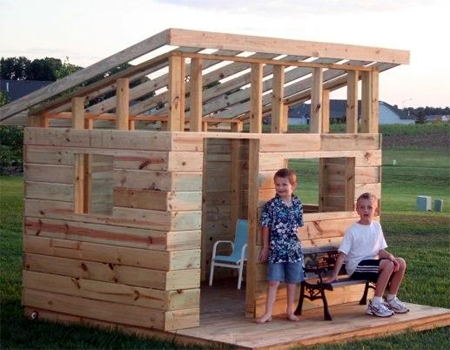
Build an outdoor fort
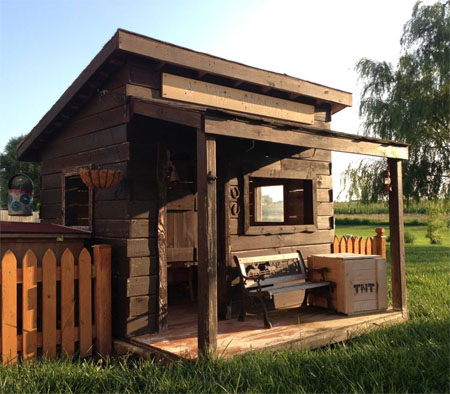
There are plenty of plans on the Internet for making an outdoor playroom - or fort - but this one needed to be bigger and better. The design is stronger than most other plans you will find, and has a western feel - built to look like a fort.
If you are lucky enough to have some reclaimed timber fencing lying around you can use that, or pop into your local Builders Warehouse for PAR pine.
HERE'S HOW:
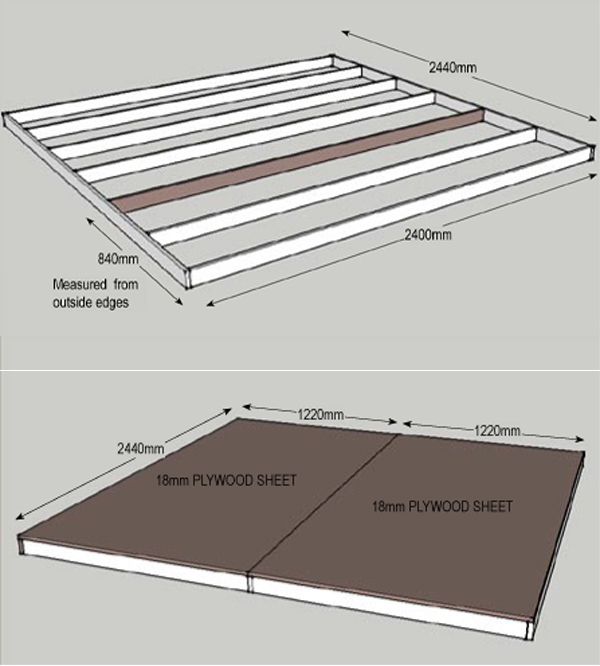
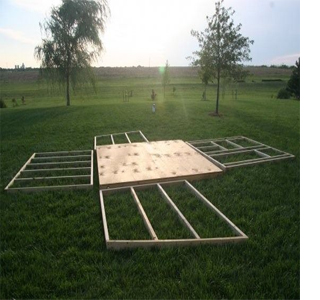
1. Make the base frame
Using 20 x 70mm PAR pine construct the base frame as shown below.
GOOD TO KNOW
Before continuing with the assembly, apply creosote to the base frame to prevent rotting.
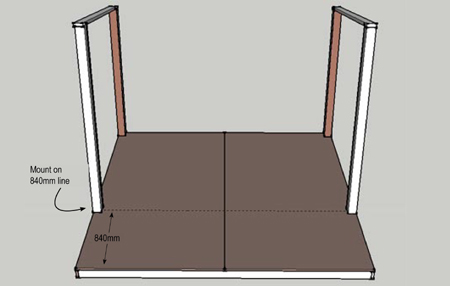
2. Add the floor
Top off the base frame with 2 x 18mm plywood sheets nailed into the base frame.

Although shown here on the grass, you need to put down a base of gravel and sand for the base. You want an area that will drain quickly and not rot the wood. Dig to a 10cm depth and fill with an 8cm layer of gravel, topping off with sand for a level surface.
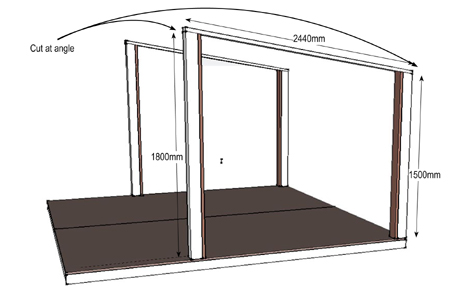
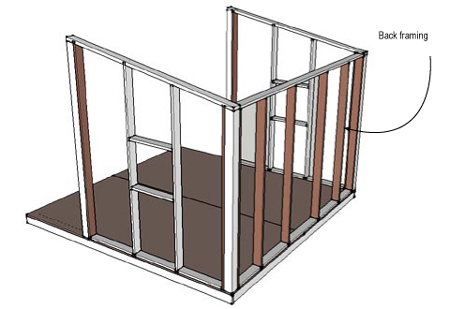
Step 3 Build the frames
Use 20 x 77mm PAR pine to assemble the panel frames for the sides, front and back. Although shown as separate panels (left), it's easier to fit the 77 x 77mm corner posts and then make and fit the frames to these. Cut the corner posts at an angle to allow approximately a 40mm drop and then attach the corner posts to the floor with galvanised roof brackets.
After mounting the corner posts you can start adding the inner frame sides and the top.
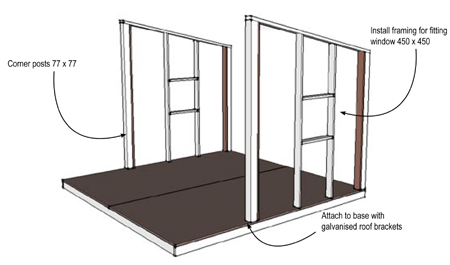
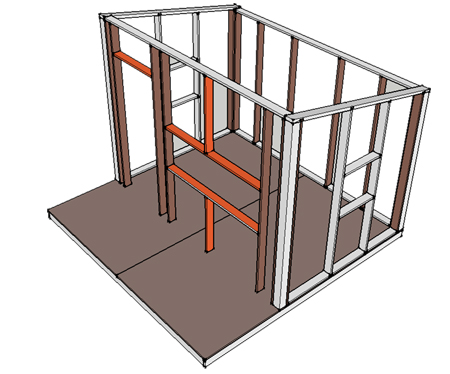
After finishing the side frames, you can start adding the back and front frames. On the front frame, allow for fitting a door and window. It's better to start with the outside of the frame and then measure and cut as you add each section. Pine thickness, although 20mm is the standard, can vary from supplier to supplier.
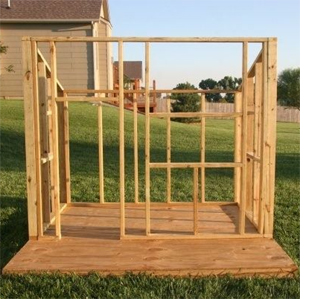
Step 4 Attaching outer boards
Measure/cut the boards to length for the sides, front and back, allowing extra for overhang. Alternate the lengths of the boards at
the corners, as pictured left. Pine boards aren't as straight as arrows, so count on having some gaps between the boards - in fact gaps will help keep the interior cool.
Check periodically with a spirit level. Meanwhile, you can also frame the roof and attach. The roof is made in the same way as the frames - with an outer frame and horizontal inner frames. A notch in the joists where it overlaps the frame will help hold it square and in place.
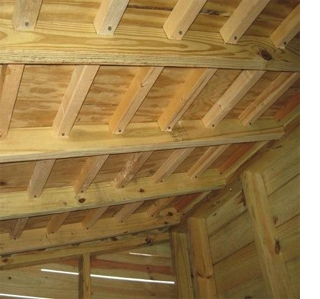
Step 5 Clad the ceiling
Use 12mm plywood board. You have the option of covering this with tar paper or simply adding creosote. It all depends on how snug you want the roof to be. Another option would be to lay roofing plastic over the beams before adding the plywood sheets.
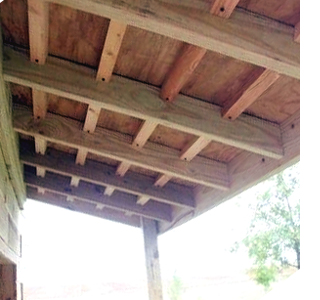
Step 6 Add porch roof
Now that you've got the hang of it... time to add a couple of posts and frame the roof. The roof is finished in the same way as for the fort, but only needs creosote, stain or seal to finish it off.

Step 7 Finishing touches
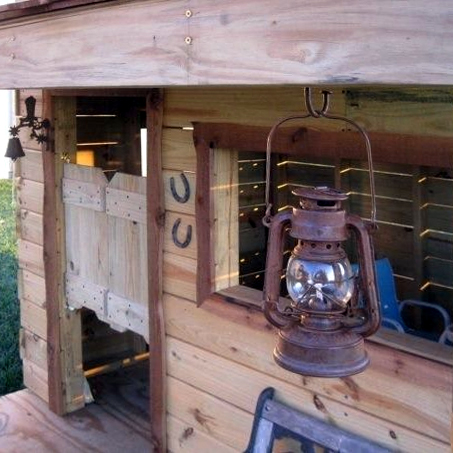
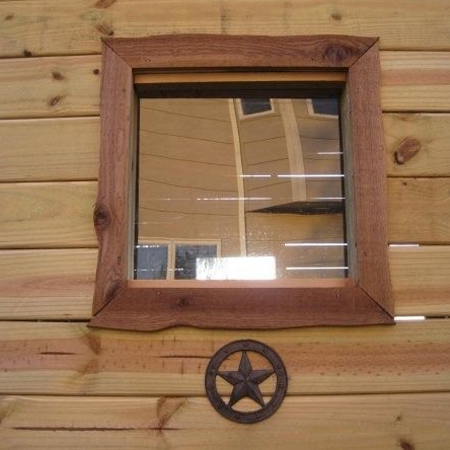
Now all that's left is the frame the window openings and door, and add a swing door (or full height panel door if you prefer) and decorate. Staining and sealing of the outdoors