
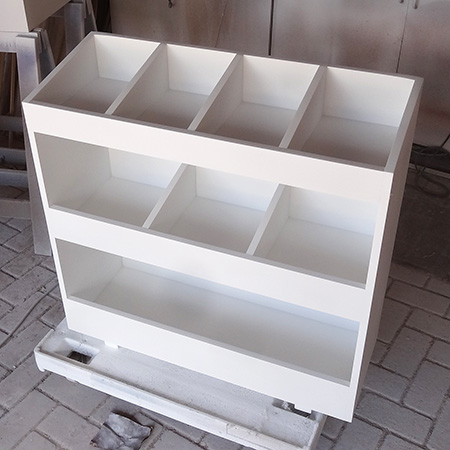
Make an MDF bookshelf for books and toys for children's bedroom
Our MDF bookshelf offers plenty of storage for books and toys for a child's bedroom. You will only need half a sheet of 16mm MDF to make the bookshelf and have board left over to make a second bookcase, or for another project.

YOU WILL NEED:
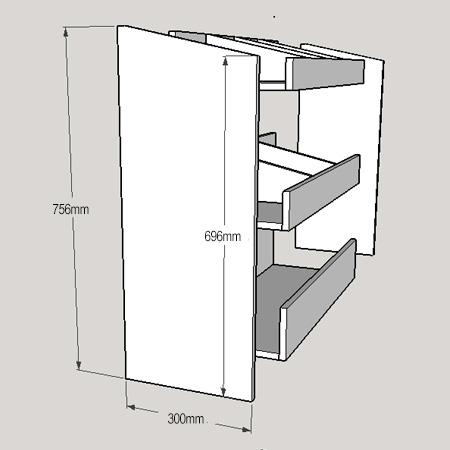
2 of 300 x 756mm 16mm
SupaWood - sides
3 of 268 x 764mm 16mm
SupaWood - shelf bottoms
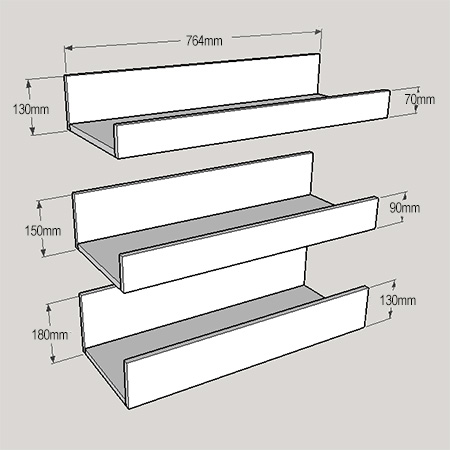
1 of 70 x 764mm 16mm
SupaWood - front, top panel
1 of 90 x 764mm 16mm
SupaWood - front, middle panel
1 of 130 x 764mm 16mm
SupaWood - front, bottom panel
1 of 120 x 764mm 16mm
SupaWood - back, top panel
1 of 150 x 764mm 16mm
SupaWood - back, middle panel
1 of 180 x 764mm 16mm
SupaWood - back, bottom panel
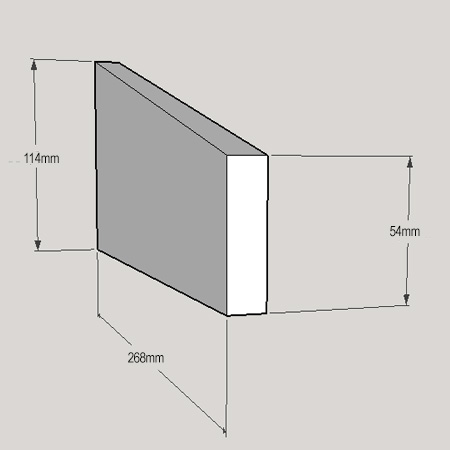
3 of 114 x 268mm 16mm
SupaWood - top shelf dividers
2 of 134 x 268mm 16mm
SupaWood - middle shelf dividers
2 of 44 x 44 x 268mm PAR pine - base supports
4 x 45mm cut screws
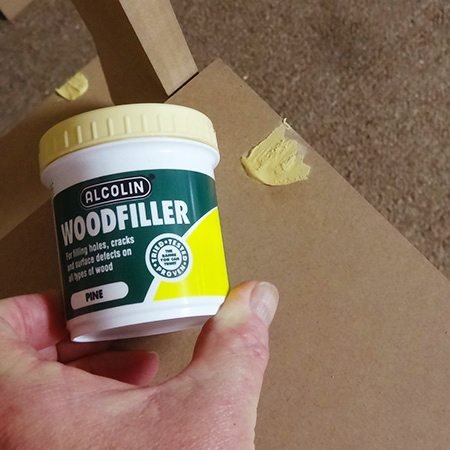
Wood filler
Pattex No More Nails adhesive
800-grit sandpaper
Paint and equipment for finishing
TOOLS:
Drill / Driver plus assorted bits
Countersink bit
Mitre saw or jigsaw to cut dividers
Orbital sander plus 240-grit sanding pads
Tape measure and pencil
Everything you need for this project is available at your local Builders Warehouse.
HERE'S HOW:
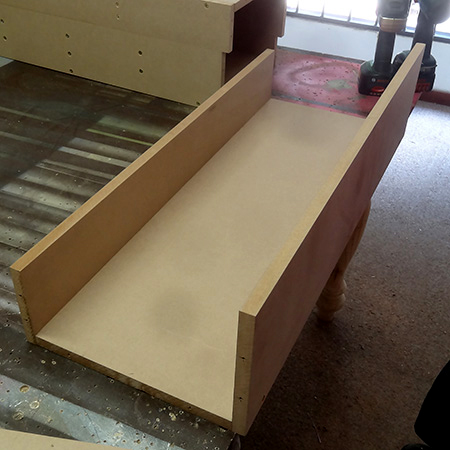
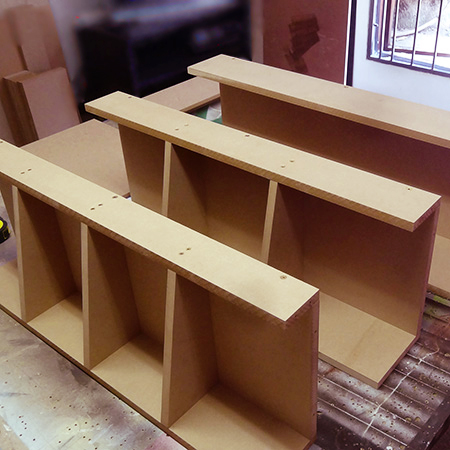
1. The first step is to attach the front panels onto all three bases. Drill 3mm pilot holes along the bottom edge of the front panels and countersink. Use 45mm screws to attach the panels.
3. Dividers for the top and middle shelves need to be cut at an angle. For the top dividers mark the front at 54mm and draw a line from back to front (114mm to 54mm). Cut away this section on all three pieces.
4. For the middle dividers mark the front at 74mm to draw a line from back to front (134mm to 74mm) and cut away.
5. Measure in 179mm from both ends of the base and mark for mounting the top dividers. The centre divider is mounted 374mm in from the edge. Secure the dividers to the front and back by drilling 3mm countersunk pilot holes and using 45mm screws.
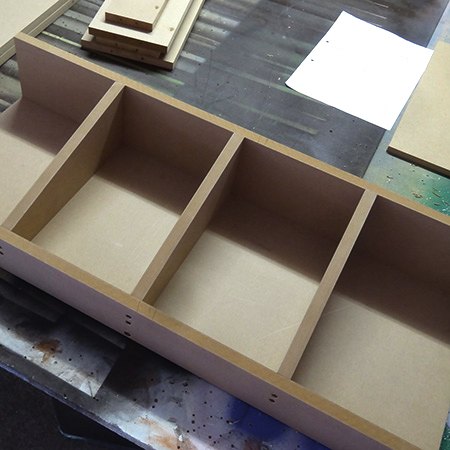
6. For the middle two dividers measure in 244mm from both ends and secure the dividers in the same way at the top shelf.
7. On both side sections measure 696mm on the front edge and draw a line from back to front (756mm to 696mm). Cut away this section.
8. Place the sides flush with the bottom shelf and drill 3mm countersunk pilots holes before using 45mm screws to secure.
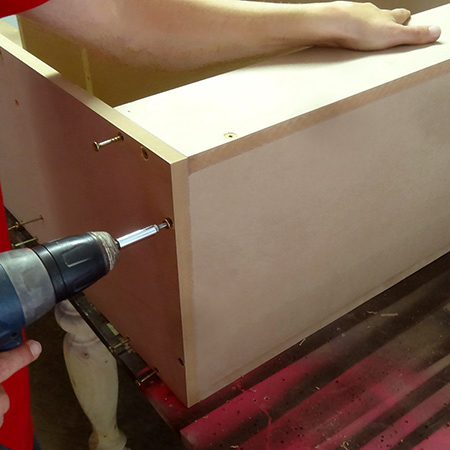
9. The middle shelf is mounted 203mm up from the bottom shelf and secured to the sides in the same way.
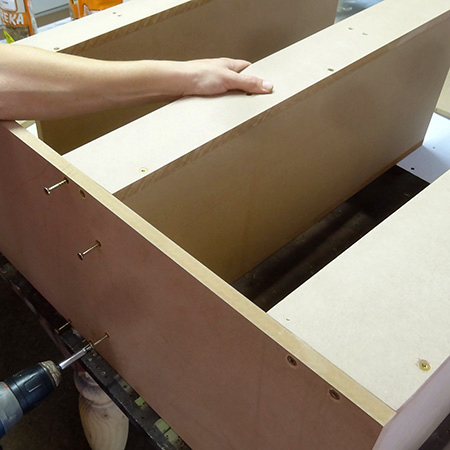
10. Finally, attach the sides onto the top shelf
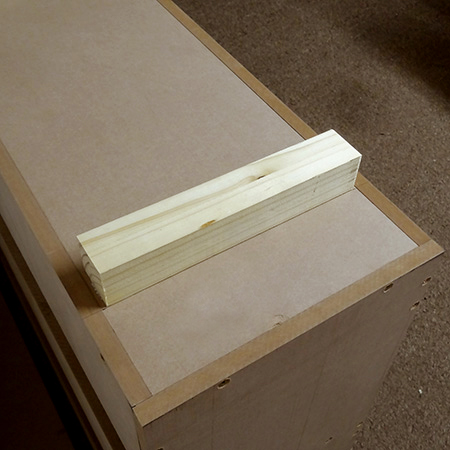
11. Place the cabinet upside down and use Pattex No More Nails adhesive to attach the supports to the base.
12. Fill all the screw holes with a small layer of Pattex No More Nails adhesive and, once dry, fill with wood filler. The adhesive helps prevent the wood filler from cracking and also ensures that the wood filler bonds over the screws.
Finishing
After sanding with 240-grit sanding pads the entire bookshelf was painted using a Bosch PFS spray system and Plascon Double Velvet. Two coats of paint were sprayed on, left to dry and then very lightly sanded with 800-grit sandpaper before applying a further two coats of paint. I prefer to use Plascon Double Velvet, as it provides a finish that is easy to clean.
If you enjoy making your own furniture, then a Bosch PFS spray system is a must-have for your workshop! Mine is now almost 4 years old and still going strong. You can buy at your local Builders.