
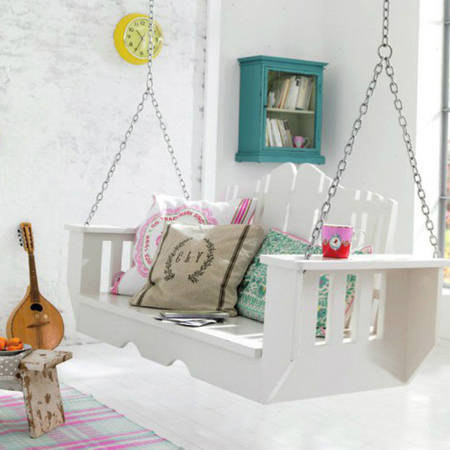
How to make an indoor swing
Perfect for an enclosed patio or sunroom, or even for a family room, this indoor swing is easy to make if you have basic DIY skills, plus you will find everything you need for this project at your local Builders Warehouse.
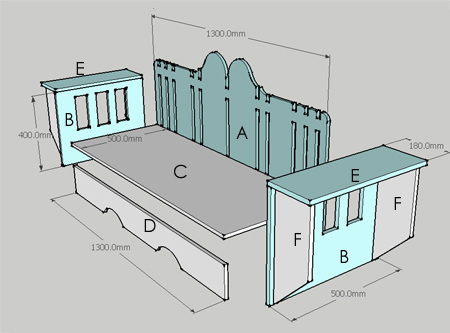
This indoor swing is made of 16mm SupaWood with a pine back that you can have cut to size for easy assembly.
YOU WILL NEED:
Buy a single sheet (1800 x 2700mm) of 16mm SupaWood and have this cut to size at your local Builders Warehouse for easy assembly.
QTY |
W |
L |
MATERIAL | ITEM | |||
A |
1 |
600 |
1300 |
16mm SupaWood | back panel | ||
B |
2 |
400 |
500 |
16mm SupaWood | sides | ||
C |
1 |
500 |
1300 |
16mm SupaWood | seat | ||
D |
1. |
150 |
1300 |
16mm SupaWood | seat front | ||
E |
2 |
180 |
500 |
16mm SupaWood | armrest | ||
F |
4 |
150 |
400 |
16mm SupaWood | arm front/back | ||
2 |
10 x 44 |
1300 |
PAR pine | optional slats |
120-, 240- and 1000-grit sandpaper
No More Nails adhesive
Wood filler
Plascon Double Velvet
4 eyehooks + nuts and washers
4 lengths of 1 metre chain for arms
2 lengths of chain for hanging from ceiling
Heavy-duty hooks for mounting to ceiling beams or joists
TOOLS:
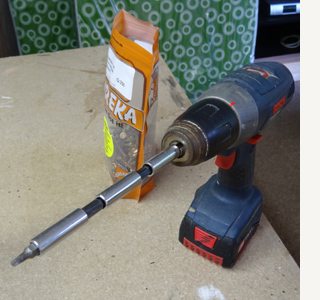
Drill/Driver + assorted bits
Countersink bit
Jigsaw + clean-cut blade
Orbital sander
Bosch PFS spray system
HERE'S HOW:
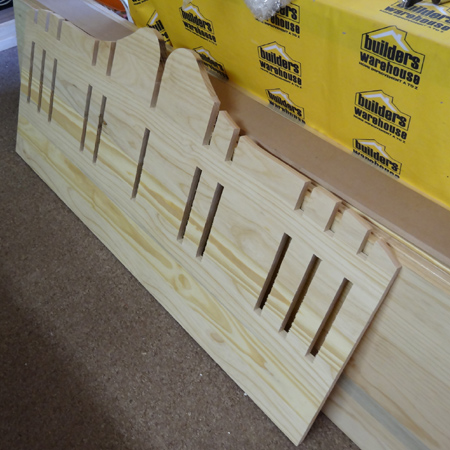
Start off by cutting out your design on the back panel [A]. I had a spare sheet of pine that I used, but have specified 16mm PG Bison SupaWood in the cutting list. With the recent problems experienced with pine, I would recommend that you use SupaWood for this project.
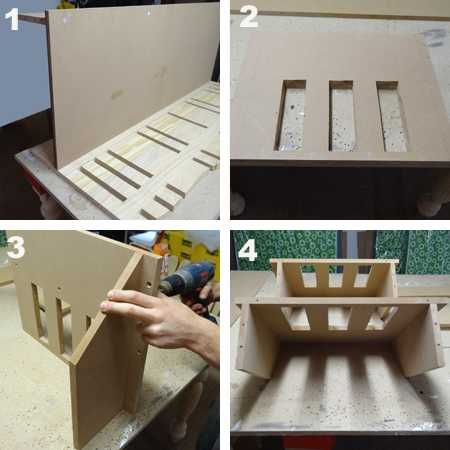
1. On the back [A] measure up from the bottom edge and draw a line. Use this as a guide to attach the seat [C]. At the same time you can attach the seat front [D] at 16mm in from the front edge of the seat. Pre-drill and countersink pilot holes through the seat [C] to attach the seat front [D].
2. Use your jigsaw to cut out openings in both armrests [B]. Use a Dremel MultiMax or hand sand to remove any uneven edges. On the armrest sides [F] measure up 150mm from the bottom, draw a line and cut a diagonal.
3. To attach the armrest front / back [F] to the sides [B], on both sides measure in 16mm and draw a line. Use this as a guide to attach the armrest front / back [F] to the sides [B].
4. Sides [B] with armrest fronts and backs [F] attached.
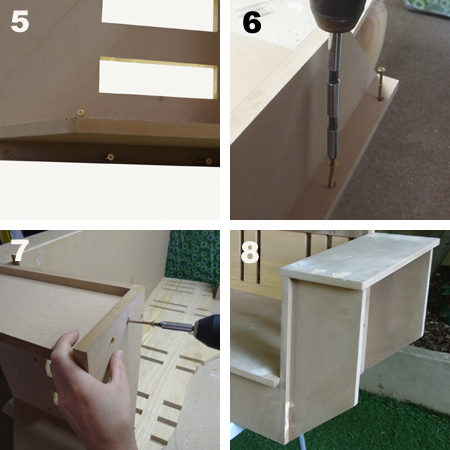
5. Attach the sides [B] to the assembled seat section by aligning the bottom of the sides with the bottom edge of the seat front and back section. The sides are flush with the back.
6. In order to be able to secure the sides to the assembled seat, join together 3 standard holders, use an extension, or remove the armrest fronts/backs and attach them afterwards.
7. Now you can attach the armrest tops [E] to the mounted sides.
8. Time to fill up all those holes! I have found an easier and quicker way to fill up holes and that is to apply a thin layer of No More Nails adhesive (sets in 10 seconds) to the holes - to just below surface level. Once set, fill up with wood filler. I find this results in less cracking, uses less wood filler, dries faster and speeds up the process.
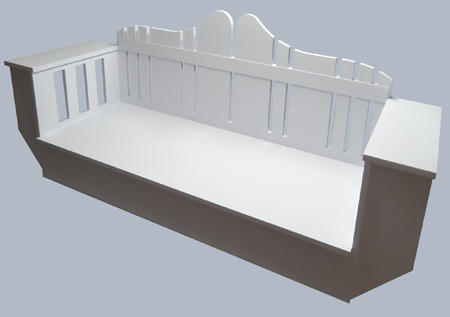
BELOW: Completed swing with pine back primed with wood primer. If you are using water-based (acrylic) paints it is important to prime wood before painting. If you don't, the wood will absorb moisture from the paint and swell.

BELOW: Three coats of Plascon Double Velvet were applied with a Bosch PFS spray system, allowing each coat to dry before applying the next coat. A final sanding was done with 1000-grit sandpaper before applying the final coat of paint.
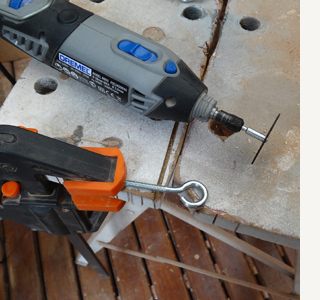
To attach the chains you may need to cut down the length of the eye hooks. I did this using my trusty Dremel MultiTool (or use an angle grinder or hacksaw).
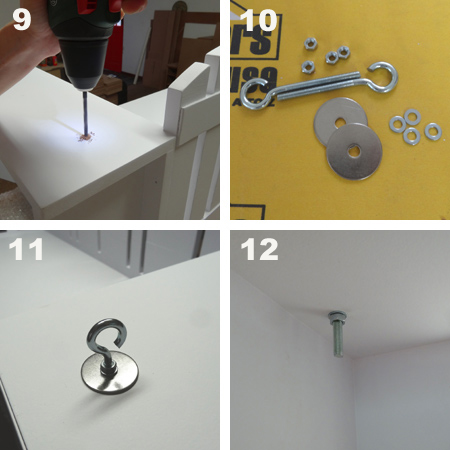
9. Drill two holes in the top of each armrest about 100mm in from each end and in the centre. The holes need to be the same size as the diameter of the eye hooks you are using, normally about 6 to 8mm.
10. To hold the chains in place you will need eye hooks, nuts and large steel washers - as shown below.
11. Add a nut and washer onto each eye hook and thread through the top of the armrest.
12. Secure on the underside with a nut and washer. Note: The washer isn't shown in this pic but does need to be added.
Note: It is important that the chains be hunk on heavy-duty hooks secured into ceiling beams or joists. You can mount into concrete ceiling using expanding eye hooks.
Everything you need to hang your new swing can be found at your local Builders Warehouse.