
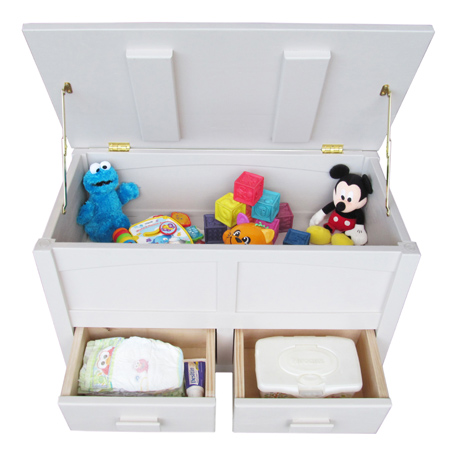
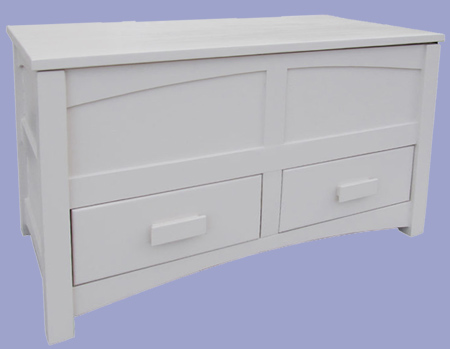
Storage chest or toybox for nursery or bedroom
This storage chest is just the thing for a nursery or child's bedroom. It has plenty of room for toys, clothes or nursery accessories. Plus, at the base of he storage chest there are two small drawers for disposable nappies, and a secret compartment at the back that will come in handy.
instructables.com
You can make the storage chest from laminated pine, plywood or SupaWood, all of which you can have cut to size at your local Builders Warehouse.
YOU WILL NEED:
4 of 44 x 44 x 600mm PAR pine - legs
2 of 440 x 842 x 16mm SupaWood - shelf / base
1 of 560 x 812 x 16mm SupaWood - back
1 of 330 x 812 x 16mm SupaWood - front
2 of 412 x 560 x 16mm SupaWood - sides
1 of 100 x 812 x 16mm SupaWood - front panel
1 x 500 x 900mm x 16mm SupaWood - lid
1 of 230 x 380 x 16mm SupaWood - small drawer base
2 of 120 x 230 x 16mm SupaWood - small drawer sides
1 of 120 x 348 x 16mm SupaWood - small drawer back
1 of 148 x 380 x 16mm SupaWood - small drawer front
1 of 166 x 810 x 16mm SupaWood - large drawer base
1 of 120 x 810 x 16mm SupaWood - large drawer back
2 of 120 x 134 x 16mm SupaWood - large drawer sides
2 of 136 x 385 x 16mm SupaWood - large drawer fronts
2 of 20 x 396 PAR pine - large drawer dividers (glued together)
Optional: 6mm SupaWood strips for decorative panels
2 of flap hinges
2 of butt hinges
8 of Steel angle brackets / braces
Pack of 50 / 16mm screws
16 of 5 x 75mm screws
Pack of 50 / 4 x 30mm screws
2 knobs or handles
Pattex No More Nails adhesive
Wood filler
120- + 240-grit sanding pads or sandpaper
Bosch PFS spray system or paintbrush and foam roller
Plascon Double Velvet
TOOLS:
Drill/Driver + assorted bits
Countersink bit
Orbital sander
Jigsaw and clean-cut blade
Tape measure and pencil
HERE'S HOW:
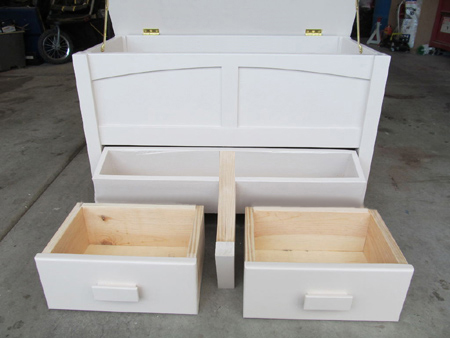
Note: Although pine drawers are shown here, these have been substituted with 16mm SupaWood due to the low quality of laminated pine available at the moment.
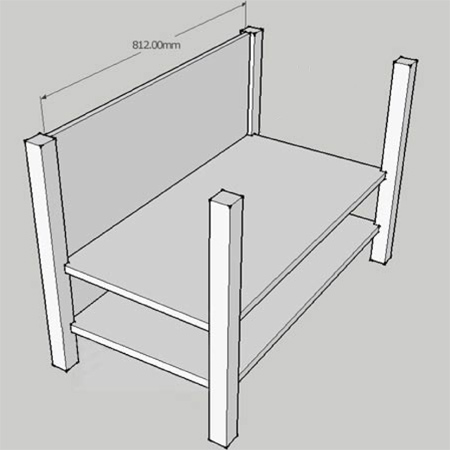
1. On the shelf and base mark a 14 x 14mm square and cut this out with a jigsaw. Use your preferred method of mounting - for this project we allowed for steel brackets mounted to the underside of the shelf and base, and mounted on the inside of each leg.
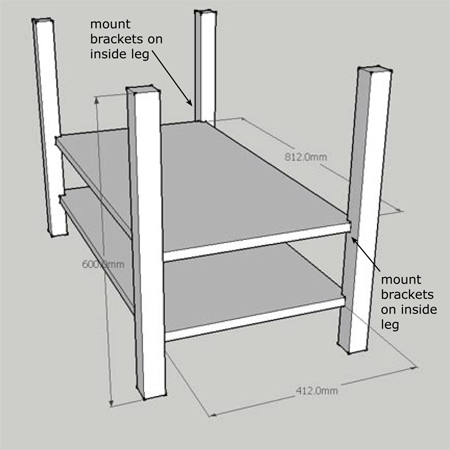
2. Measure and mark for placing the shelf and base and secure to the inside of each leg using steel angle brackets or your preferred choice of mounting, or using a pockethole jig.
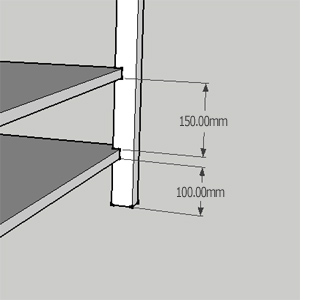
3. Attach the back panel to the legs, aligning at the top and leaving a 40mm gap at the bottom. To secure, measure and mark 50mm down from the top and 90mm up from the bottom. Drill 4mm pilot holes through the legs and into the board, countersink and then drive in 5 x 75mm screws.
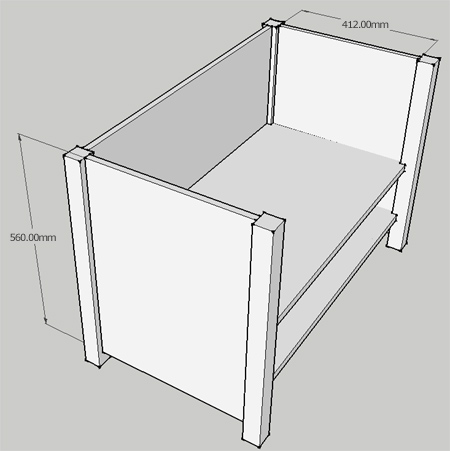
4. Secure the sides in the same way as the back, measuring 40mm down from the top and 100mm up from the bottom of each leg.
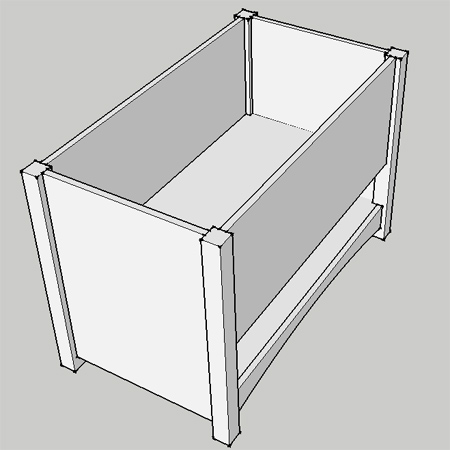
5. Secure the front in the same way, adjusting for the measure and mark as in Step 3. Use a template or draw a curve on the front panel and cut out with a jigsaw before attaching to the front edge of the base using 4 x 30mm screws (pre-drill pilot holes and countersink).
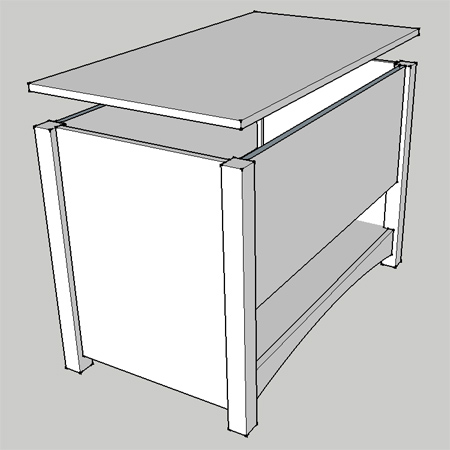
6. Use butt hinges to secure the lid to the back panel. Once attached measure and mark for attaching the flap hinges. It helps to have someone hold the lid in the upright position while you mark and mount the flap hinges using 16mm screws.
GOOD TO KNOW
Before attaching the hinges to the lid, sand all the pieces with 120-grit (on the cut edges) and 240-grit sandpaper to finish before wiping clean and painting.
If you are adding the optional 6mm decorative panels, cut to fit and glue these on with No More Nails adhesive before painting.
A Bosch PFS spray system gives a professional finish to your painted projects, but you can use a paintbrush and foam roller. Apply two to three coats of Plascon Double Velvet in your choice of colour, allowing drying time between each coat.
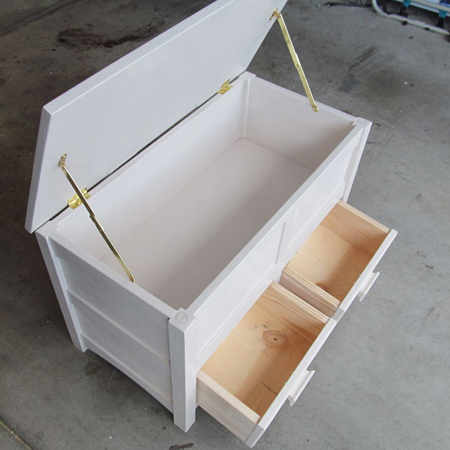
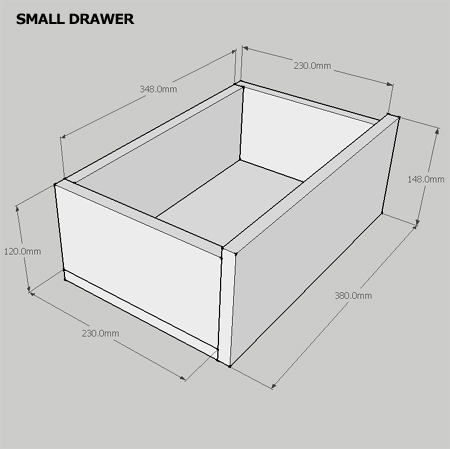
Small Drawer Assembly
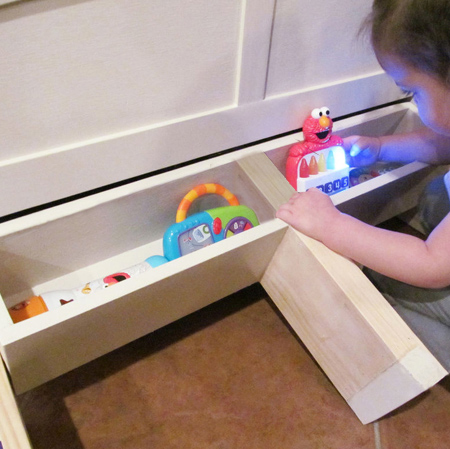
The toybox has two small drawers and a concealed large drawer in the base. At this stage you have the option to change the design to accommodate 2 small drawers that are deeper, or a large single drawer.
Assemble the small drawers as shown in the diagram below, using 4 x 30mm screws (3mm pilot
hole and countersink).
Large Drawer Assembly
Assemble the large drawer as shown in the diagram below, using 4 x 30mm screws (3mm pilot
hole and countersink). The centre panel is two pieces glued together with No More Nails adhesive.
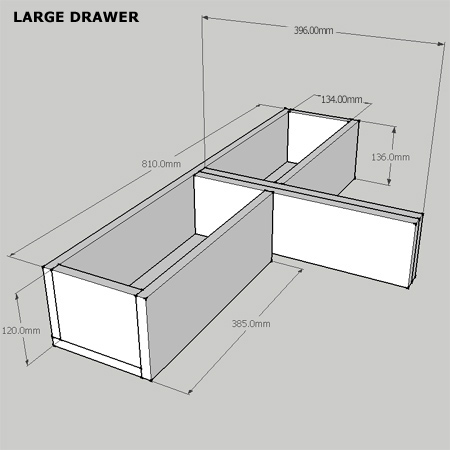
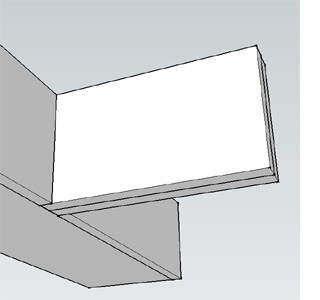
Either before or after gluing the two boards together, cut a rebate 16mm wide x 134mm long so that the joined boards sit nicely on top of the drawer base. Sand and paint the drawer fronts and centre panel to match the toybox.
Home-Dzine or Janice Anderssen do not accept responsibility for any incorrect measurements. Full safety precautions must be exercised when doing any projects and we assume no liability for accidents or damage.