
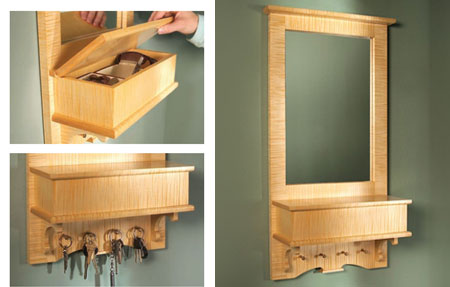
Build a hallway mirror
My front hallway is the most heavily travelled, and usually the most cluttered, space in my home. Keys are tossed here and there, notes are scattered and the mail keeps getting lost. I found a decorative way to keep everything together and organized.
.
americanwoodworker.com
No more misplaced bills and no more lost keys. The design of this hallway mirror is simple yet elegant, allowing the wood to shine. It is the first thing people see when they enter my home.
YOU WILL NEED:
A |
frame stile | 2 |
20mm |
40mm |
690mm |
|
B |
top frame rail | 1 |
20mm |
76mm |
254mm |
|
C |
middle frame rail | 1 |
20mm |
76mm |
254mm |
|
D |
bottom frame rail | 1 |
20mm |
170mm |
254mm |
|
E |
top | 1 |
20mm |
45mm |
356mm |
|
F |
box lid | 1 |
20mm |
136mm |
324mm |
|
G |
box bottom | 1 |
20mm |
134mm |
324mm |
|
H |
bracket | 2 |
10mm |
100mm |
90mm |
|
J |
short box side | 2 |
20mm |
70mm |
124mm |
|
K |
long box side | 2 |
20mm |
70mm |
305mm |
|
L |
decorative cap | 1 |
6mm |
22mm |
60mm |
|
M |
hinge rail * | 1 |
12mm |
12mm |
324mm |
*Cut from box lid (F)
Mirrors, cut to size once finished
Jigsaw or tablesaw
Drill press
Router or Dremel Trio
25mm wood screws
Wood glue
2 barrel hinges
2 mounting brackets
6 glazier points or 4 mirror brackets and small screws
4 brass pegs
Felt pads
Woodoc 5 or 10 interior sealer
Woodoc fine steel wool
Paintbrush
HERE'S HOW:
GOOD TO KNOW
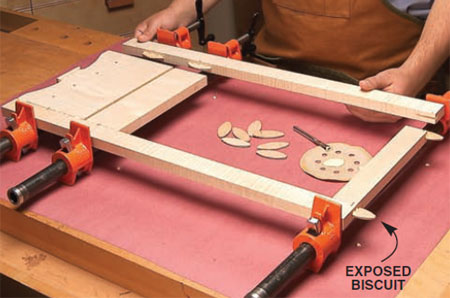
Once all the pieces have been cut, sand with 240-grit sandpaper before assembly.
Step 1
Join the frame parts using biscuits - or dowels. On the narrow top
rail, offset the slot so the biscuit or dowel protrudes out the top of
the frame. It can be trimmed off later and completely covered
by the top.
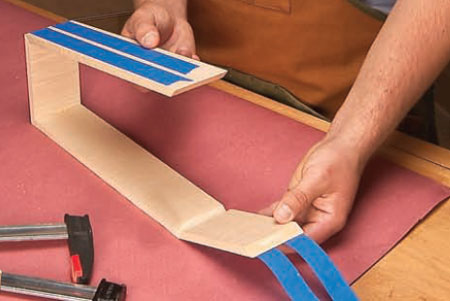
Step 3
Position the box parts on two strips of masking tape.
Spread glue and fold the pieces together. Use the overhanging
tape to strap the last mitre together. Square the box
and snug the mitres together with clamps.
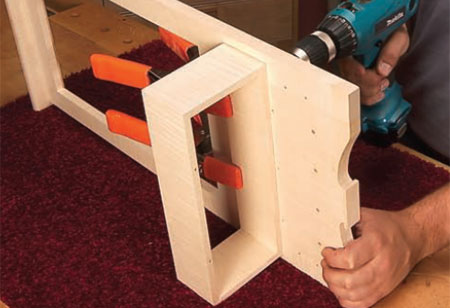
Step 4
Screw the assembled box sides to the frame and build
the rest of the box on the frame. Using this approach,
it’s easier to get the box lid and bottom to fit tightly against
the mirror frame.
Step 5
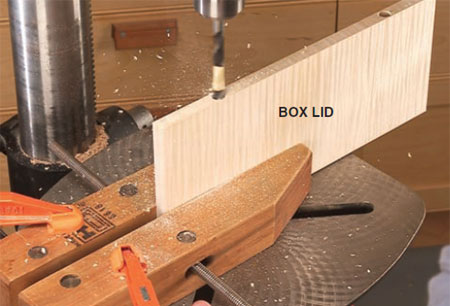
Drill holes in the box lid for the barrel hinges. Barrel
hinges can be fussy to install. In this case, predrilling the
hinge holes in the box lid and then cutting the hinge rail
guarantees perfect alignment.
Step 6
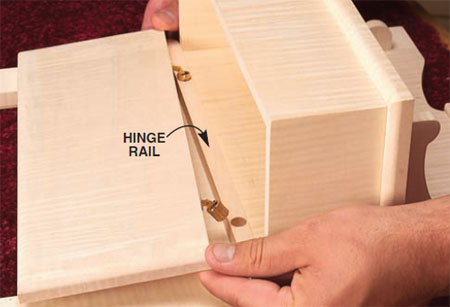
Cut the hinge rail from the box lid. Because the hinge rail
will be cut from the box lid, the holes must
be 3mm deeper than the length of the hinge to account for
the stock the tablesaw blade removed.
Step 7
Place the hinges in the holes of the hinge rail. Tighten
the screws just enough so the hinges can move in and
out with pressure but do not slide freely.
Step 8
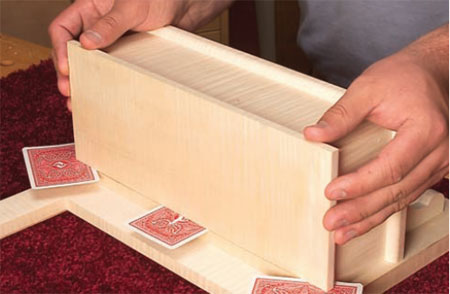
Use playing cards to set the gap between the lid and
hinge rail. The perfect fit has a nominal gap between the
lid and hinge spacer but allows the lid to close completely. If
the lid does not close completely, double up the cards.
Step 9
Use a paintbrush to apply Woodoc interior sealer to the entire project. You can use a clear or tinted sealer, depending on the finished look that you want. After the first coat has dried, lightly rub down with Woodoc fine steel wool before applying a second coat. The third and final coat can be applied directly over the dry second coat.
Step 10
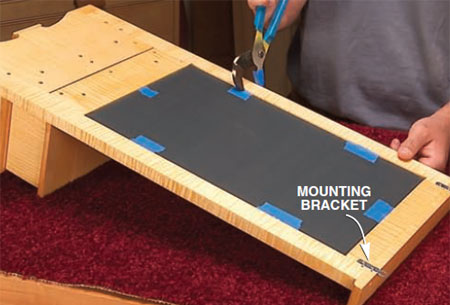
Secure the mirror with glazier points or mirror brackets. Place tape
below each point and on the plier jaws to prevent
scratches. Stick a few felt pads on the back of the frame to
keep the frame from rubbing against the wall.