
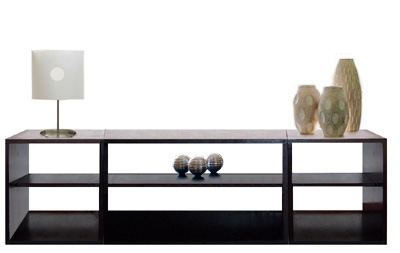
Make this Entertainment Unit
Don't pay a fortune for furniture when you can easily make this unit for as little as R800!
YOU WILL NEED:
[2] 1000 x 500 x 22mm SupaWood Top and Bottom
[2] 506 x 500 x 22mm SupaWood (MDF) Sides
[1] 956 x 500 x 22mm SupaWood (MDF) Shelf
[1] 995 x 545 x 3mm SupaWood (MDF) Backing Board
- 3.5mm wood screws
- Drill, 3.5mm drill bit, countersunk
- Cordless screwdriver - optional
- Wood Glue
- Wood Filler
- Sandpaper (fine grit)
- Prominent Sheen - black
- Foam roller and tray
- Dust cloth
- Pencil and ruler
NOTE: Have all your wood cut to size at your hardware store and remember to specify PG Bison SupaWood for a quality product.
HERE'S HOW:
1. Using a pencil and ruler, mark the top and bottom pieces at either end. Since the thickness of the SupaWood is 22mm, carefully mark at 11mm in at either end. Then mark in both pieces from front and back to a distance of 100mm.
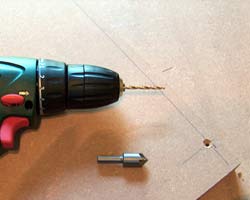
2. You will pre-drill all the holes before assembly to make the process a lot easier. Place the top and bottom pieces exactly on top of each other. Using a 3.5mm drill bit, drill the marked points. Use a countersink bit on all holes to allow the screws to be sunk into the wood and invisible after filling these holes with wood filler once the unit is complete.
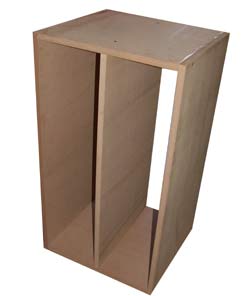
3. Assemble the box using wood glue and 3.5mm drywall screws. Apply wood glue to all the sides to be screwed together. Place the top and bottom sections on their sides and position the two side pieces. Screw through the top and bottom sections to attach the two side pieces.
4. Mark both side pieces to the centre line for mounting the shelf. Mark 100mm in from either side. Drill 3.5mm holes and countersink. Position the shelf and attach with screws at either side.
5. Use wood filler to fill in the screw holes and leave this to dry before lightly sanding with 180-grit sandpaper to a smooth surface. Don't oversand, you don't want to damage the surface of the SupaWood.
6. The unit is now ready for painting. I used Prominent Sheen - black for my project. As this is SupaWood, you can expect the first coat to be quickly absorbed. You will need to apply 2 to 3 coats for a nice finish.
DIY Tips:
If you intend to make a longer central unit, add internal upright supports to take the load.
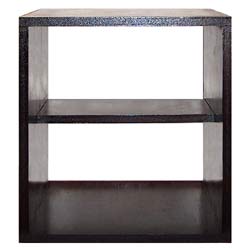
Adding additional storage
You can add even more storage to the central unit by adding side pieces. These are made in exactly the same way as for the central unit.
Finishing
You can paint this project any colour you like. You could even try your hand at a faux wood grain technique.