
My little corner of Africa
I am still decorating the entrance to my home and you have already seen my Console Table (in Easy DIY magazine) and new Front Door. Next to the door is a small alcove and I have been wanting to add shelves for ages. I have a small collection of African curios, and this seemed like the perfect place to add some shelves for display.
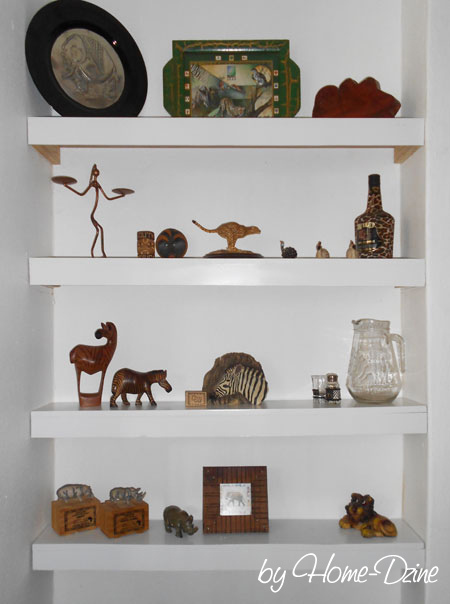
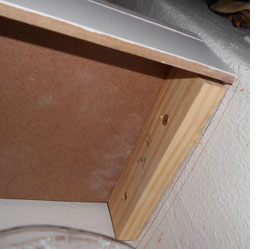
This is what the shelves look like underneath, and if you have an alcove that is going to waste, this is an easy and affordable way to add some shelves. In this project I will show you how easy it is to install shelves in an alcove and you can easily complete this project in a couple of hours.
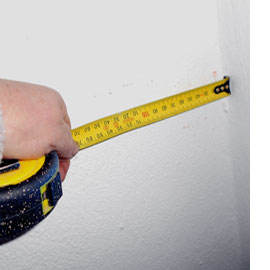
The most important part of this project is to measure up right. Just a few millimetres out and you end up with shelves that are uneven, which spoils the whole point of putting the shelves up in the first place!
As the saying goes... Measure twice - cut once.
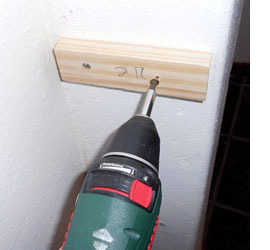
You also have to watch out for walls that are not straight. In my entrance the walls are not straight and every single shelf had to be cut to a different size; measure all the way up on both sides of the wall. Draw pencil lines where you want to mount individual shelves. It also helps to mark the number of each shelf on the wall, so that when it comes to mounting you know which one fits where, which is especially important if your walls are not straight. Use a spirit level to ensure that all your drawn lines are straight, particularly on the depth from back to front.
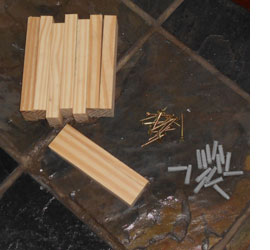
Once you have all the measurements in hand, cut pine battens to support the shelves. Once again, check the depth of the alcove all the way up the wall so that you do not end up with shelves that stick out in places where the wall is not of even depth. Number and mark each batten for left or right.
You will also need Fischer wall plugs. These wall plugs are made of nylon and are much stronger and safer to use than plastic wall plugs, and of course you'll need some screws. To determine the size of the wall plugs and screws use a bit of savvy. If you are hanging light items you only need a small wall plug, but the heavier the item - the larger the wall plug. I am mounting supawood shelves for display and I'm using a Fischer SX6 wall plug 30mm in length that takes 4 to 5mm diameter screws.
When selecting the right screws remember that the screws should be long enough to go through the battens (20mm), into the plugs (30mm) and allow an extra 5mm length = total 55mm long.
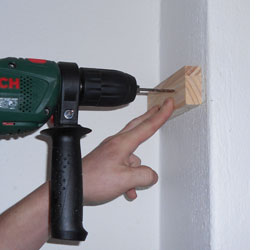
To mount the battens on the wall have someone old the batten against the drawn lines while you drill through the batten and into the wall, remembering to drill to a depth equal to that of the screw length (EG. 55mm). A piece of masking tape wrapped around the drill bit at the depth needed to drill will assist in drilling all holes to the correct depth.
DIY Tip:
Use an all-purpose drill bit that allows you to drill through the wood and wall without having to change bits. If you don't use this bit, you need to drill through the batten with an HSS bit to leave a mark on the wall and then change to a masonry bit to drill into the wall.
Insert the wall plug into the drilled hole and then place the screw in the batten, screwing in just enough so that the tip of the screw protrudes at the back. This makes it easier for you to line up the screws with the holes.
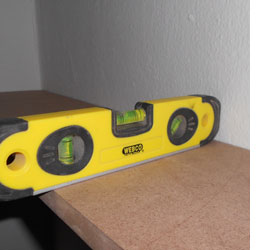
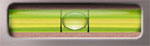
For the shelves I used 16mm PG Bison SupaWood. Each shelf was cut to length and width according to the initial measurements. Place the shelf on top of the mounted batten and check that it is level: side to side and front to back. The air bubble on the spirit level must be within the centre lines.
You can make minor adjustments by adding thin strips of whatever to make the shelves level.

To conceal the supports or battens I glued a strip of supawood to the front of the shelf. A clamp at each end holds in place until the glue dries. Although, thinking about it afterwards I could have glue to panel on before mounting the shelves (dumb blonde!).
To finish off the shelves I rubbed a layer of wood filler along the cut edge at the front and filled the join between top and front panel, let dry and then sanded smooth. The shelves were painted with two coats of Rust-Oleum 2X spray paint in satin white. You will find tips on painting supawood here.
If you want to add a wood grain effect to supawood you will find a project here, or visit our Decorating Section for more paint effects and techniques.
