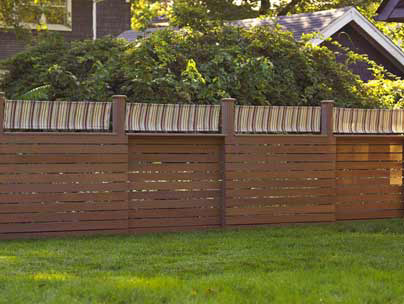
Easy garden fence
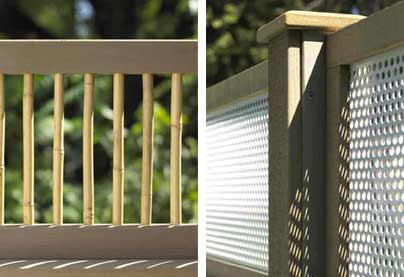
Underneath this great-looking fence are the steel posts that once supported a drab-looking chain-link fence. The "good-neighbour" design looks equally pleasing on both sides. We added colour with outdoor fabric. If you'll need additional posts, add metal posts and ready-mix concrete to your materials list.
HERE'S HOW:
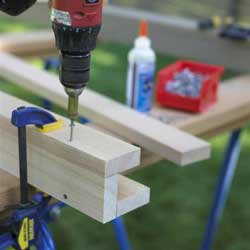
1. Assemble the post sleeves. A 'pinwheel' construction simplifies things by requiring just one size part and a consistent edge-to-face assembly technique. Use glue and screws to assemble the sleeves, then trim the ends to the finished length.
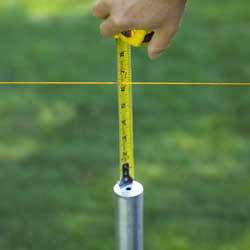
2. Level the post sleeves. The steel posts are likely to vary slightly in height, so for each post, measure from the top to a guide string tied to the end posts. This indicates the length of the stop block you'll need inside the post sleeve. Adhere a fender washer to the top of each post; that's where the bottom end of the stop block will rest.
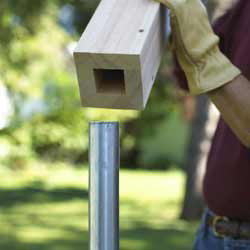
3. Install the post sleeves. After securing the stop block inside the upper end of the sleeve with wood glue and screws, fit the post sleeve over the steel fence post. Attaching the slats will automatically align the sleeve with the rest of the fence.
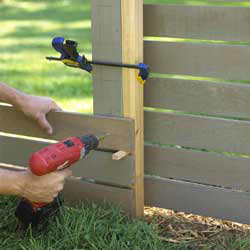
4. Attach the slats. Work your way up from the bottom as you attach the 1x4 fence slats. Start flush with the lower end of the post sleeve, and use spacers to produce a consistent gap between slats. The guide board clamped to the post helps align the slat ends for a consistent offset. Attach the next section of slats to the back of the posts; continue to alternate from section to section. This makes the fence look good on both sides.
5. Finish off the fence with three coats of Woodoc 50 Exterior Clear Sealer or Woodoc 55 Exterior Sealer in three colour variants. Apply according to the recommended instructions.
DIY Tip:
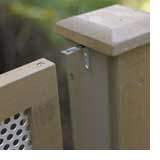
Small angle brackets, attached first to the sides of the post, provide inconspicuous mounting support for the metal panel frames. All but the top end of the bracket will be hidden when the panel is in place, and a single screw at each end provides the holding power.