
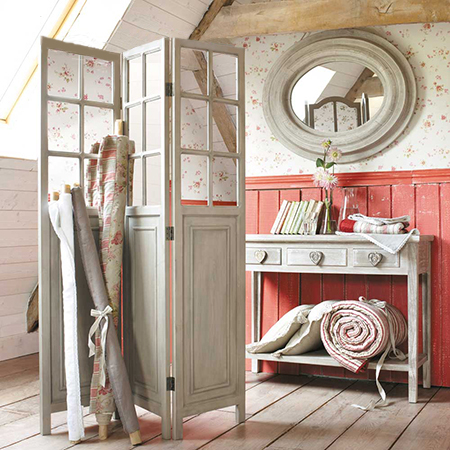
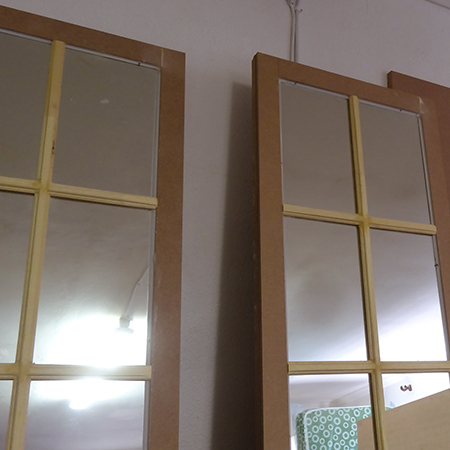
Decorative 3-panel privacy screen
Our decorative Shabby-Chic style privacy screen is an easy project that uses 6mm and 9mm supawood. The mirrored top section has cottage frame panels and the screen is painted with Plascon Polvin ‘Whisper’ [B5-E2-3], dry brushed with Plascon Polvin white, and then given a rub down with antique wax.
YOU WILL NEED:
6 of 400 x 1800mm - 6mm supawood - backing
6 of 40 x 180mm - 9mm supawood - vertical frames
9 of 40 x 320mm - 9mm supawood - horizontal frames
8 of 1800mm pine moulding strips
3 of mirrors 315 x 695mm (check the size after cutting)
9 of butt hinges and 25mm long screws
Pattex No More Nails adhesive
Masking tape
Wood filler
Craft knife
Panel pins, small
TOOLS:
Caulking gun
Drill / Driver plus assorted bits
Mitre box and backsaw or mitre saw
Sander plus assorted grit sanding pads
HERE'S HOW:
1. Working on a large, flat surface glue together the 2 backing panels for the three frames. Place a bead of Pattex No More Nails adhesive around the edge of the board and down the centre and place one backing on top of the other. Do all three frames at the same time.
2. Place the vertical frames down either side of the glued frames and secure in place using Pattex No More Nails adhesive. Press down to ensure the frames are flush with the surface and immediately wipe away any excess adhesive that oozes out.
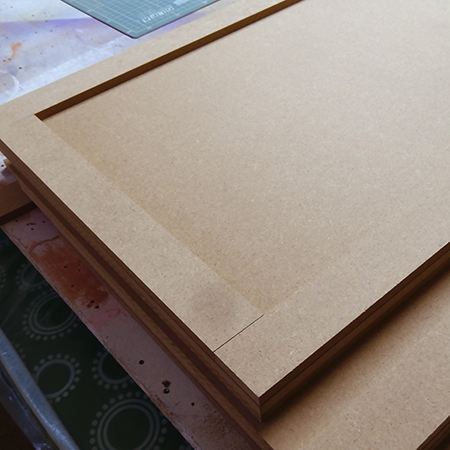
3. Attach the top and bottom horizontal frames with adhesive then measure and mark 700mm down from the inside edge of the top frame. At this mark secure the centre frame with Pattex No More Nails adhesive. Leave the panels overnight for the adhesive to set.
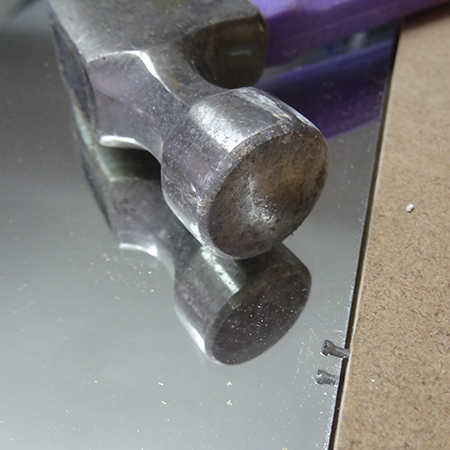
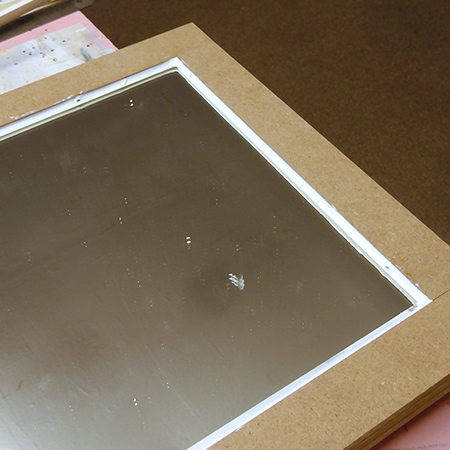
4. Place the cut mirrors in the top panel of each frame and use a hammer to secure small panel pins around the edge. For safety use 3 pins along the length of the vertical frames and 2 along the horizontal frames. Angle the panel pins slightly to make tapping into place easy.
GOOD TO KNOW
As an alernative to using panel pins you can use Pattex No More Nails
Ultra adhesive. This adhesive is solvent-free and will not damage the
back of the mirror.
5. To protect the mirror while you apply adhesive around the edge, place strips of masking tape 5mm in from the edge of the frame and use a craft knife to cut a neat edge at all corners.
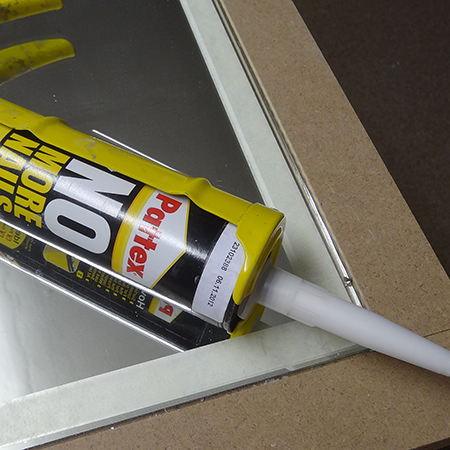
6. You don't need to buy additional sealer for around the edge of the frame - Pattex No More Nails works just as well. Apply a thick bead of Pattex No More Nails adhesive around the edge of the frame and use a Pattex Profiler Kit or the tip of your finger to smooth and remove any excess glue. Remove the masking tape while the adhesive is still wet.
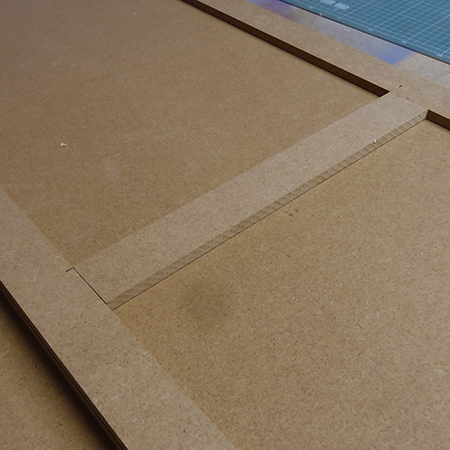
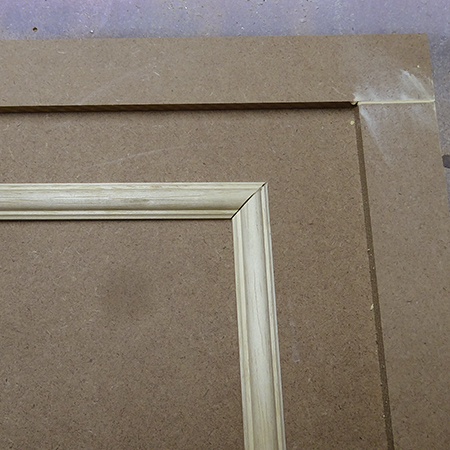
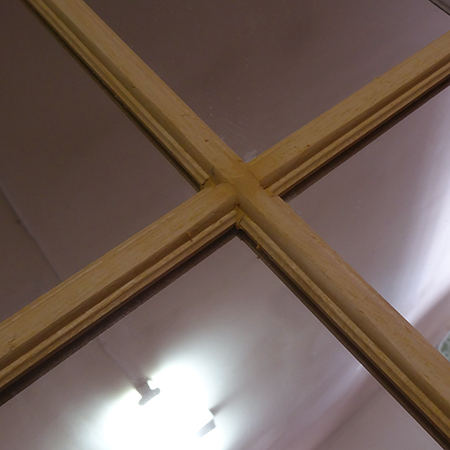
7. Before the adhesive has time to set, cut the pine moulding to size for the length and width of the faux cottage panes. Because pine moulding comes in different widths and styles you will need to measure and cut for the length and cross pieces. Measure the lengths for the vertical and then measure the total length and divide into three for the horizontal strips. Secure the strips onto the mirror with Pattex No More Nails adhesive and leave to dry.
HANDY HINT
Use a craft knife to cut away the side edges on the centre strip to
allow a more authentic finish for the cottage pane effect.

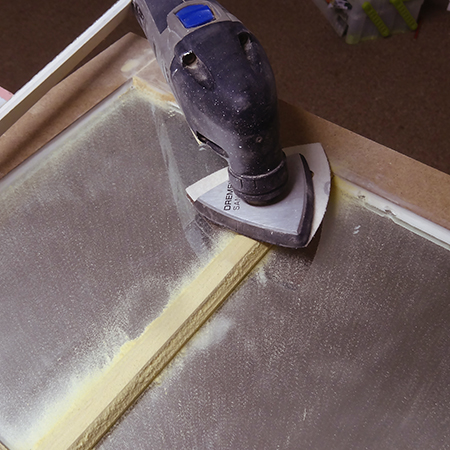
8. After making sure the adhesive has set, use a sander to remove the excess from the moulding to allow it to sit flush with the height of the surrounding frames.
9. Now you can measure and cut the moulding strips for the bottom section. Cut the corners at a 45-degree angle and then glue the strips onto the panels using Pattex No More Nails adhesive.
10. Any gaps around the moulding or frames can be filled in with wood filler. Let this dry and then sand smooth with 180-grit sanding pads.
11. Now the panels can be painted. It is better to paint before you add 3 butt hinges to the panels to join them together. When adding the butt hingesw drill a 2mm pilot hole when mounting the hinges to prevent the board from splitting.
Finishing
Use a combination of paintbrush and foam paint roller to paint. A
small paintbrush is handy for painting the cottage pane strips and
getting into the edges around the frame. Our screen is painted
with
Plascon Polvin ‘Whisper’ [B5-E2-3], dry brushed with
Plascon Polvin white, and then given a rub down with Woodoc antique
wax.