
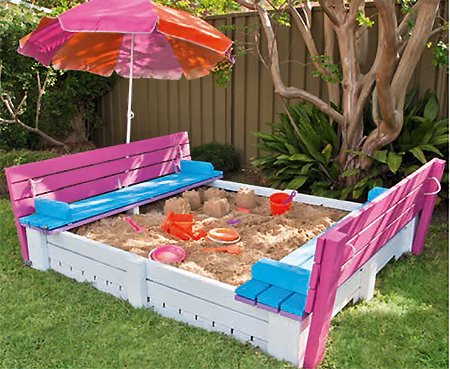
Build a covered sandpit
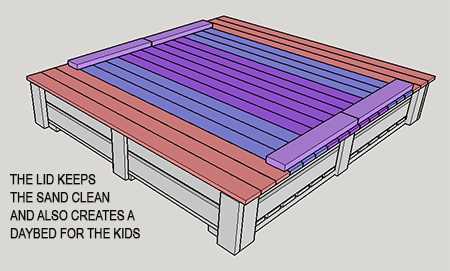
Young children love a sandpit and can spend hours with a bucket and spade make sandcastles and having fun. This sandpit has a lid that can be easily placed over the top to keep out cats and ensure the sand stays clean. It also doubles as a daybed or play platform when not used as a sandpit.
au.lifestyle.yahoo.com
YOU WILL NEED:
3 of 32 x 144 x 1662mm PAR pine - base supports
15 of 20 x 94 x 1469mm PAR pine or decking planks - base slats
12 of 32 x 94 x 264mm PAR pine - corner and side battens
4 of 20 x 94 x 1469mm PAR pine - base ends
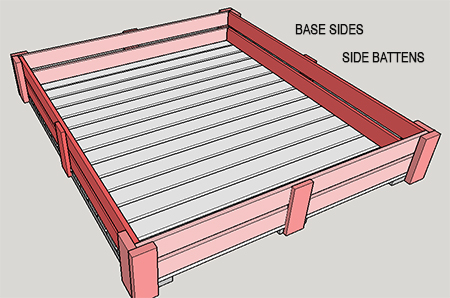
4 of 20 x 94 x 1620mm PAR pine - base sides
2 of 20 x 44 x 1469mm PAR pine - end rails
2 of 20 x 44 x 1620mm PAR pine - side rails
18 x 20 x 94 x 1600mm PAR pine or decking planks - seat slats
4 of 32 x 94 x 282mm PAR pine - seat batten
4 x 32 x 94 x 590mm PAR pine - backrest supports
1 of 32 x 94 x 1340mm PAR pine - cross beam
12 gate hinges
2 latches and 4 eye hooks
8 steel angle braces
Rope for handles
4 x 40mm / 5 x 75mm cut screws / 16mm screws
Landscape fabric
Sandpit sand
TOOLS:
Drill / Driver plus assorted bits
Circular saw or jigsaw
Tape measure and pencil
GOOD TO KNOW
Shop around for the best prices for wood for this project. Buying
direct from a timber merchant can offer substantial savings and you will
only need to cut the timber to size yourself.
HERE'S HOW:
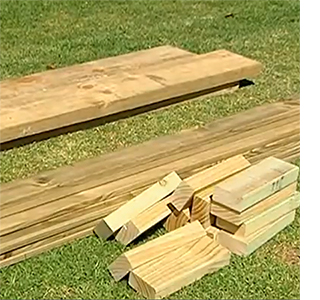
If you don't have the tools to cut the wood yourself, have all your PAR pine cut to size at your local Builders Warehouse to make assembly quick and easy.
GOOD TO KNOW
Sand with 120-grit to remove rough edges and then sand smooth with
180- or 240-grit sanding pads and an orbital sander.
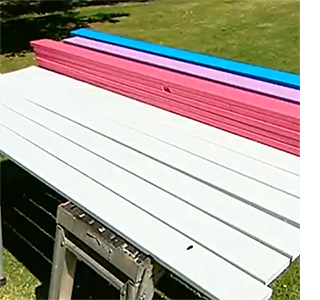
Prime and paint all the pieces prior to assembly. You can always touch up after assembly with a final coat.
GOOD TO KNOW
Apply Wood Primer and then use an exterior paint such as Plascon Wall & All
or Plascon Velvaglo. Apply 2 to 3 coats, allowing each coat to dry before
applying the next coat.
ASSEMBLE THE BASE
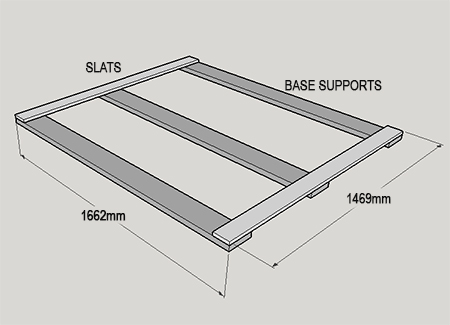
1. Lay the base supports where the sandpit will be placed. You can use a couple of slats to determine the width.
GOOD TO KNOW
Measure diagonally to ensure the layout is square before attaching
the slats on top.
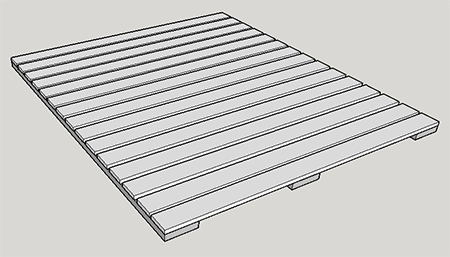
2. Attach the ends and then lay the remaining slats out so that you can allow even spacing. Allow about a 20mm gap between each slat to allow for expansion and contraction, and allow for drainage. Secure the slats to the base supports with two 40mm screws at each end and in the centre.
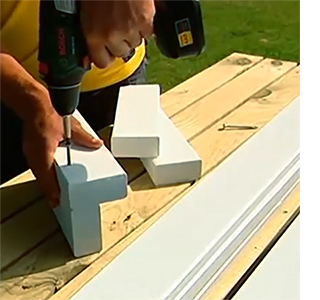
3. Make the corner battens using a butt joint to secure two sections together with 75mm screws.
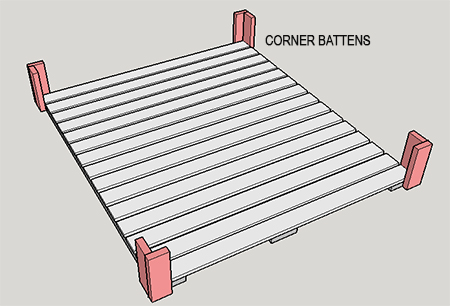
4. Attach the corner battens to the corners, with the widest part at the front and back.
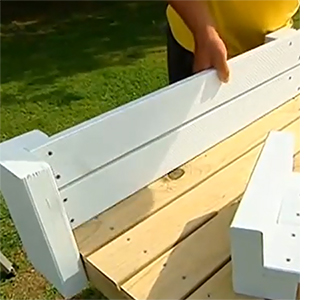
5. Assemble the base ends by attaching a side batten in the centre. Place the base ends and then attach a side batten at the centre of each. Slot these in place and secure onto the corner battens.

6. Insert the base sides in the same way.
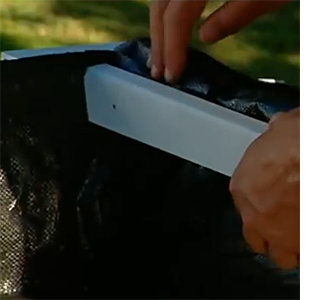
7. Place the landscape fabric inside the base and press into the corners and edges. Secure at the top with end and side rails and 40mm screws. Cut away any excess fabric with a knife.
MAKE THE SEATS AND LID
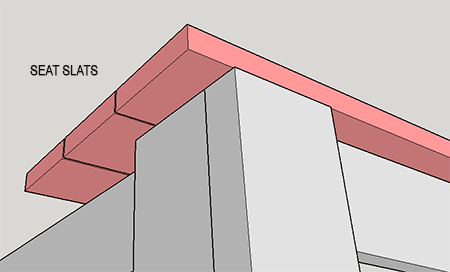

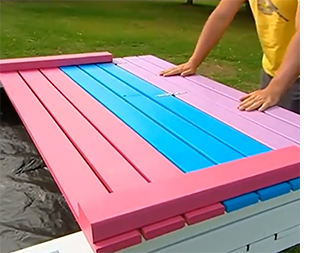
8. Place all the top slats over the top of the base to determine the spacing. At both ends secure 3 slats in place (shown in pink).
9. The next 3 slats are joined together underneath using a seat batten. This batten also becomes and armrest when the panel is raised. Cut a 45-degree angle at one end.
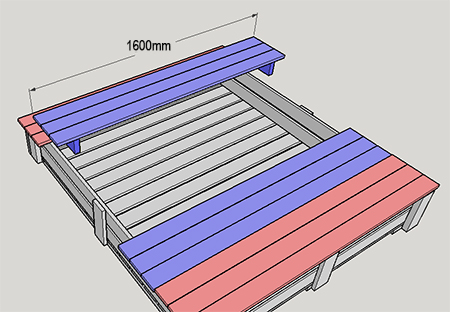
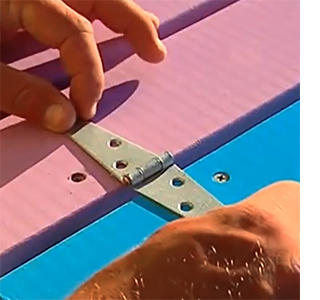
10. The second panel, which will be the seat, (blue one shown left) is attached to the first panel with gate hinges mounted on top at the sides and centre. This will allow this panel to fold over.
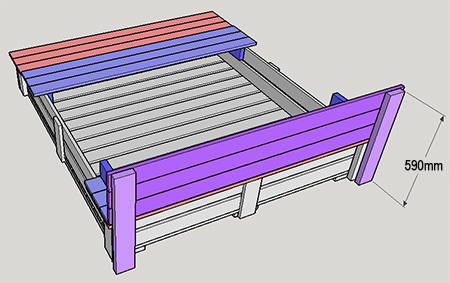
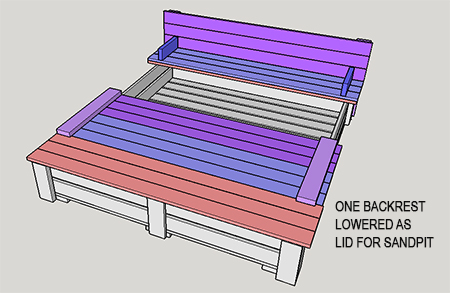
11. Assemble the backrest using 3 slats mounted on the backrest supports. Place the supports approximately 30mm in from the edge and secure with 40m screws, making sure the top slat is aligned with the top of the support.
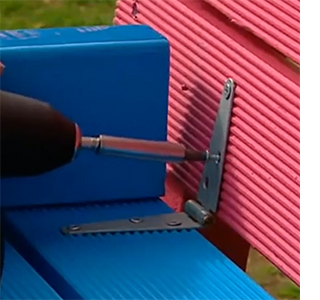
12. Place the backrest assembly against the edge of the base. With the seat folded back, attach 3 gate hinges along the length onto the backrest using 16mm screws.
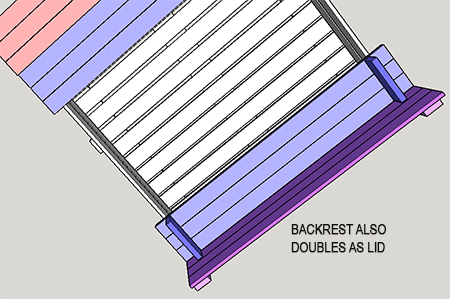
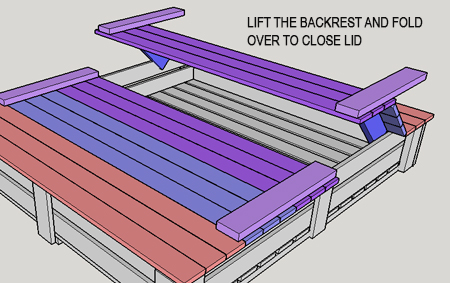
The hinges allow the backrest - and seat - to be lifted and placed over the top of the sandpit to provide a cover.
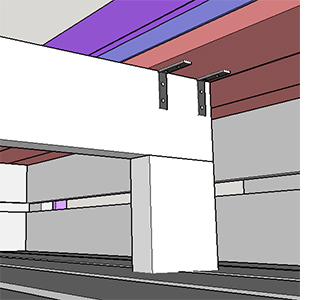
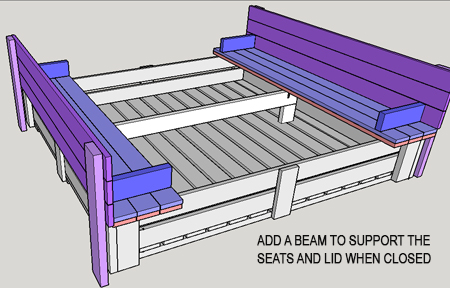
13. Use angle brackets to secure a centre beam underneath the seat section.
Cut a piece of offcut to secure underneath the beam to fit snug into the base. This beam will add support to the seat and to the lid when closed.
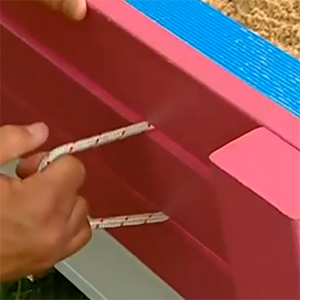
Add some rope straps onto the backrest/lid to make it easier to lift up. Cut lengths of rope and knot to secure.
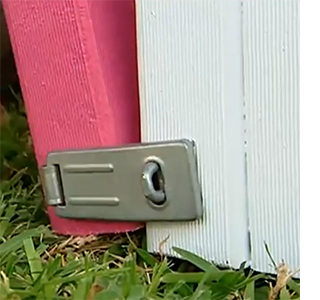
Fit a couple of latches at the base of both backrests so that they can be safely secured when the lid is open. Now you are ready to pour in the sandpit sand. Use only cleaned sand for a sandpit.
Not responsible for errors or ommissions.