
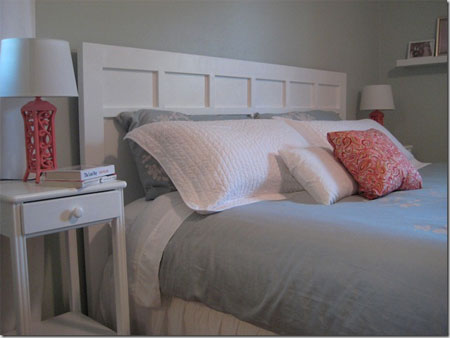
How to make a cottage headboard
Michelle and Nate at Decor and the Dog modelled this headboard from one they saw in a popular home-decor catalogue. It is very simple to build - you can have all the pieces cut to size at your local Builders Warehouse - then the whole piece is painted white.
YOU WILL NEED:
9mm SupaWood for the backing
9mm SupaWood for the frames
Wood glue
Sander and 180-grit sandpaper
Prominent Paints Premium Sheen - white
Foam roller and paint tray
Artist's paintbrush
HERE'S HOW:
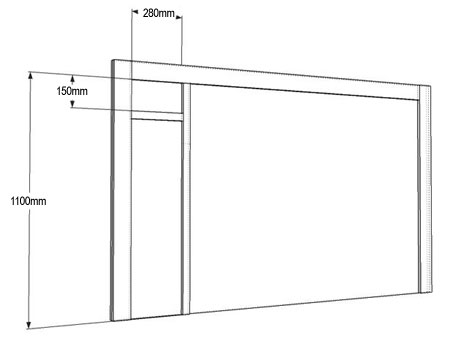
1. Use the above diagram to calculate how many frames (top and sides) you will need for the size of the headboard you need for your bed. The side and top frames are 80mm wide.
2. The inside frames that make up the design are 30mm wide.
DIY TIP:
It's a good idea to sand all the cut edges with 180-grit sand paper before assembly. It makes it much easier to paint.
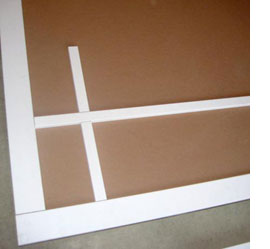
3. Lay the back board on the floor and dry fit all the components to be sure that they fit. Don't worry too much about small gaps - these can be filled in with wood filler.
4. Apply a small bead of wood glue to the individual pieces to attach them to the back board.
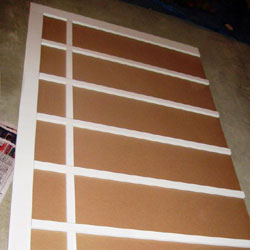
5. Let the wood glue dry before filling any gaps with wood filler. Let this dry and then sand with 180-grit sandpaper.
6. Use an artist's paintbrush to paint the edges of the frames and then go over this with the foam roller for a smooth finish. Paint all the larger surfaces with a foam roller. Let the first coat dry before applying the second coat.
MOUNTING
If you need to mount the headboard onto the wall, attach keyhole brackets to the left and right sides. Drill for wall plugs and screws, leaving the screw head to protrude 3mm out from the wall. Slip the keyhole brackets over the screw heads.