
Concrete garden table
Create a polished concrete table with a solid wood base, with inlays of glass, leaves, tile or other materials. This project is simple enough for even a beginner to tackle and give you some insight into working with concrete.
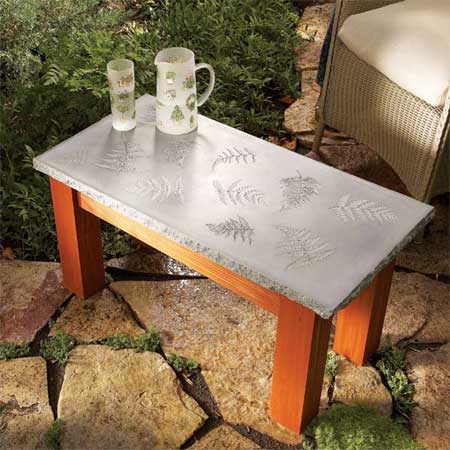
If you want a tabletop that’s elegant enough for any indoor setting and tough enough to withstand outdoor weather, you’ve found it. Tables similar to this one sell for hundreds at garden centres and outdoor furniture stores. But you can make one yourself for around R300.
Give yourself half a day to build the form and pour the concrete and an hour to build the table base. A few days after casting the top, you’ll spend a couple of hours removing the form, chipping the edges and applying a sealer.
YOU WILL NEED:
BisonLam
Wood screws
TFC countertop sealer
Silicone sealer - grey or black
Masking tape
Concrete
mix for countertop
Rubber gloves
TOOLS
Drill/driver and asstd drill and screw bits
Impact drill and paint stirrer
2cm cold chisel
Plastic spatula
Scrubbing brush
Bucket
Making a form
Melamine-coated chipboard is the perfect form material for this project because it’s smooth, water-resistant and inexpensive. Create a form for the size of table required. If you use screws, be sure to drill pilot holes to avoid splitting the chipboard, spacing screws about 150mm apart.
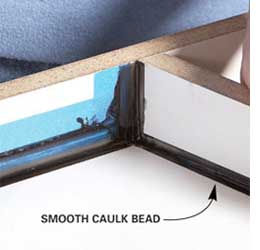
Apply silicone sealer to the inside corners to seal the form and create rounded edges on the tabletop. Use colored silicone sealer, which will show up well against the white melamine. That way, you can easily spot and clean off smudges. Keep in mind that every tiny imperfection on the form will show up on the finished tabletop.
For neat lines, run masking tape about 20mm from the corners. Apply the sealer one side at a time, smooth it with your finger and remove the tape quickly before the silicone starts to cure.
Mixing concrete
We mixed our concrete in a bucket, using a drill and a large paint mixer attachment. This method is fast, but it requires a powerful drill and won’t work well with thicker mixes. Instead, you can use a garden hoe and a plastic cement tub. Be patient and mix thoroughly so you completely wet all the powdered ingredients.
Pay attention to the mixing instructions, especially the recommended amount of water. An extra cup of water can make the mix too thin. The best concrete mix for this project is a concrete countertop mix, which pros use to cast concrete countertops. This mix has special additives called 'super-plasticizers', which allow you to add less water. Less water means a denser, stronger top. You can buy colour additives when you buy the mix, or buy concrete pigments from your local Builders Warehouse.
Filling the form
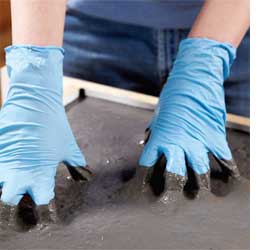
Set your form on a solid, perfectly level surface, otherwise your top will not be level. Pour in the mix around the edges to get an even distribution of material. Pouring the entire mix in the middle might concentrate the heavier particles there and weaken the edges. Wear rubber gloves as you work the material into all corners and edges. Use a gentle touch, however, if you have fragile objects glued to the bottom. If the mix you use requires wire reinforcement, pour and work in about two-thirds of the mix. Then add the wire and the remaining mix.
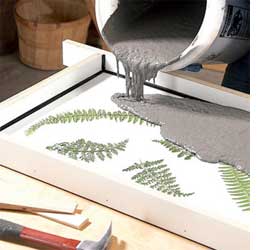
If you want to cast leaf or fern 'fossils' in the top, first press them for a day or two in a book or between scraps of cardboard. Then lay them out on newspaper and coat them with spray adhesive. Press them onto the form so they lie perfectly flat. Thick stems may not lie flat and can leave imprints that are too deep. To avoid this, shave fern stems down with a razor blade. Pour the mix evenly around the perimeter of the form. The form must be level.
Work the mix into corners and around objects cast into the tabletop. Then lightly tap the sides of the form with a hammer to drive out air bubbles. When you’re finished, cover the top with plastic and let the concrete harden and cure anywhere from four hours to two days, depending on the brand.
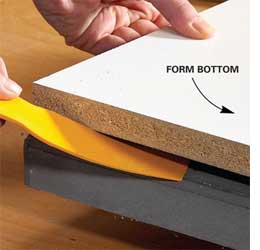
To remove the form, pry off the long sides and then the short sides. Pry against the form base rather than the concrete. If you have to pry off the form base, use a plastic spatula; metal will scratch the surface.
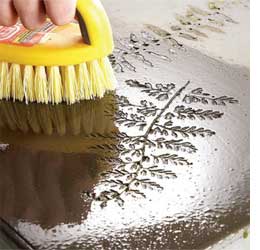
If your top has imprints with fine detail, cover it with plastic and let it harden for an extra day. Then scrub with water.
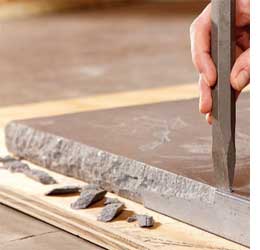
The mix we used chips off neatly for a rough edge look. Be sure to set the top on a solid surface. We used a 2cm-wide cold chisel, but you can use whatever width best produces the effect you want. For safety, hone down any sharp edges with a file or sandpaper.
Your top will withstand outdoor weather, but it’s susceptible to stains. To prevent them, and to bring out more colour, we recommend that you seal it with a countertop sealer.
Well done! Chances are that once you complete one top, you’ll want to make another.
the family handyman