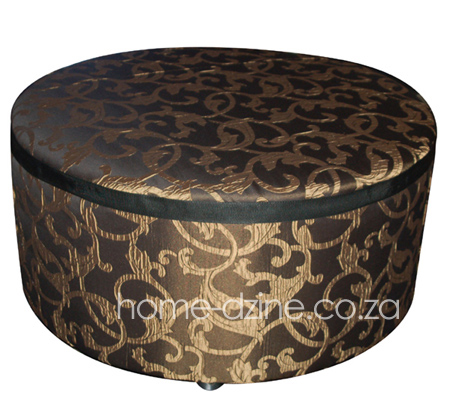
How to make a circular ottoman
Making this circular ottoman wasn't difficult once I figured out the best way to make it and I will definitely be making more of the same.
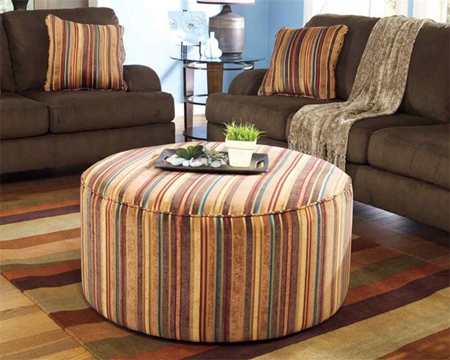
The fabric used for this circular ottoman was chosen by the client, but I would like to make a more relaxed version of this ottoman for my own home, similar to the one shown below. You would make this in exactly the same way, without the strip around the top edge and smaller feet.
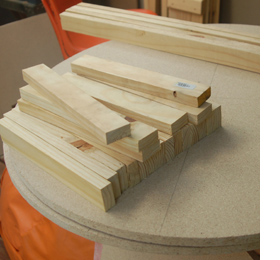
YOU WILL NEED:
2 of 16mm BisonBord 800 x 800mm
20 of PAR pine 44 x 300mm long
Piece of high density foam 20mm thick and
800mm diameter
Medium-weight batting
4 feet - or make your own using blocks of
pine - and 16mm screws
Drill / Driver plus assorted bits
Staple gun and 10 or 12mm staples
Scissors
Hammer
Pack of 4 x 40mm smooth shank
screws
HERE'S HOW:
Step 1
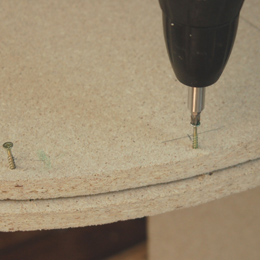
Draw diagonal lines from corner to corner
on one of the 800 x 800mm boards. Where the lines intersect as the centre, pop in
a panel pin. Tie a pencil to a piece of
string and tie the other end to the panel
pin. Adjust as required to draw an 800mm
diameter circle. If you didn’t have the PAR pine cut to
length, cut into 300mm long sections for the
uprights.
Step 2
Use a jigsaw to cut the first circle and then
use this board as a template to cut the
second circle.
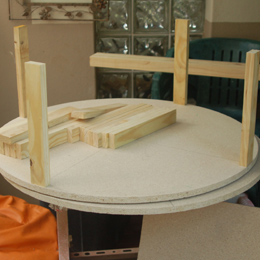
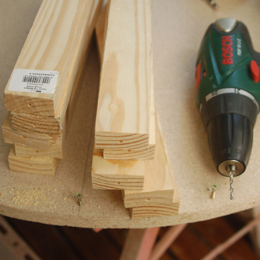
Step 3
Use the diagonal lines to assist in placing
the uprights around the outside edge of
one of the 800mm diameter boards. There
are 20 uprights in total and these need to
be spaced evenly.
Once you have the layout right, use a
pencil to draw around each upright.
Step 4
Place the 2 circular boards on top of each
other, lining them up exactly. Drill a 3mm
pilot hole in the centre of each draw block
and through both boards at the same time.
DIY TIP
Make sure the boards are hanging over the
edge of your workbench, or you will also
drill holes through that as well.
Step 5
In both boards, drive the screws partway into the board so that only the tip shows on the other side. We used 4 x 40mm smooth shank screws for this project. The reason
being that a smooth shank screw will pull the uprights to the board and hold them
tightly in place.
Step 6
At both ends of each upright, drill a 3mm
pilot hole to a depth of about 1mm. This
will help in matching up and will prevent
the pine from splitting.
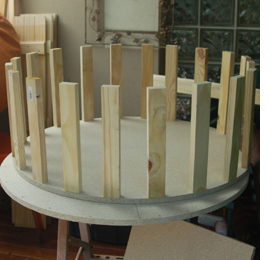
Step 7
Place the first circle with the screw tips
face up. Match the drilled pilot hole in the
upright to where each screw tip shows
through the board. Hold the upright level
with the edge and vertical before driving in
the screws.
Repeat for all uprights.
Step 8
Place the second circle over the top of the
uprights with the screw tips facing down.
Align the screw tips with the drilled pilot
holes and screw in place.
Step 9
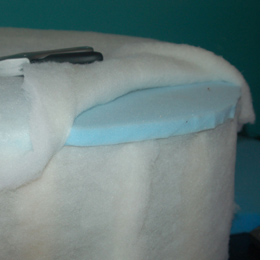
Cut a strip of batting that is slightly wider
than the height of the ottoman. Use a
staple gun to staple the batting to the
edges of the top and bottom at each
upright.
Step 10
Cut a piece of 2cm-thick foam to exactly
the same size as the top. Cut a piece of
batting that is slightly larger than the top.
Use a staple gun to staple the batting
around the edge of the top board.
DO NOT pull the batting to tightly around the outside of the frame. If you do it will not hide the frame nicely.
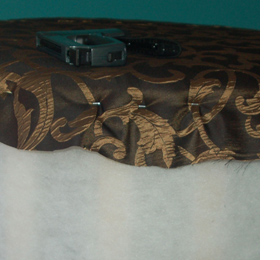
Step 11
Cut the fabric for the top. Use a staple
gun to attach fabric to edge of
top board.
Pop in a staple at four equidistant points
around the diameter. You can easily do this
by using the uprights as a guide. Now staple at a centre point between
these four. Continue doing this and working
around the ottoman rather than working out from one point. This will ensure that the
fabric is nicely laid across the top.
DIY TIP
Your staples need to be as close as
possible to the bottom edge of the board.
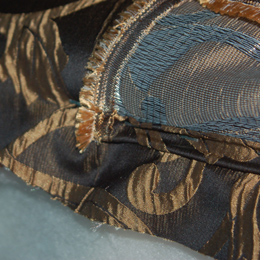
Step 12
Cut fabric for the side section. This piece
needs to allow extra for folding a hem at
the top and bottom edges. To save on
fabric, I cut a single piece of fabric in half.
When you finish, it’s easy to disguise the
joins with a bit of hand stitching.
Step 13
Place the side section face-to-face with
the top. Fold the fabric under and pin every
10cm or so. This makes it much easier to
staple using both hands.
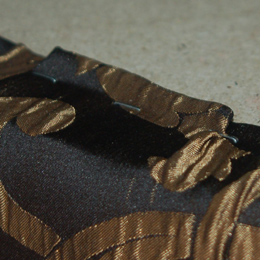
Step 14
For the first section you can staple right to
the edge and then staple every 3 to 4cm along the edge of the top board. If you are using a single strip of fabric for the
side, fold under the end before stapling. If
using two half sections for the side, staple
down the first half and fold under the
second half before stapling down.
Step 15
Turn the ottoman upside down. Working in
the same order as you did for the top, fold
under and staple the fabric to the base. You may need to make folds, so be sure to
pop a staple over the top to secure.
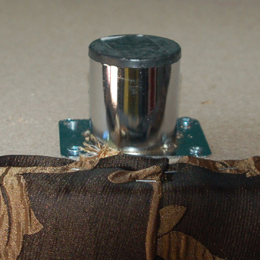
Step 16
Secure the feet to the base with 16mm
screws, positioning equally around the
base.
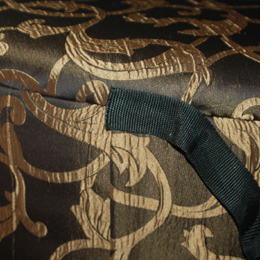
Step 17
If you had managed to finish without any visible staples you can finish now. Or, you can add webbing or trim to conceal the
join between the top and side.