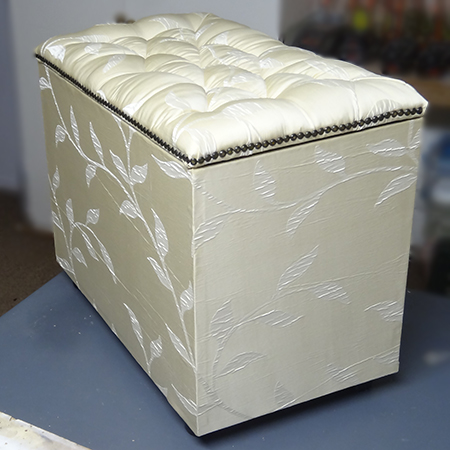
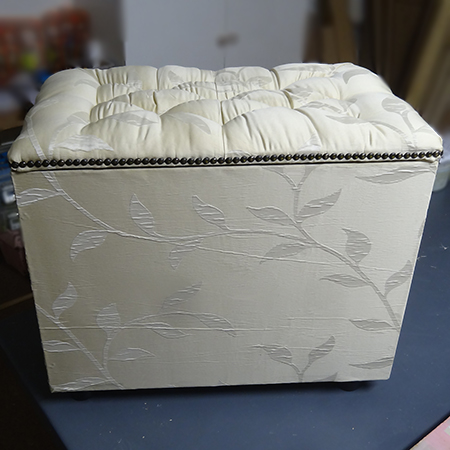
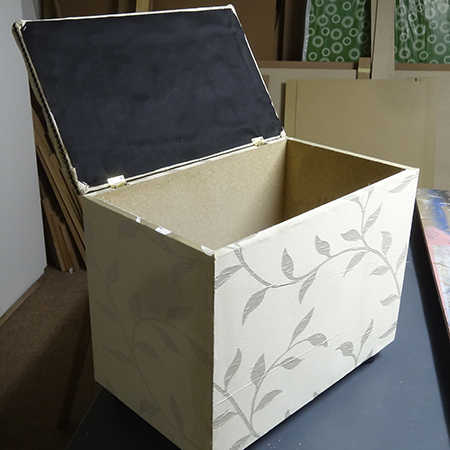
Cheat's diamond-tufted ottoman
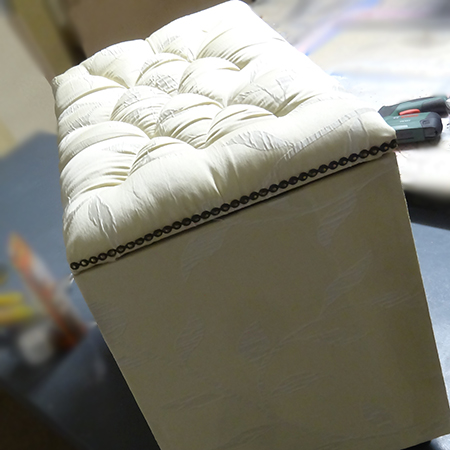
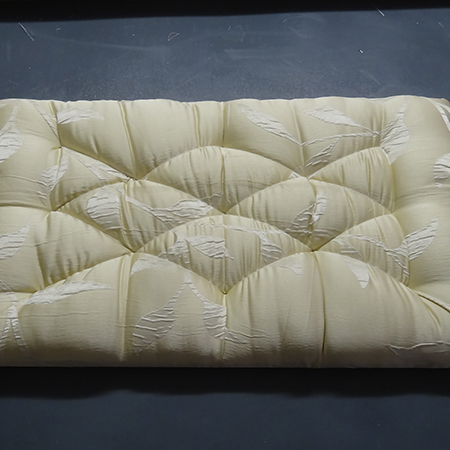
I love the look of diamond-tufted furniture, but getting it right requires patience and plenty of practice, especially on a small project. After this weekend I had spare pieces leftover from the DIY Divas ottoman workshop and decided to show you an easy way to get the look of diamond-tufted upholstered pieces... with a small cheat!
The secret to this cheat's version of diamond tufting is to use indestructible thread. Unlike cotton thread, indestructible thread won't break as easily and allows it to be pulled and worked to create the diamond-tufted look that I used for this upholstered ottoman.
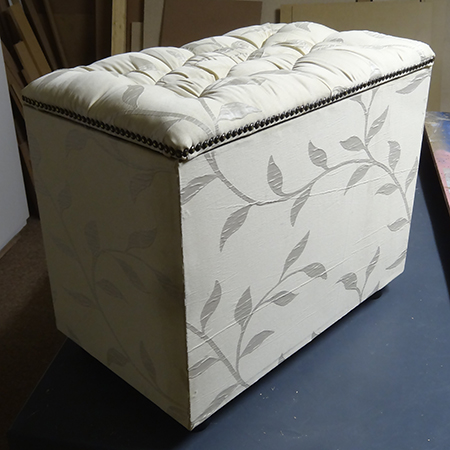
The ottoman has a lift-up lid that allows you to use it for storage, and you can even make a longer one for at the bottom of the bed. If you are interested the Joburg DIY Divas have an Upholstered Storage Bench workshop in the new year.
YOU WILL NEED:
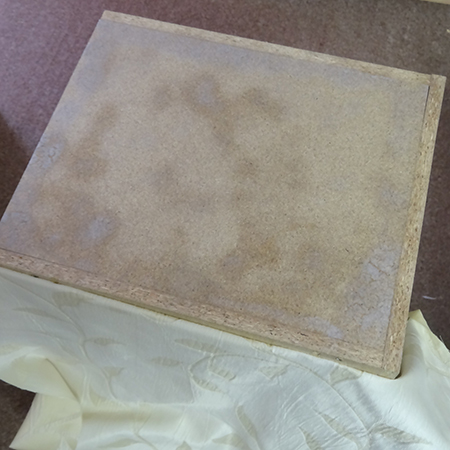
2 of 400 x 600mm 16mm particleboard - front / back
2 of 318 x 400mm 16mm particleboard - sides
2 of 350 x 600mm 16mm particleboard - top / bottom
4 plastic feet and 6 x 60mm screws
Fabric for box 600 x 2400mm
Fabric for lid 600 x 800mm
2 piece thick batting 350 x 600mm
Liner fabric for back of lid 350 x 600mm, trimmed to fit
Long upholstery needle plus nylon line + indestructible thread
4 x 35mm cut screws
Wood filler
120-grit sandpaper
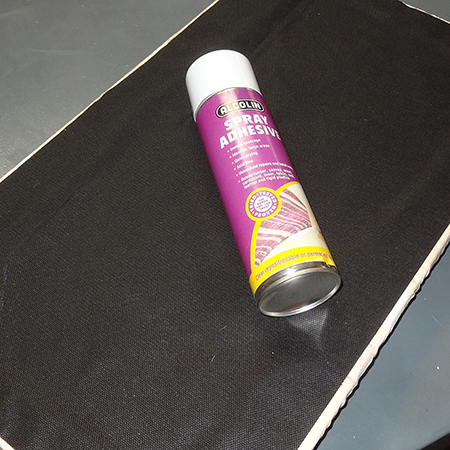
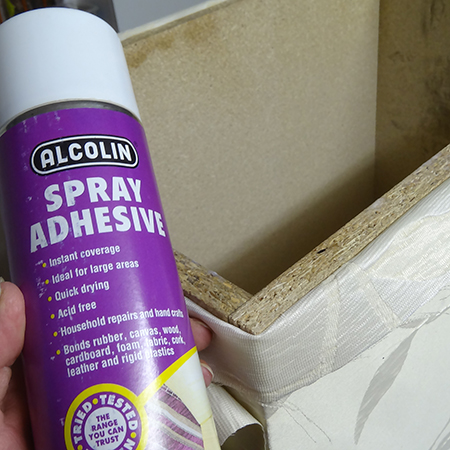
Alcolin or Bostik spray adhesive
2 butt hinges and 16mm screws
OPTIONAL: Upholstery strip and pins
TOOLS:
Drill / Driver plus assorted bits
Bosch Tacker and staples, or staple gun
Sharp scissors
Tape measure and pencil
OPTIONAL: Corner clamps, hammer
HERE'S HOW:
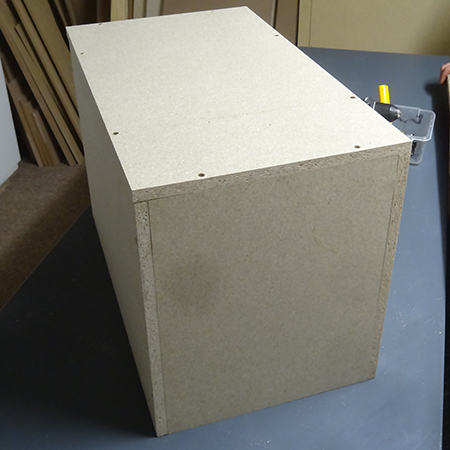
Making the box
1. Use corner clamps to hold one front and
side together will you drill 3mm countersunk pilot holes down one side
to secure the front to the side.
GOOD TO KNOW
Most chipboard is soft enough that you don't even need to drill a countersunk pilot hole.
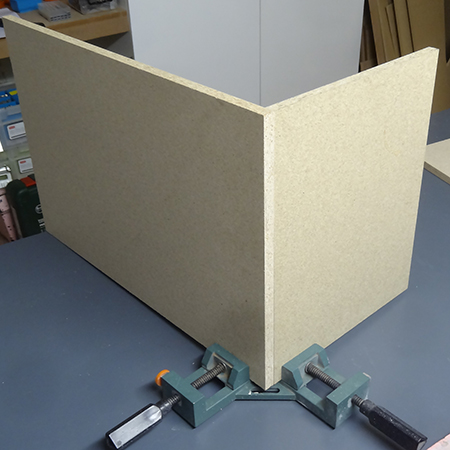
2. Attach the other side in the same way.
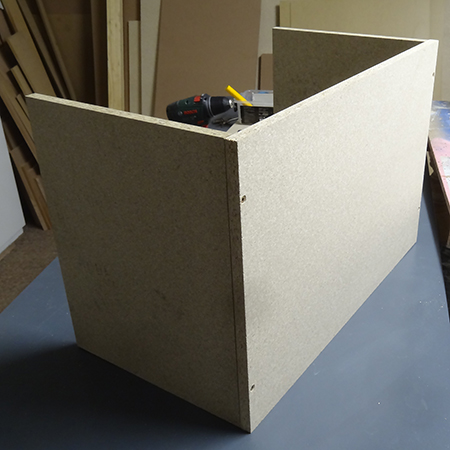
3. Attach the back to finish the frame for the box.
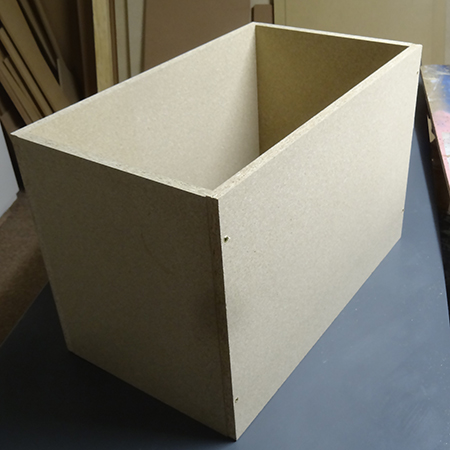
4. Screw the bottom onto the frame with two screws along all edges into the frame.
GOOD TO KNOW
Fill the holes on the front and back with a small amount of wood filler. Sand smooth once dry. Any uneven edges need to be sanded.
Upholster and tufting the top
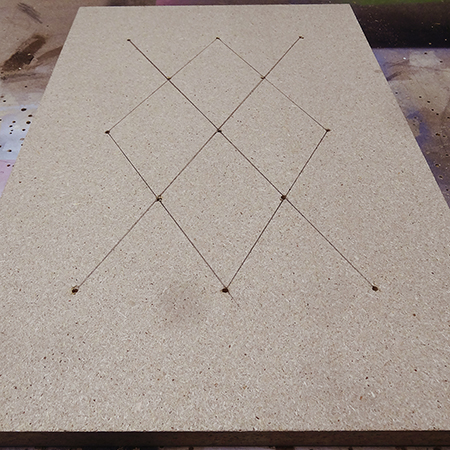
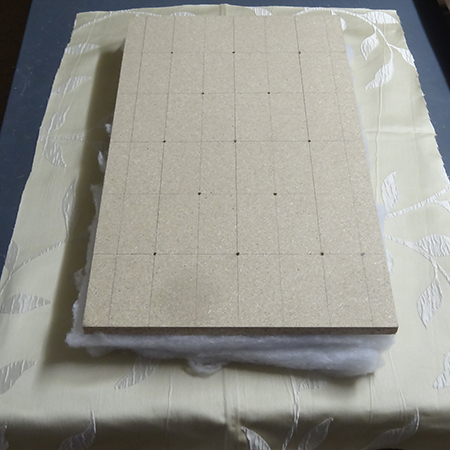
5. Now you can start working on the lid. Use a tape measure and pencil to divide the lid into rectangular blocks 50 x 100mm. This will be a guide for you to drill 3mm holes to create the diamond shape.
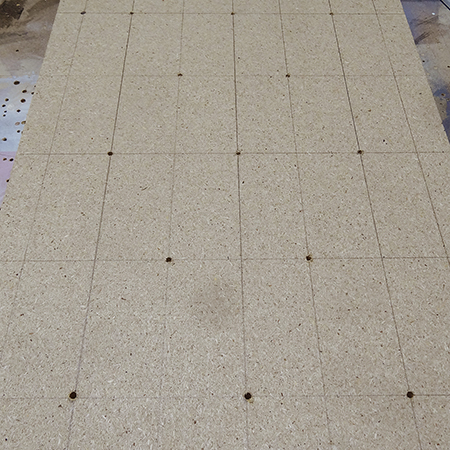
6. Before you drill the holes, make sure you have a nice diamond pattern for the top.
7. Cut a double layer of batting for the lid. I like to use my Olfa circular fabric cutting. It's easy and make a perfect cut.
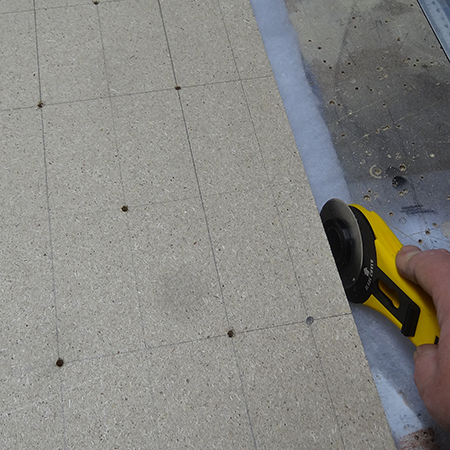
8. Place the double layer of batting on top of the lid and use a Bosch Tacker or staple gun to press down where the holes are drilled. Don't staple directly over the hole, but lift up the batting so that you can place a staple as close to the hole as possible. This makes is so much easier to create the diamond-tufted look without too much hard work.
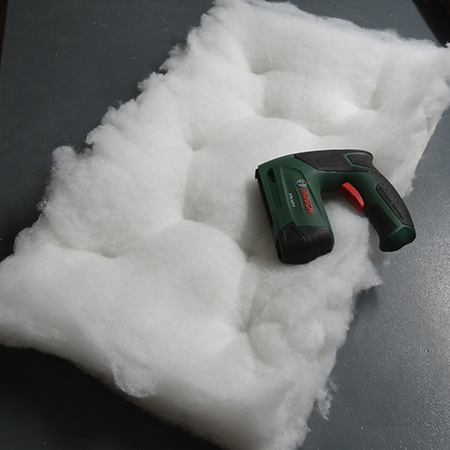
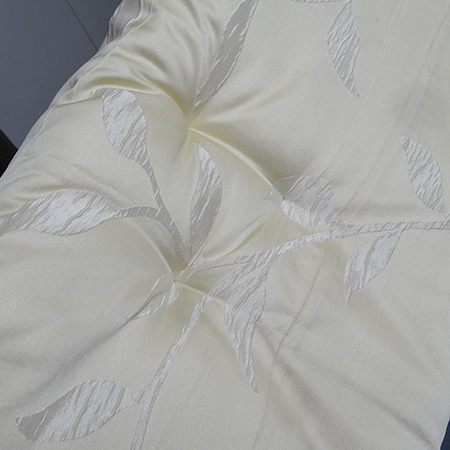
9. Cut the fabric for the lid with plenty to spare all the way around. When you start tufting you need plenty of excess fabric to give you the pleats and mounds on top.
10. Using a long upholstery needle and nylon line, start at the centre and work towards one side edge.
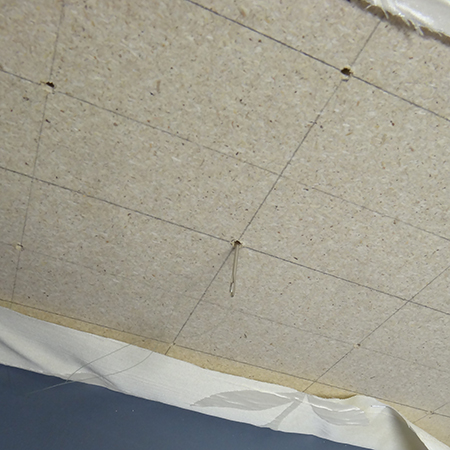
11. Press your hand down on the front to locate the stapled depression so that you can make sure the needle comes out in the right spot. Bring the needle through, move it slightly and then take it back down through the fabric. Leave a long piece of thread where you started, as you will need to secure this as shown below.
12. To secure the nylon line at the back of the top use a staple gun to make a zig-zag pattern to hold the line. While this might look messy, you will add a cover later on and this will be hidden out of sight.
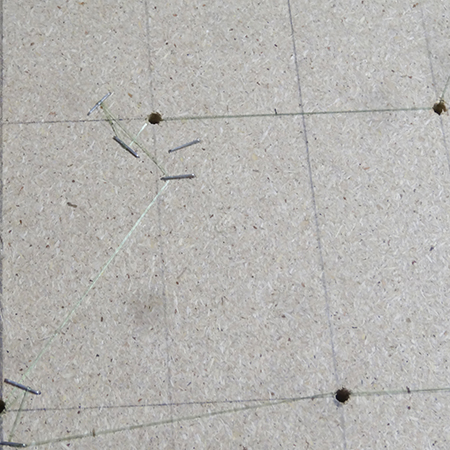
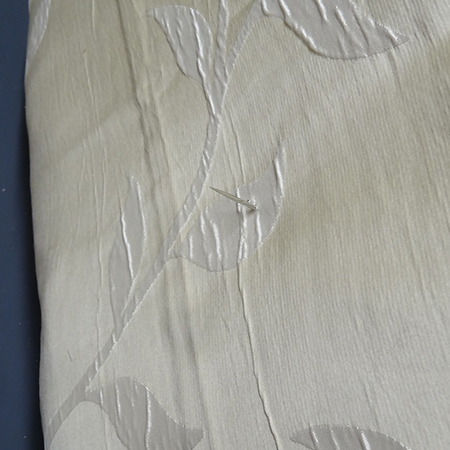
13. Move the needle to the next hole and repeat the process. With each hole press down on the fabric and pull the line as taut as it can go before securing at the back with staples. Continue to one edge and then return to the centre to do the next row.
GOOD TO KNOW
Keep the fabric loose at the front as you secure each hole, pressing the fabric into the depression made with the staples marking the positions.
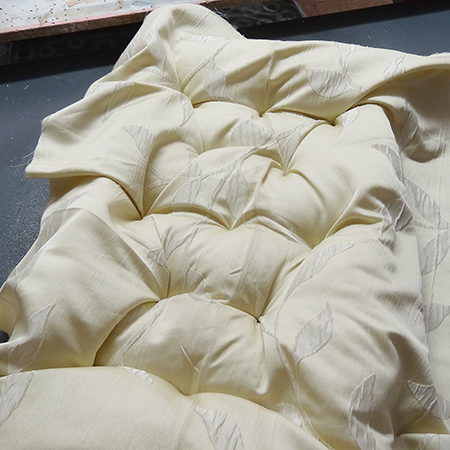
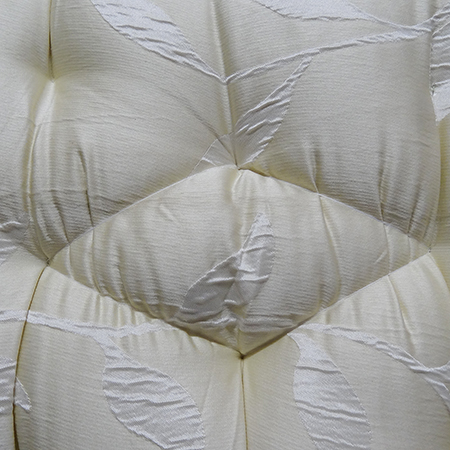
15. Once you have done the diagonals with indestructible thread, continue the horizontal or vertical rows with nylon line, again making sure the fabric is loose enough to leave dips and folds.
16. Once your tufting is complete, fold and staple the fabric to the back of the lid, pulling the fabric taut before securing with staples.
17. To cover the back of the top I use lining fabric cut to size and secure this with Alcolin spray adhesive. You need to spray both the back of the lid and the back of the fabric and leave for about 5 minutes. When pressed together these stick nicely in place without any visible fastenings.
Cover the box
18. I'm not adding any batting to the box because I want a neat, flat finish. To do this I apply spray adhesive to one side of the box, leave for 5 minutes and then place the fabric on top of this. Align the fabric to fit and press down from the centre outwards to remove any trapped air and smooth out wrinkles.
Repeat this process for all the sides. At the end of the fabric make sure you have a neat cut edge. Fold under a hem and secure with spray adhesive and then use spray adhesive to fasten this onto the box.
GOOD TO KNOW
When using spray adhesive be careful not to overspray onto other areas. Shake the can well and place close to the area where you want to spray.
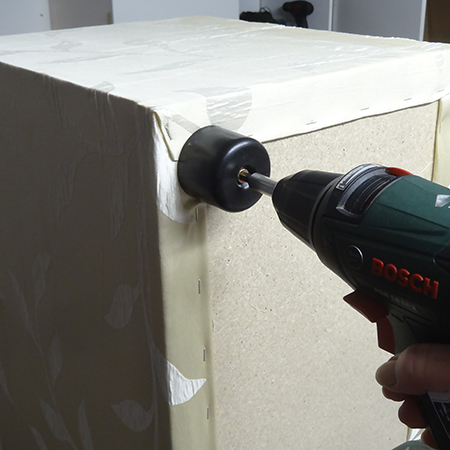
19. At the bottom of the box the fabric is turned over and stapled in place with a Bosch Tacker. The feet are added using screws that are long enough to go through the feet and into the base of the box. I used 6 x 50mm screws for the feet.
GOOD TO KNOW
Control the drill / driver so that you don't over-screw and end up stripping the hole. Only apply enough power so that the screw grips into the wood and then stop. If you do strip the hole, move the foot and try again!
20. I also used spray adhesive to secure the top edge. Spray the top edge and the back of the fabric and leave for 5 minutes before pressing the fabric firmly in place.
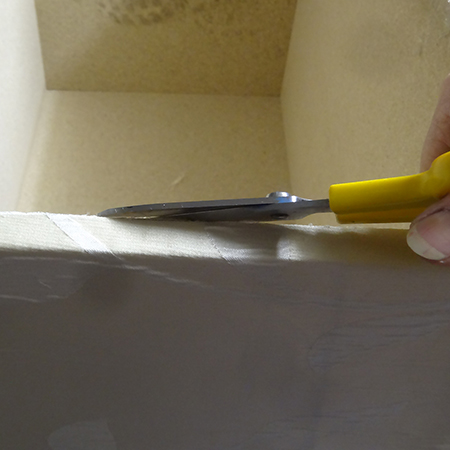
21. Cut the corners at a 45-degree angle to fit nicely together.

22. Cut away any excess fabric with sharp scissors.
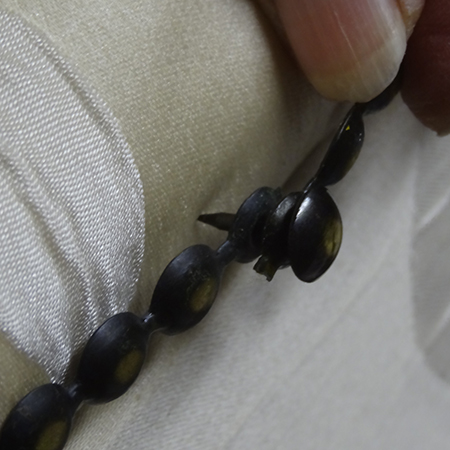
23. For added effect I fitted upholstery strips along the edge of the lid. These comes in one metre lengths with spare pins included for attaching the strip using a hammer.
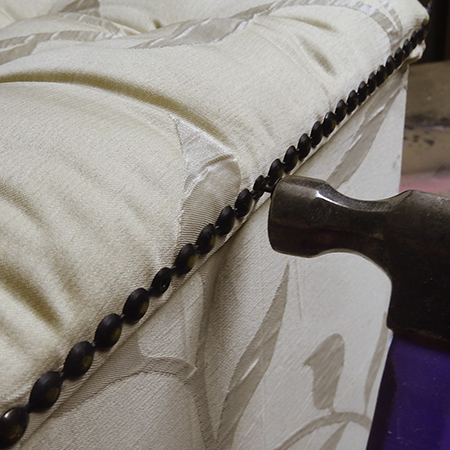
GOOD TO KNOW
If you need to join strips together, at the end of each strip is a hole for an upholstery pin. Place the one strip over the other and secure with an upholstery pin through both strips.
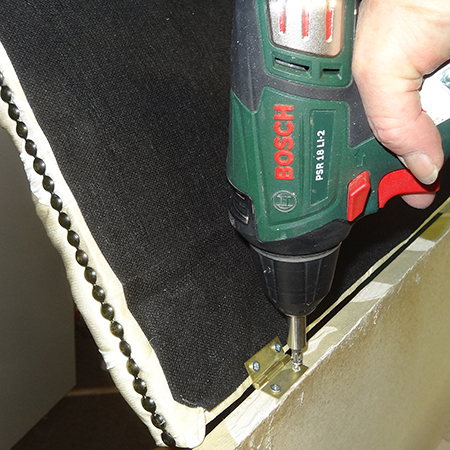
24. Finally, add the butt hinges. Measure in 100mm from both sides on the underside of the lid and secure the hinges using 16mm screws.
GOOD TO KNOW
Have someone hold the lid in place while you screw onto the back of the box. Make sure that the sides are lined up and the barrel (centre) of the hinge is over the edge of the lid and box frame.
That's how easy it is to make a cheat's diamond-tufted ottoman. Not the professional way to do it... but definitely the way to go if you don't know how to do diamond-tufting and want this effect for a small piece of decorative furniture.