
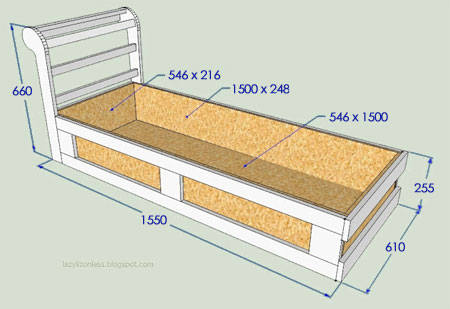
DIY chaise lounge
This chaise lounge is definitely a project that I will be making. I have previously tackled a chaise lounge, but this one has built-in storage that is absolutely perfect for in a bedroom.


Making your own chaise lounge is easy with these step-by-step instructions, and you can upholster your chaise lounge once you're done.
YOU WILL NEED:
A |
2 |
pine |
180 |
660 |
backrest sides | |
B/E |
16 |
pine |
50 |
570 |
backrest horizontal/box lower support | |
C |
4 |
pine |
64 |
1450 |
box long side support | |
D |
6 |
pine |
100 |
130 |
vertical long side support | |
2 |
pine |
76 |
610 |
horizontal short side support | ||
2 |
meranti |
38 |
1470 |
seat part long side | ||
4 |
meranti |
38 |
534 |
seat part short support | ||
2 |
12mm ply |
216 |
546 |
box short size cover | ||
2 |
12mm ply |
250 |
1500 |
box longer side cover | ||
1 |
12mm ply |
546 |
1510 |
box bottom cover | ||
1 |
18mm ply |
see below |
arm support - cut to shape | |||
5½ metres fabric
2 metres fabric ( for bottom and inside seat box cover)
5cm thick foam cut to 610 x 1830mm
Glue/spray glue
Staple wire
4 box furniture tacks
2 hinges
Pocket hole Jig and screws
Corner braces
Steel joining plates
S-spring or no sag spring or webbing
4 metres batting
4 legs or feet
HERE'S HOW:
NOTE: When joining sections together, always apply a small bead of wood glue to the edges.
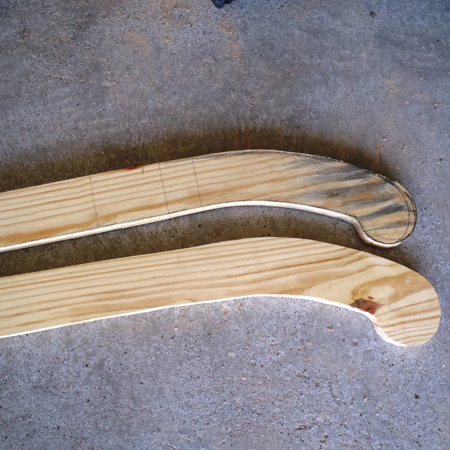
Make the curved backrest piece.
I freehand drew the curve side on a piece of [A] 180 x 660mm - but made sure to maintain the 76mm width except for the round part with radius of 50mm. Use a jigsaw to cut out one piece and then trace to make a pair - but make sure to cut this one inside the line.
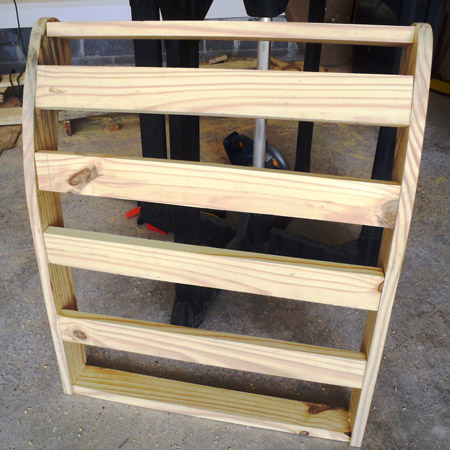
Assemble the back rest with the [A] cut sides [above] and [B] 50 x 570mm horizontal pieces. Drill pilot holes and countersink through the sides to mount the horizontals.
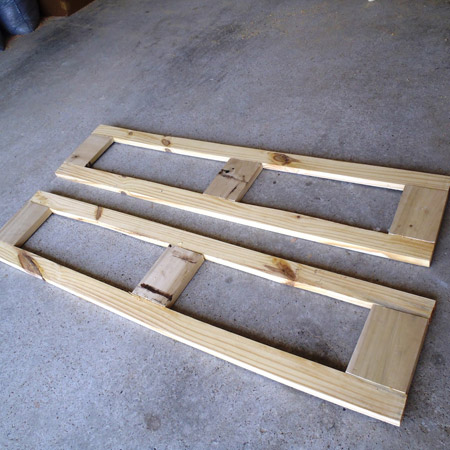
Start making the storage box frame by building the two longer sides. Use a pockethole jig to join the [C] and [D] sections together. If you don't have a pockethole jig you can use steel braces to join.
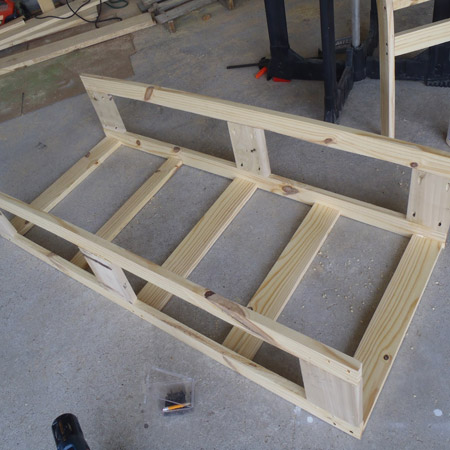
Attach the [E] bottom supports as shown left. To attach drill pilot holes and countersink before screwing through the base sides into the supports.

Attach on end to the frame as shown left.
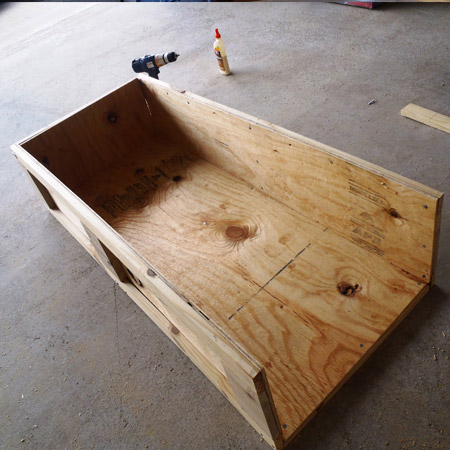
Cut and attach plywood pieces to assemble the box as shown left. Use corner brackets / braces to reinforce the corners.
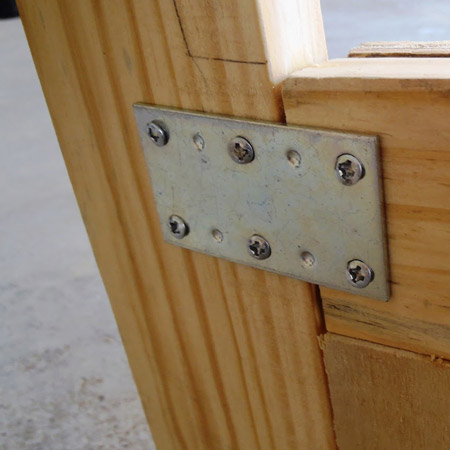
Use steel joining plates to attach the backrest frame on the box.
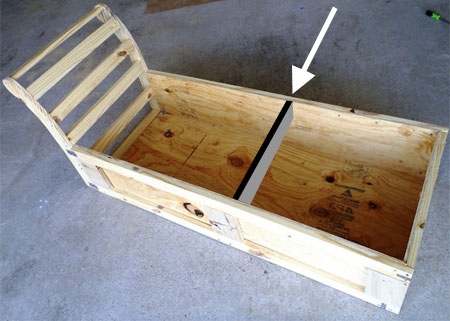
NOTE: Not shown above is the addition of a centre bar to add and much needed support.
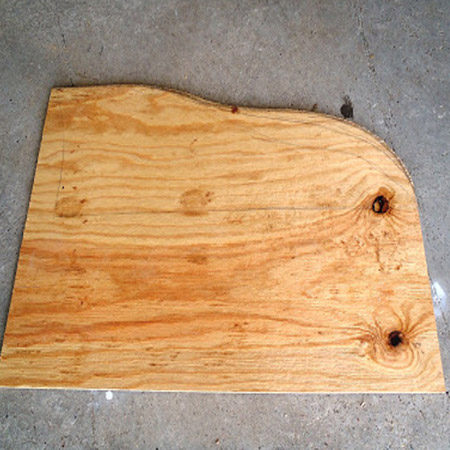
Cut out the armrest. You can cut this to any shape or length you prefer. For sturdier arm rest, wood glue two 19mm plywood sheets together. For now, drill two holes through the arm rest, and two matching holes through the side of the frame. You will mount to armrest to the frame after it has been upholstered.
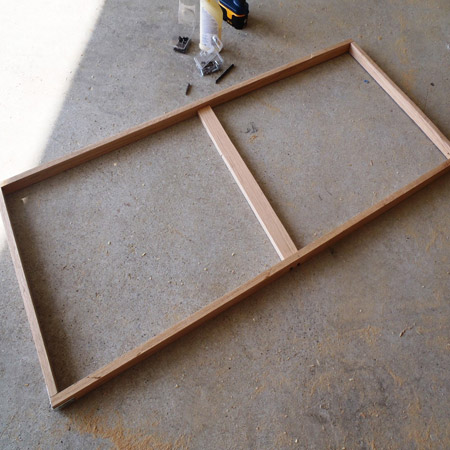
Start making the storage cover frame (seat part). It's probably best to use meranti for this, as it's stronger than pine and then you don't need to use a thicker and wider board. Use corner braces on the outside of the frame and glue to attach the corners.
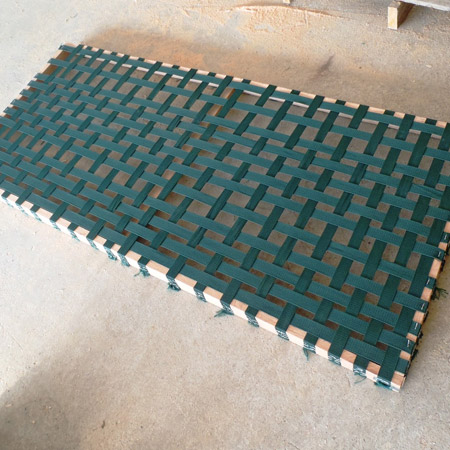
I used left over nylon webbing from a previous project. I recommend no sag S-spring or making a solid plywood base. If using plywood, use 10cm thick foam. Chaise is for me so I know using the left over nylon webbing is okay and can hold my weight. Measure and cut the foam to fit onto the frame and use some spray adhesive to hold in place.
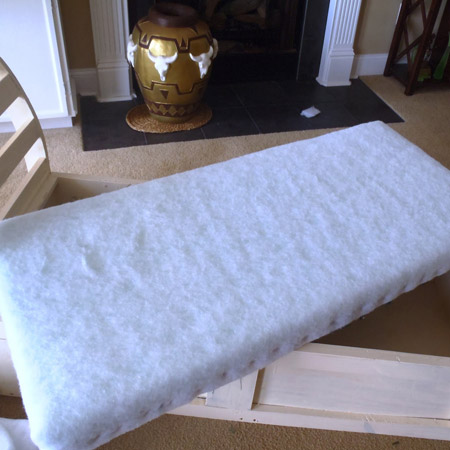
Add the batting using spray adhesive and then staple the sides to the frame.
The next step will be to upholster your completed chaise lounge.