
Make a storage caddy
Put your basic DIY skills to use and make this cute storage caddy as a recycling project. The plastic bottles take a fair amount of weight and can be used to store your monthly accounts, magazines or your kids' artwork

Every single person on the planet is striving to do his or her bit towards sustainability and reducing their carbon footprint. If there is one waste product we need to eliminate, it’s plastic. Manufactured in many different forms, plastic can be found littering our beautiful countryside and spoiling our pristine beaches.
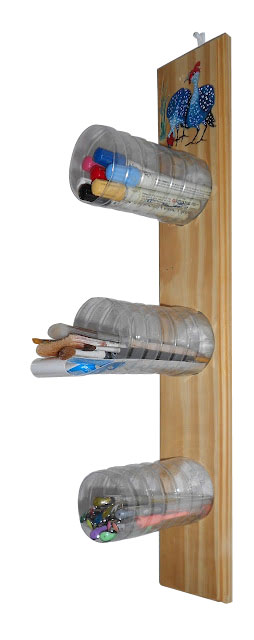
Let’s all do our bit and look for ways to recycle plastic containers, rather than tossing out. In this project we show you how to use clean plastic bottles to make a storage caddy. This handy caddy can be used in a kitchen for storing mail, in a home office, in a craft or hobby room, or even in a child’s bedroom for corralling stationery supplies.
YOU WILL NEED:
Piece of pine or board
Plastic bottles, preferably all the same size and shape
Epoxy glue
Picture hanger and small screw
Woodoc 5 matt sealer
Paintbrush
TOOLS
Craft knife
Tape measure and pencil
Drill
60mm diameter hole saw
MultiTool and sanding ring or 120- and 240-grit sandpaper
OPTIONAL: Dremel Trio and decorative routing bits
HERE'S HOW:
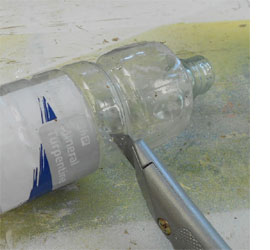
1. Clean and rinse your plastic bottles before cutting off the top with a sharp craft knife. You want a nice, clean edge and there are normally markings on the bottle that you can follow.

2. Place the cut edge of the bottle on the pine board and position centrally, so that you can draw around the bottles to show where to cut out the opening. There are no measurements for the length of the board, and you can add as many bottles as you wish.
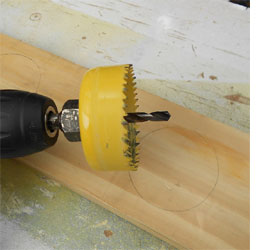
3. The bottles in this project measure 70mm in diameter, so we used a 60mm diameter hole saw to cut an opening.
GOOD TO KNOW
Only use a hole saw with a minimum 500W drill and securely clamp the board to a workbench or table. As the saw reaches the surface of the board, hold the drill firmly, and increase speed. To remove the cut block, take the hole saw attachment out of the drill and tap on your workbench.
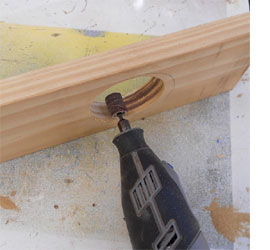
4. To enlarge the hole to fit the bottle we then used a multitool and sanding ring. Alternatively, use 120-grit sandpaper until the opening allows the base of the bottle to fit snugly.
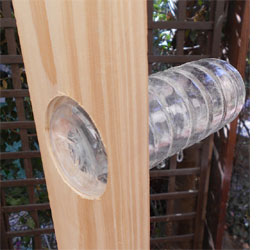
5. Apply a layer of epoxy glue around the base of the bottle and push this firmly into the opening.
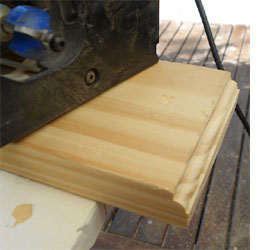
6. To add more decoration, we used a Dremel Trio and routing bit around the outside edge of our board. You can always use a sander or sandpaper to round off as a substitute. Sand the board with 240-grit sandpaper for a smooth finish.
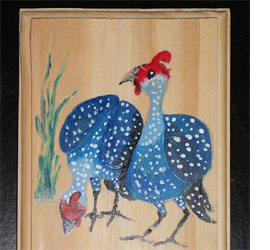
DECORATING YOUR STORAGE CADDY
If you want to add a bit of decoration, use a pencil to draw your design onto the board and fill in with craft paint. Finish off with three coats of Woodoc 5 for a matt finish, or Woodoc 10 for a satin or glossy finish.
7. Screw a picture hanger to the centre back of the board and mount your new storage caddy in a suitable spot.