Build a built-in closet
When my son decided he wanted a larger bedroom I said bye-bye to my home office just to keep peace in the home. Unfortunately the room didn’t have any built in cupboards and it wasn’t long before the mess started to pile up.
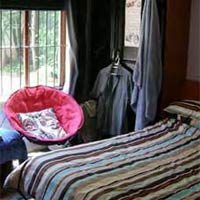
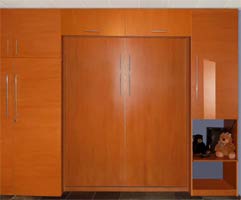
Time to add built-in cupboards, which were done in a weekend and cost far less that getting someone in to do it for me. Having received several quotes in the region of R6000 upwards, I realised that I could save a bundle by doing this project myself. There are several PG Bison board products that can be used for a project of this nature, and I settled on MelaWood, as I needed to match the Murphy Wall Bed that I had already installed in the room. (PIC TOP: The cupboards were built around the Murphy Wallbed that was previously installed).
Other board products that can be used are: BisonLam and SuperLam. All board products in the PG Bison range are available in a variety of colours and styles, as well as board sizes and thickness. A 16mm board thickness is recommended for a study, well built closet system that will last.
Getting started
The first step was to measure up the area and draw a plan.
Take measurements from wall to wall and floor to ceiling.
The plan is essential for working out board sizes for cutting,
what sides need to be edged by your local Timbercity and
what hardware you will need to complete the project.
The Assembly
With your plan in hand, having all your boards cut and edged,
and all your hardware, the assembly should be fairly easy.

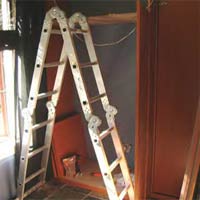
Tools that you will need for this step:
Cordless screwdriver or Drill/Driver
Impact/Hammer drill
4mm drill bit and countersink
Spirit level
Stepladder
Tape measure
Pencil
Have some scrap pieces of thin timber available to use as spacers for floor and walls that aren't plumb.
1. Start by fitting the two end uprights to the wall. Drill pilot holes into the boards at the top, middle and bottom, and countersink. Drill through the boards to mark the wall.
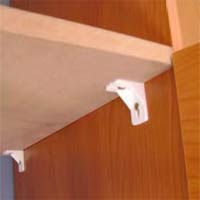
2. Refer to your diagram. Place all the uprights on a flat, level surface. Mark, drill pilot holes and countersink for mounting shelf brackets and screw the shelf brackets onto the uprights.
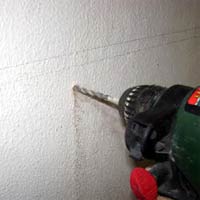
3. Use a hammer drill to drill into the wall for the wall plugs. Use wall plugs and screws to attach the two end uprights to the wall. You can use spacers to fill gaps for any walls that are not straight.
4. For this step you will need an extra pair of hands. Start at one end and position the next upright. Place a shelf at the top and screw onto the brackets. Do the same at the bottom. I left a 50mm gap at the bottom to fit a panel. Work along and continue to add uprights and shelves at the top and bottom. Once complete, you can mount the remainder of the shelves.
Fitting the doors
If you prefer to make your
own holes for hinges, you
will need a 32mm Forstner
Bit and a Router, or drill and
drill stand. Test fit the hinges
and mark with a pencil to
determine the position of the
hinge holes and screws. Drill pilot holes for screws. For perfect mounting the
rule of thumb measure
twice - cut once comes
to mind. If your holes are
just 2mm out, your doors
will not sit flush together.
Take the time to get your
measurements right.
Adjusting the hinges
Minor adjustments can
be made on the hinges
themselves. The screw
closest to the front of the
cabinet adjusts how far
out or in the doors are in
comparison to your cabinet
and to the other doors.
Loosen the screw and
manually push or pull the
door to adjust it. Re-tighten
the screw when the door is
in the position you want.
The screw farthest from the front of the cabinet
can be turned clockwise and counterclockwise
to move the door from side-to-side (right or left).