
How to use a Router
If you have the knowledge and know-how a router can be a very versatile tool. All you need are a few simple techniques and specialty bits and you can achieve perfect edge profiles, flawless dadoes and precision pattern cutting.
The main key to success when using a router it to ensure that you always use a sharp bit and run the router in a counter-clockwise direction around the top of the piece to be worked. By using the router in this way, the bit pushes the router toward you rather than pulling it away, so it’s easier to control. It's also not necessary to push the router, let it run at its own pace for a smooth cut.
They say that practice makes perfect and with a router it is always better to test your cuts on a scrap of wood to confirm proper cutting depth. If the wood burns when you start to cut then you need to adjust the cutting depth or cut in stages, by making a series of shallow passes, gradually extending the bit. A deep pass can bind, burn the wood or twist the tool in your hands.
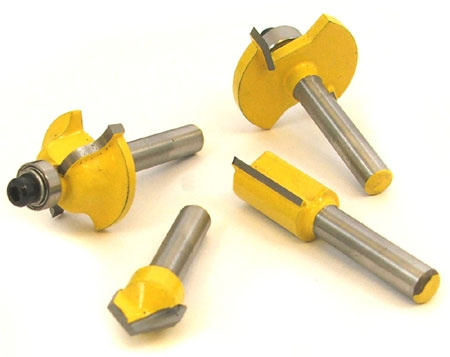
Installing bits
The first step is to install a router bit. To make your life easier, remove the router base when installing and removing bits. When installing a bit in the router, set it so 2/3 of the shank is inside the collet, then tighten the collet (nut). Make sure your router is unplugged before you insert bits, make height adjustments, or do any other setup type procedure. This is a good habit to get into with all your power tools.
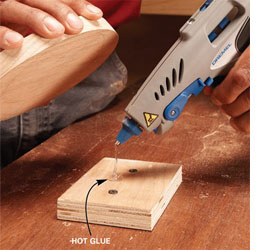
Secure your project
Any work needs to be secured to your bench or worktop. While clamps work, they also tend to get in the way. A rubber non-skid mat makes life a bit easier when working with smaller pieces. With your project on the mat you can work around all four edges without interference. Another great idea from Family Handyman is to secure small pieces with a hot glue gun while you rout them!
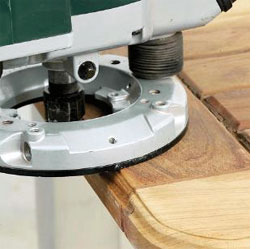
Move in the right direction
In order to safely use a router, you've got to move it in the right direction. When routing the outside edge of a board, you should go counter-clockwise. Going in the correct direction prevents the router from climb cutting and getting away from you. Router bits spin clockwise as you look down on the router, so moving the router counterclockwise tends to pull the pilot bearing tight against the wood allows easy control of the router. However, when you're routing the inside of something like a picture frame, move the router in a clockwise direction.
Where to start
When routing around all four edges it's important to make the cuts in the right sequence. Start on end grain. As the bit exits the end grain, it may slightly chip the adjacent edge. When you rout that edge you'll automatically clean up any chipping.
GOOD TO KNOW
- To prevent any mishaps, always clamp your project securely.
- Where repeat shapes are to be formed, use a template or jig whenever possible - freehand cutting requires patience, steady hands and practice.
- Before undertaking any project, familiarise yourself with your router. Read the owner's manual carefully and heed all safety precautions. And always wear goggles and a dust mask when operating your router.
- If you are planning a project that would incorporate the use of a router, I would suggest that you attend a DIY Divas workshop. We provide you with basic knowledge to operate the unit as well as techniques to achieve the best results from your Router.
GOOD TO KNOW
Routers rotate at extremely high speeds and the material being cut can get thrown during the routing process. Always wear appropriate eye protection.