
Tips on using a Bosch electric planer
Using an electric planer allows you to shave, trim and easily remove excess wood for edges. You can use an electric planer for cutting doors to size, levelling uneven floorboard or planks and removing saw roughness.
In this article we will introduce you to using an electric planer for the first time, as well as provide a few tips, tricks and techniques.
The first time I used my Bosch electric planer I had no idea what the tool could do. When you take it out of the box, take the time to read the instruction manual to acquaint yourself with the do's and don'ts of what this tool can do.
Reading the manual will also explain the unique blade system on this tool and how to change and replace the blade when required.
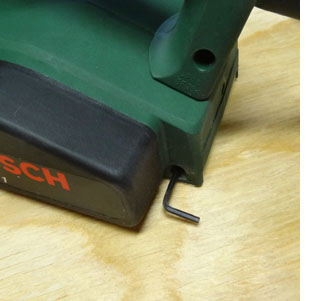
To change the blade on your planer you will need to use the allen key that is supplied with the planer. This is usually secured within the machine casing - as shown above.

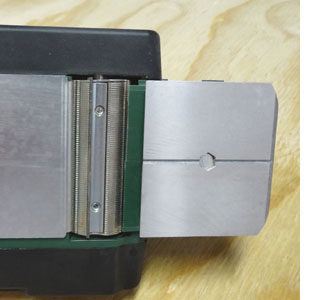
Use the allen key to loosen the blade plate located underneath the machine on the drum. The blade on a Bosch planer has two cutting edges, so you will simply remove the dull blade - turn it over - and re-insert before tightening up. While you can use any planer blade as a replacement, the Razor Wood blade by Bosch is recommended.
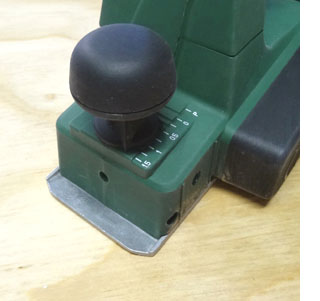
Before using the planer you will need to set the depth adjustment. This varies but on a green DIY model the settings are from 0 to 1.5mm cutting depths.
GOOD TO KNOW
If you need to level out an uneven edge, the depth adjustment can be turned to start at 0 along the length.
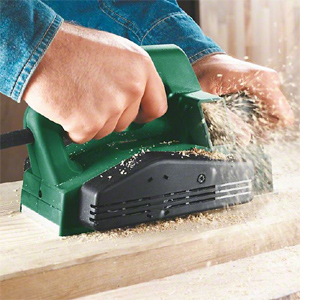
When using the planer, note that wood shavings are expelled out of the waste shoot on the right-hand side, so place yourself and your project to work on the left-hand side.
GOOD TO KNOW
To ensure you are protected from wood shavings - wear safety glasses.
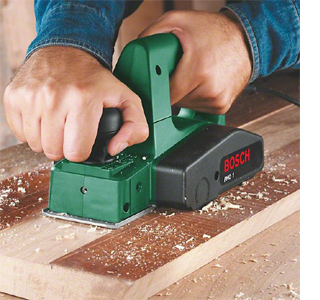
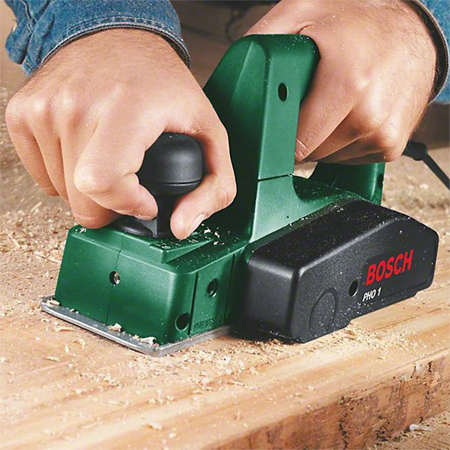
Unless you are levelling an uneven cut, always start the planer with the front of the machine at a straight level on the wood and the cutting blade away from the edge of the wood. Gently guide the planer onto the wood and across the surface. After a few practice runs you will soon get the hang of balancing pressure on the front knob. Don't push too hard, simply guide the planer along and let it cut at it's own pace to avoid blunting the cutting blade. Stop when the blade has passed the edge and hold the planer firmly to prevent dipping at the edge of the project. After cutting, rest the planer on its side until the blade stops spinning. With proper handing you can ensure that the blade lasts longer.
GOOD TO KNOW
For smaller projects securely clamp the piece before using a planer.
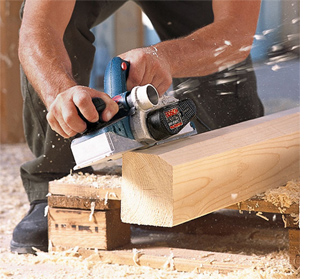
Use a planer to chamfer (cut corners at a 45-degree angle), adjusting the cutting depth as required. Continue making long, smooth passes until you reach the desired depth. To level uneven sections, mark the uneven areas with a pencil mark and use this as a guide to shave off small amounts at a time. Always clean the planer after use. Brush to clean off dust and wipe the base plate. Before the first use spray the cutting blade with WD-40 to repell moisture.