
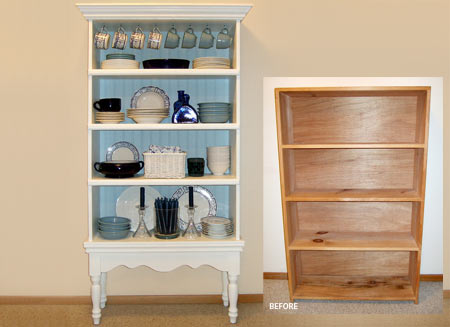
Transform a raw pine bookcase
This project shows you how to take a plain, raw pine bookcase and - using paint techniques and a bit of DIY savve - transform it into a piece of furniture you'll be proud to have on display in a home.
monicaewing.com
YOU WILL NEED:
Lotters Pine - raw, unfinished bookcase - or old bookcase
Plenty of scrap pine and other wood - you'll see why below
Old table with turned legs - or 4 turned legs
Crown moulding
Clamps
Ponal wood glue
Wood filler - white and pine
Jigsaw
Sander and 240-grit sanding pads and sheet of sandpaper
Hammer, wood nails and panel pins
Bosch Tacker or staple gun
Here's how:
1. If the cabinet has a back you will need to remove it at this stage. Most backings are simply stapled on and are easy to remove.
2. I decided that building a table for the bookshelf to sit on would work nicely - and add extra height to the bookcase. I was lucky enough to have an old table that I could use for the legs and some scrap melamine that was cut out with a jigsaw for the skirt - but you can use pine instead.
3. The skirt pieces were mounted between the legs and attached with angle brackets. The skirt pieces were glued and clamped to the tabletop, with a few nails hammered in from the top.
4. Wood glue was used to attach the bookcase to the table base.
5. To build up the top for the crown moulding, glue, clamp and nail pieces of pine.
6. Lining up the moldings and trim boards was a bit tricky as you need to cut the corners at an angle to fit together. Cut the centre piece first and then one side at a time. Make the side lengths longer than they should just in case you need to trim for the moulding to match up nicely. Glue and clamp together the crown moulding and attach to the top of the cabinet once dry. Use panel pins to attach the moulding to the bookcase. Fill in nail holes and any gaps with white - or pine - wood filler. Let dry and then sand smooth with 240-grit sanding paper.
7. Re-attach the backing board with panel pins or use a Bosch Tacker or staple gun. Before you put the backing board on, paint it or cover it with fabric or wallpaper for a decorative touch to your new cabinet.
8. Sand the entire piece using an orbital sander and 240-grit sanding pads. Wipe clean to remove all dust.
9. To finish off apply a coat of primer and two coats of white paint - Plascon Velgaglo is perfect. For the larger areas, I used a small paint roller, which made the job faster and eliminated brush strokes.
DIY Tip:
Don't be tempted to buy cheap paint rollers and brushes. You'll only end up tossing them and buying better ones. Splurge on the good stuff. Why? You'll get a smoother, more even finish, and the job will go much faster.
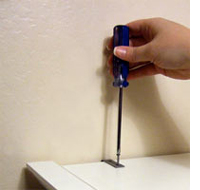
10. It's tall, skinny, and a bit top heavy, so it needed to be bolted to the wall. I screwed two L-brackets into the wall, then screwed the top of each bracket to the shelf unit. Use fischer wall plugs and screws - and use a Bosch PDO Detector to make sure there are no cables or pipes in wall before drilling.