
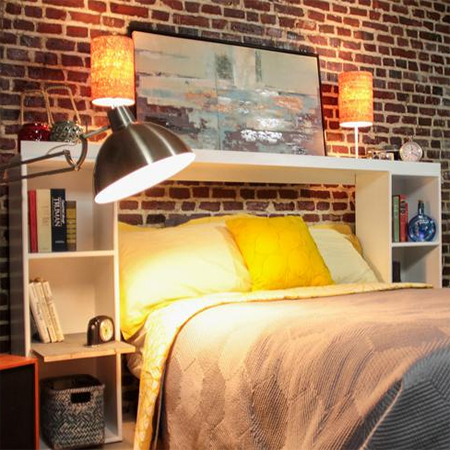
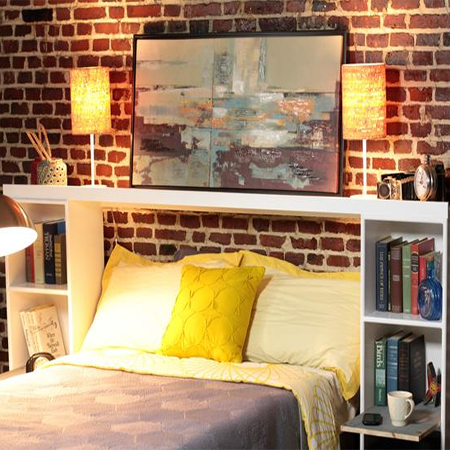
Make a simple storage headboard
Make a simple storage headboard using a couple of bookcases, or make your own storage shelves following our instructions below. This storage headboard adds easy storage above and at the sides of a bed, and we provide instructions to make the storage headboard for any size of bed.
diynetwork.com
YOU WILL NEED:
2 small bookcases plus materials for top shelf and backing boards or make your own:
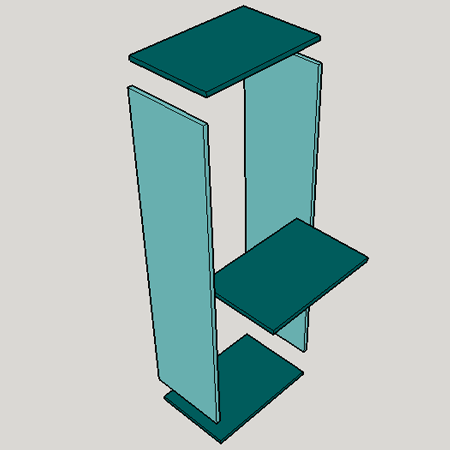
4 of 300 x 1200mm 16mm MDF - sides
6 of 300 x 450mm 16mm MDF - shelves
3 of 50mm 16mm MDF x length of top shelf - top shelf front panel / back support
2 of 472 x 1190mm 3mm masonite backing boards
- 1 of 284 x 1432mm 16mm MDF - top shelf SINGLE
- 1 of 284 x 1100mm 16mm MDF - top shelf THREE-QUARTER
- 1 of 284 x 1400mm 16mm MDF - top shelf DOUBLE
- 1 of 284 x 1550mm 16mm MDF - top shelf QUEEN
- 1 of 284 x 1860mm 16mm MDF - top shelf KING
4 x 45mm cut screws
Wood filler
Pattex No More Nalis adhesive
Plascon water-based Velvaglo
Paintbrush and foam roller
TOOLS:
Drill / Driver plus assorted bits
Countersink bit
Sander plus 180- and 240-grit sanding pads
Staple gun or hammer and panel pins
Have all your boards cut to size at your local Builders Warehouse.
HERE'S HOW:
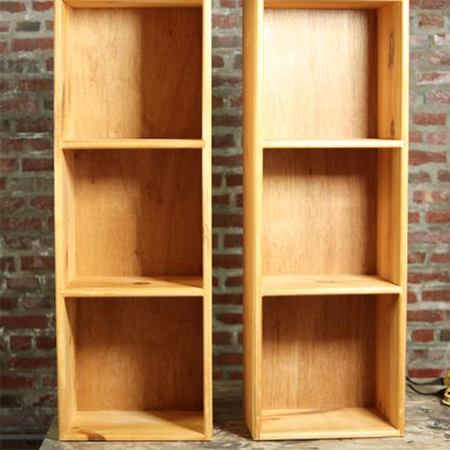
1. If you already have a couple of bookcases that you are not using you can easily incorporate these as part of the design for your storage headboard. If you don't... Make your own storage shelves
2. Prep ready-make bookcases for painting by sanding with 180-grit sandpaper to de-gloss a varnished finish. For your made storage shelves, sand the edges with 240-grit sandpaper until super smooth.
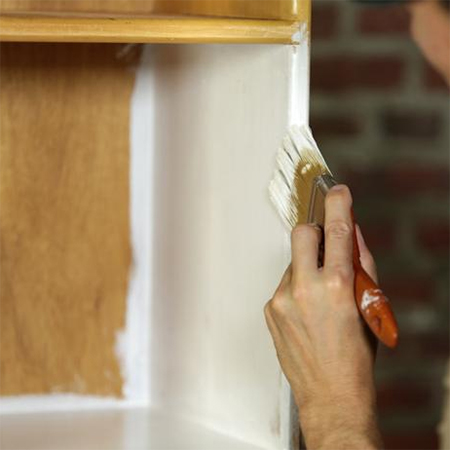
3. Paint the bookcases or storage shelves with Plascon water-based Velvaglo enamel in your choice of colour. Use a combination of paintbrush and foam roller for a smooth finish.
4. Paint the top shelf, front apron and back supports before assembly.
5. Glue the front apron to the edge of the top shelf. Leave for about an hour.
6. Apply Pattex No More Nails adhesive to the top of each bookcase and then place for fitting the top shelf onto both shelf units. Drive in a couple of screws at the ends

7. Attach the backing boards using a staple gun or hammer and panels pins an then attach the back supports using screws.
GOOD TO KNOW
You can mount the bottom back support higher up to allow for
skirtings.