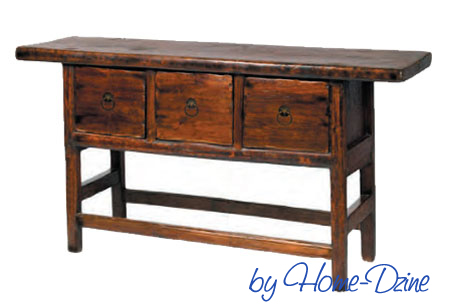
DIY Bali server or console table
For those of you who haven't yet subscribed to Easy DIY magazine, or perhaps your local Builders Warehouse is always sold out of copies, here is the Bali Server that we made earlier this year.
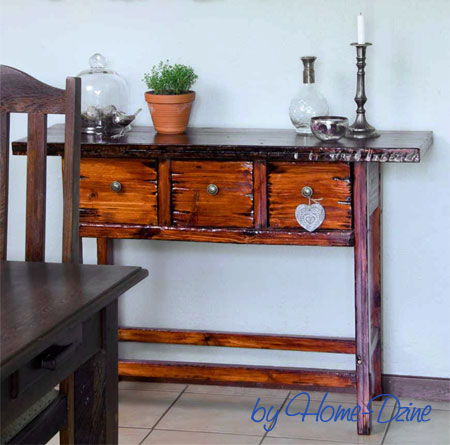
We make a lot of furniture as part of our DIY Divas workshops and I often come across ideas that I would love to have in my home, but the price tag that comes with these finds is normally so exorbitant that it makes me so glad I can do-it-myself!
We’ve used pine for this project, which
would normally be made of some or
other exotic wood species. However, it’s
a more eco-friendly option as pine is a
faster growing, more prolific wood than
most other. It’s also a lot more cost effective
and very versatile.
YOU WILL NEED:
4 Pine boards 380 x 1800mm*
Assorted wood screws
Wood glue
60-, 120- and 220-grit sanding
pads
3 Antique brass handles
Woodoc 5 or 10 interior sealer
Woodoc Gel Stain - Imbuia and
Ebony
Steel wool
Paintbrush
Clean cloths
3 antique brass handles
TOOLS:
Tape measure and pencil
Jigsaw + clean cut blade
Drill/Driver + assorted drill and
screw bits
Orbital sander
Hammer
Large chains
Angle grinder (optional)
MultiTool and sanding rings
Dremel VersaTip or VersaFlame
CUTTING LIST:
A. 2 of 380 x 120mm pine - top
B. 4 of 44 x 44 x 800mm pine -
legs
C. 2 of 20 x 250mm - side cross
beams
D. 2 of 20 x 830mm - front/back
cross beams
E. 1 of 330 x 830mm - drawer
support shelf
2 of 250 x 250mm – side panels
2 of 44 x 44 x 200mm - upright
supports
6 of 10 x 10 x 300mm -
drawer guides
DRAWERS:
3 of 200 x 250mm - drawer fronts
6 of 150 x 300mm - drawer sides*
3 of 150 x 200mm - drawer back*
3 of 200 x 284mm - drawer
bottom*
* I used 16mm SupaWood that was lying around but you can substitute with pine.
HERE'S HOW:
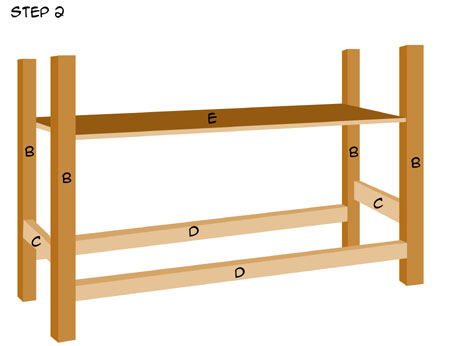
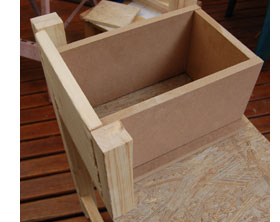
1. BUILD THE FRAME
Use the diagram below to assemble the various sections of the frame. All sections are glued and
screwed from the outside. Pine is fairly soft, so drive the screws so that all screw heads are
below the surface of the wood.

2. FINISH THE FRAME
Insert the shelf support [E] and attach by driving screws through the outside of the legs.
Again, drive the screws below the surface of the wood.
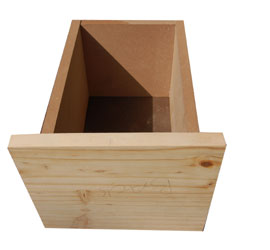
3. MAKE THE DRAWERS
Place the drawer sides, back and front
around the drawer bottom. Glue these in
place and clamp until the glue has set.
4. FIT THE DRAWERS
A thin strip of SupaWood, glued to the
top of the bottom drawer shelf on either
side of the drawer, ensures that the
drawers slide in and out easily. Fill the gap
between the drawers with the upright spacers and glue this to the top of the drawer support shelf.
5. GLUE AND FIT SIDE PANELS AND TOP
Apply glue to the edges of the side panels and place these between the front and back legs before attaching the top. The
top consists of 2 boards [A] that are glued
together and clamped until the glue has
set. To ensure a seamless finish on the
top, apply a small amount of wood filler
mixed with wood glue to fill the gap
between the two. Once set, fit the top
in place by gluing and screwing through
the top into the legs and upright spacers,
making sure that screw heads are below
the surface of the wood.
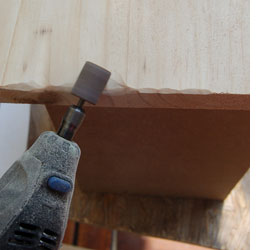
6. AGEING THE WOOD
You want to achieve a rough, worn look
around all the edges. Start off by removing
the sharp corner edges and then move the
Dremel MultiTool backwards and forwards
until you are happy with the desired
effect. Finish off the edges by sanding with
220-grit sandpaper until slightly smooth.
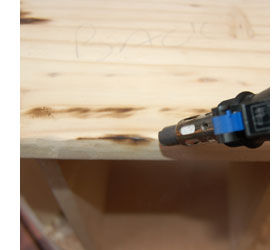
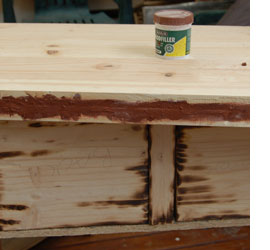
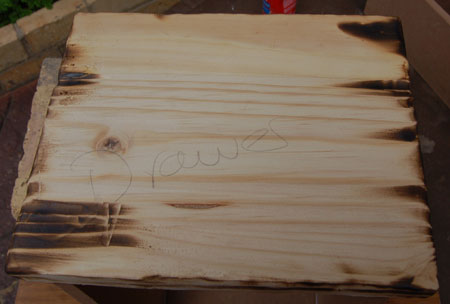
7. BURNING THE WOOD
To give the console an aged effect I first used my Dremel VersaTip soldering iron - with the soldering tip removed - to burn the edges. It looks awful at first, but once the stain and sealer are applied it looks authentic.

8. FINISHING OFF
Use a clean cloth to apply Imbuia
gel stain across all surfaces,
adding a small amount of Ebony to a
second cloth to apply small amount here
and there. Blend the two stains together for
an even finish. Apply 3 coats of Woodoc 5
or 10 Interior sealer, sanding with steel wool
after the first coat.
If you prefer a natural finish for your Bali console Table, miss out the wood burning and staining. Roughen the edges with the Dremel MultiTool and sanding ring, sand smooth with 220-grit sandpaper and then apply Woodoc 5 Matt or Antique Wax to the surface.