
Liming indoor and outdoor wood
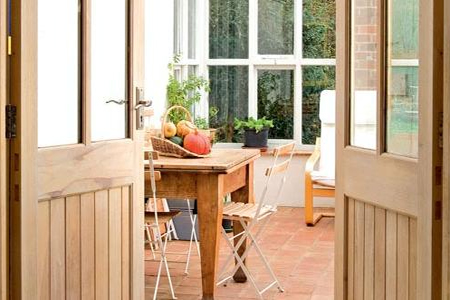
Wooden doors, floors and furniture can be transformed by the simple chalky tones of liming wax. Liming has long been used as a traditional finish on exposed timbers, floorboards and furniture. Applied to exteriors it offers some protection against the weather and is believed to discourage attack from wood-boring insects.
This age-old technique has a pleasing look when used on open-grained wood such as oak and oregon pine; it's not so effective with pine. Interesting effects can be created on soft woods that may be colour-washed or stained before to achieve more of a contrast. Or, you could mix pigment into the lime wax for even more distinctive effects – the permutations are endless.
Natural wood floors finished with liming wax are lighter in colour and easier to maintan than floors left unfinished.
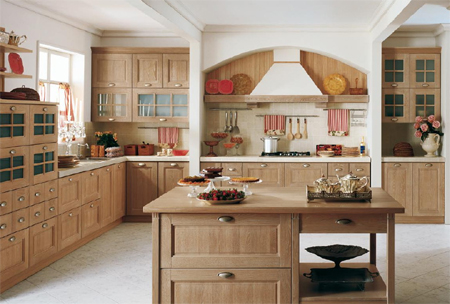
Limed oak cabinets in a kitchen are an alternative to stains, sealer, varnish and paint. Liming allows you to lighten or update kitchen cabinets without drastic measures.
YOU WILL NEED:
Wood filler and filling knife
Bronze brush
Liming wax
Fine paste wax
Finishing oil
Rags for rubbing and polishing
Work gloves
HERE'S HOW:
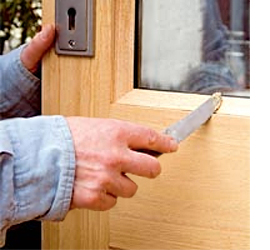
To start liming, wood must be clean, dry and grease-free, and existing finishes completely removed.
Waxed wood can be scrubbed with a solution of hot water and strong detergent, rinsed with hot water and when dry, wiped over with a rag dampened with white spirit.
If a chemical stripper has been used to remove old paint, ensure that it has been neutralised before you start (follow product guidelines). Sometimes after stripping an item the wood revealed may be disappointing – it could be damaged or of an inferior quality. This is an ideal opportunity to apply a limed finish, which will enhance the overall appearance while still highlighting the beauty of the grain.
Step 1
If there are any nail heads showing in the wood, knock them just below the surface and push the wood filler firmly into the holes leaving it slightly proud of the surface. Allow to dry, then smooth flush with glasspaper. To avoid unsightly scratches always sand with the grain. Fill any gaps that may detract from the finished look.
Step 2
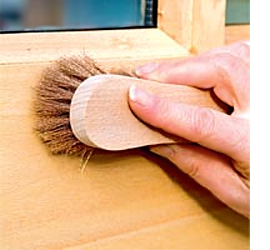
To help raise the grain, new wood can be wiped with a damp cloth and allowed to dry. Take a bronze brush and rub vigorously following the direction of the grain. Some woods have a chemical reaction with steel so avoid using a steel brush. Fragments left can blacken the wood and disfigure the finish.
Step 3
These doors were made to measure so we used some timber offcuts as test pieces to try out different finishes. You may decide to dye or stain the wood before applying the lime wax, or to add pigment to the liming wax. If you haven’t got any offcuts, test on an area that doesn’t show in the first instance.
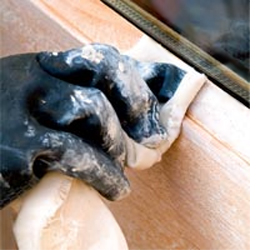
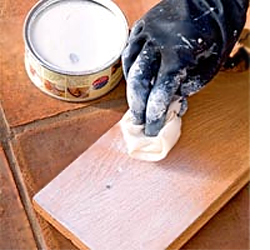
Step 4
Vacuum the wood, adjacent areas and floor to get rid of any sawdust. Wipe over with a lint-free cloth to remove surface dust. Apply liming wax – I used Liberon Liming Wax – with a rag, working into the grain of the wood. This is best done with a circular motion or following the grain, depending on the type of wood.
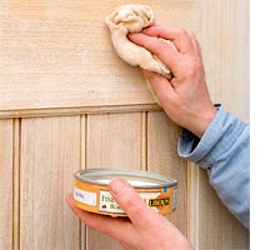
Step 5
Take a cloth and rub hard to remove most of the excess wax on the surface. Keep changing the face of the rag as it becomes clogged. To make the job less strenuous I used various scouring pads along with towelling rags. To remove the white haze that remains, apply a fine paste wax, such as Liberon Black Bison Paste Wax, with a clean cotton lint-free cloth. The wax should also help to protect the limed finish and provide good resistance to finger marks and everyday wear and tear.
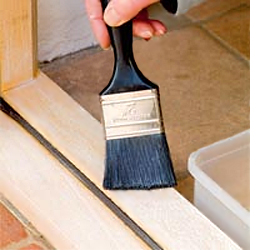
Step 6
For a more durable, water-resistant finish, apply finishing oil to provide a protective coating. I used Liberon Finishing Oil on the threshold and applied liberally by brush.
Leave to soak in for 20 minutes, then wipe away any surplus oil – if left to congeal on the surface it will stay sticky and attract dirt and dust. Wait for at least five hours for the wax and finishing oil to dry. Take another piece of cotton rag and buff the doors to a soft sheen.
A furniture brush is best for this if you are treating a large area. For ongoing care, wipe with a damp cloth to keep the wood fresh, and occasional waxing and buffing will restore the shine.
periodliving.co.uk