Did you Know that You Can use Dowels for Furniture Projects?
Dowels are reasonably priced and easy to work with so why not use them for making furniture for your home, or grab your tools to make one of these dowel furniture projects?
06/12/2023

Below, you will find two examples of furniture that you can make using pine or meranti dowels that you will find at any Builders store around the country. Not only that but it is easy to use dowels for projects as these can be cut to size using a mitre box and backsaw rather than power tools. That means that you can have most of the timber or board cut to size at Builders and only have to worry about cutting dowels to fit your projects. Take a look at two items you can make using dowels.
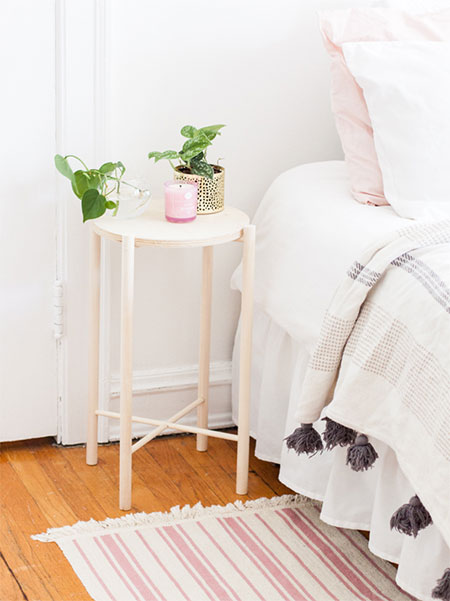
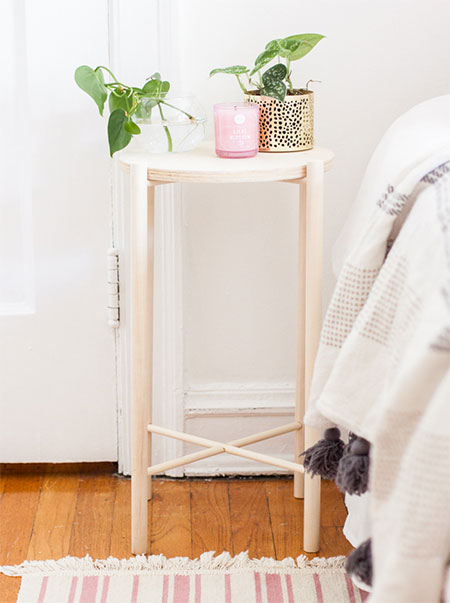
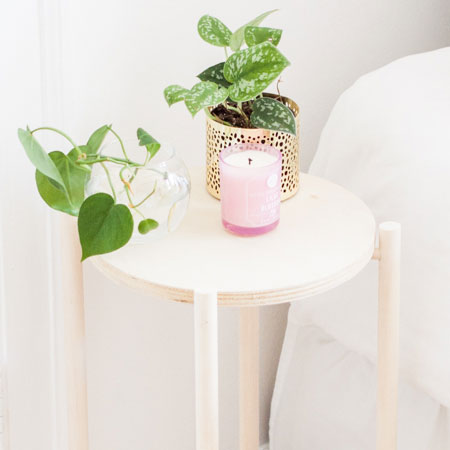
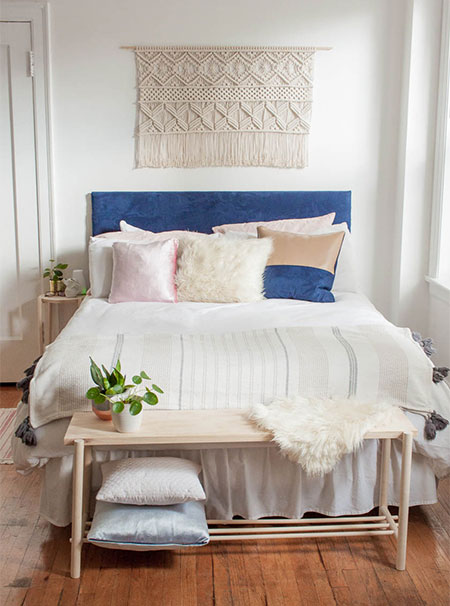
Dowel Bedside Table
whydontyoumakeme.com
While 12mm and 25mm dowels have been used for this bedside table, you can modify this based on what you can find in stock at your local Builders store or timber merchant. However, keep in mind that you will need to allow for 6mm dowel pins to assemble the table.
whydontyoumakeme.com
If you prefer to keep the bedside table as natural looking as this one, apply 2 to 3 coats of ModPodge, clear acrylic sealer or Rust-Oleum matt sealer to ensure it is protected and easy to clean.
whydontyoumakeme.com
YOU WILL NEED:
2 of 25mm diameter dowels - 1200mm length - legs
2 of 12mm diameter dowels - 1200mm length - cross pieces
Piece of plywood or pine for the tabletop and optional shelf
8 of 6mm dowel pins
Wood glue
Sandpaper 180-grit
Drill plus assorted bits
Spade bit 12mm
Mitre box and backsaw
Wood chisel
Jigsaw
Tape measure and pencil
Clamps
HERE'S HOW:
Preparation
Cut the [2] 25mm dowels in half to 600mm and the [2] 12mm dowels to a length of 324mm. You now have 4 of each. Sand the cut ends smooth.
Step 1
On the [4] 25mm dowels, determine where you want the top of the table to be placed. The one shown here is 16mm-thich plywood and the holes drilled are 20mm down from the top. Repeat this for where you want the shelf to be mounted.
Step 2
To drill the holes, clamp the dowels firmly to your workbench or work surface and use the 12mm spade bit to drill holes to a depth of 5mm. Change to a 6mm drill bit to drill the hole deeper - to a depth of 10mm.
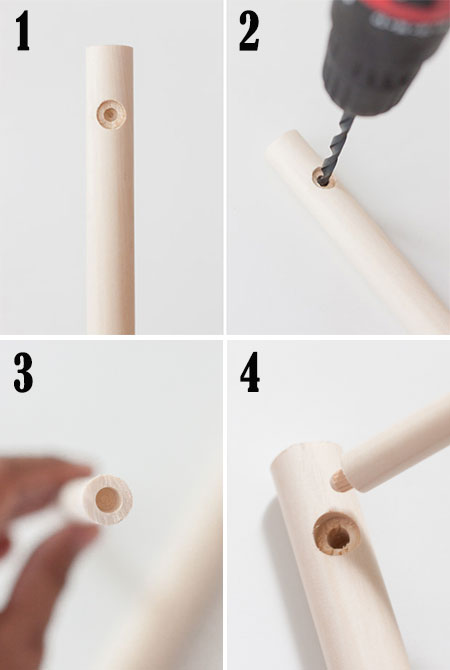
Step 3
On the ends of the [4] 12mm dowels, clamp securely to drill 6mm holes in the centre to allow for the dowel length less 10mm.
Step 4
Place wood glue inside these holes and push in the 6mm dowel pins. Tap on your workbench to ensure the dowel pins are firmly in place and put aside for an hour to give the glue time to harden.
GOOD TO KNOW
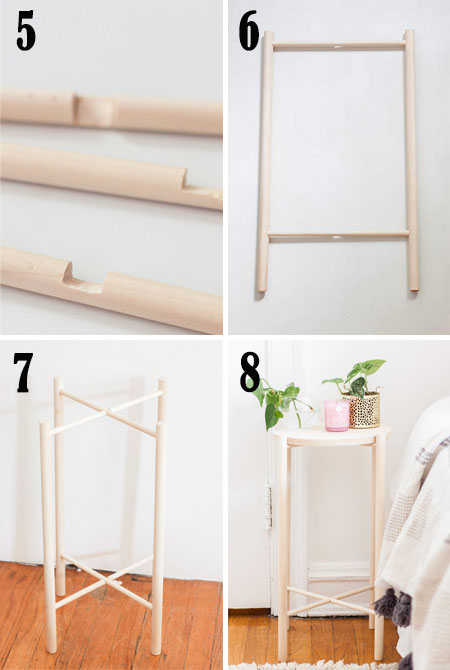
Before you assemble the table, use a mitre box, backsaw and wood chisel to cut 12mm notches in the centre of all [4] 12mm dowels. This creates a half-lap joint and allows the 12mm dowels to fit together at the centre once the frame is assembled.
Step 5
Use a mitre box, backsaw and wood chisel to cut 12mm notches in the centre of all [4] 12mm dowels. This creates a half-lap joint and allows the 12mm dowels to fit together at the centre once the frame is assembled.
Step 6
Apply wood glue to the drilled holes in the 25mm dowels [see step 4] to assemble one side of the frame as shown in the image below.
Step 7
Repeat step 6 but fit this side onto the other side before gluing all the pieces together.
Step 8
Using a jigsaw, cut the circle for the top. If you want, you can also cut an additional circle to add a lower shelf.
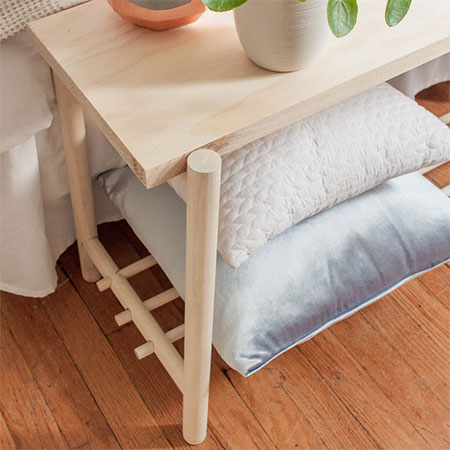
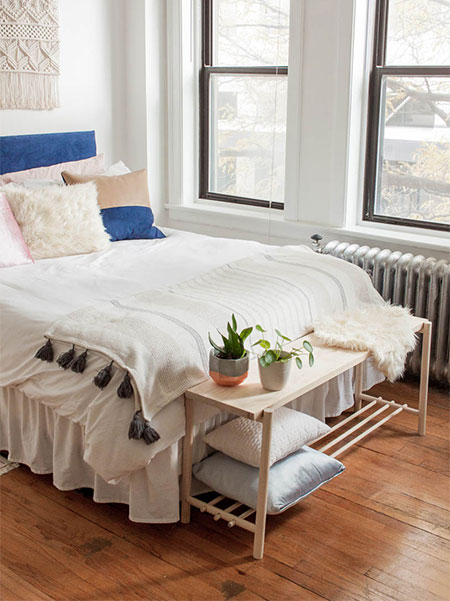
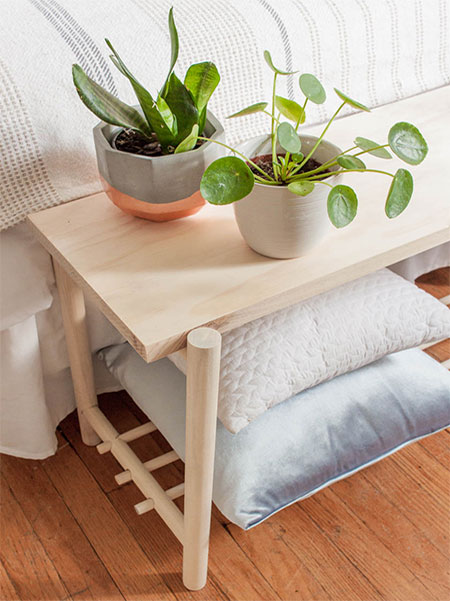
Dowel Seating Bench
whydontyoumakeme.com
Having a bench at the end of the bed is like a finishing touch for the bedroom and this bench might not be a place to sit but it is perfect as an extra touch in the bedroom. This bench, like the bedside table above, is made using dowels and topped off with a solid piece of wood or plywood and, just like the previous project, it is an easy one to make that will not require any special tools.
whydontyoumakeme.com
Finish off the bench as you will but there is no denying that it looks perfect when left unfinished and just given a couple of coats of matt sealer for that natural look.
whydontyoumakeme.com
YOU WILL NEED:
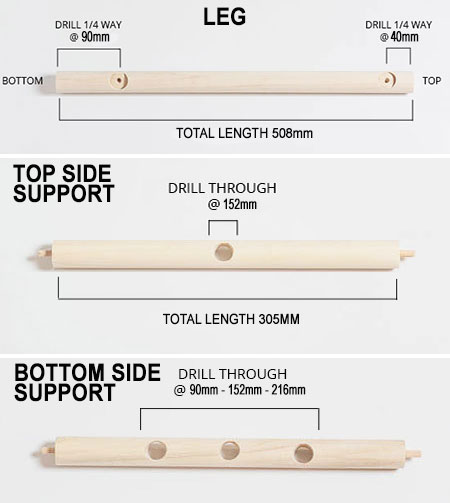
4 of 38mm diameter dowels - 508mm length - legs
4 of 25mm diameter dowels - 305mm length - side supports
4 of 12mm diameter dowels - 1220mm length - horizontal struts
Piece of plywood or pine for the top
8 of 6mm dowel pins
Wood glue
Sandpaper 180-grit
Drill plus assorted bits
Spade bit 12mm and 25mm spade bit
Mitre box and backsaw
Jigsaw
Tape measure and pencil
Clamps
Rubber mallet
HERE'S HOW:
Preparation
Cut and drill holes in all the dowels as per the diagrams below. Sand smooth before assembly.
Step 1
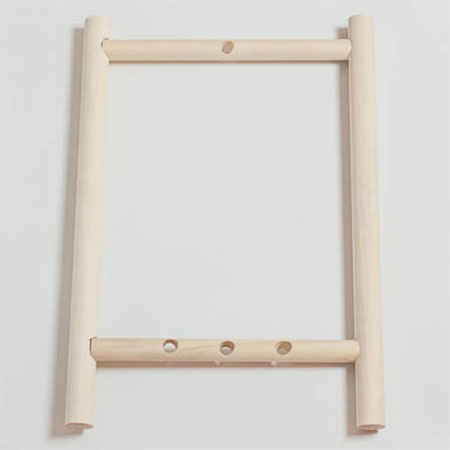
Use dowel pins and wood glue to assemble the top and bottom side supports to the legs, as shown below. Repeat this for the other side.
Step 2
Insert the upper and lower horizontal struts as indicated below. Have a rubber mallet on hand if you need to tap the dowels into position. No wood glue is used for this step of assembly.

Step 3
Cut and sand the top to fit onto the frame to finish off the bench. Apply your choice of finish.