
Tiling Tips to Achieve a Professional Finish for all your Tiling Projects
When you are tackling a tiling project for the first time, keep these tiling tips in mind if you want to achieve a professional finish.
18/04/2023
Do -it-yourself tiling has become increasingly popular as homeowners look for ways to save money in and around the home. Purchasing the materials you need for a tiling project - and that alone can cost plenty - but add in the amount to cover labour and the cost is almost doubled. The problem is that tackling your first tiling project can be daunting but knowing in advance the rights and wrongs of any tiling project will ease your doubts and have you jumping in to tackle any tiling projects in the home. Use these helpful tips to ensure that you achieve a professional finish - even if it is the first time! And don't forget that we have plenty more tiling advice and tips in our Home Improvement section.
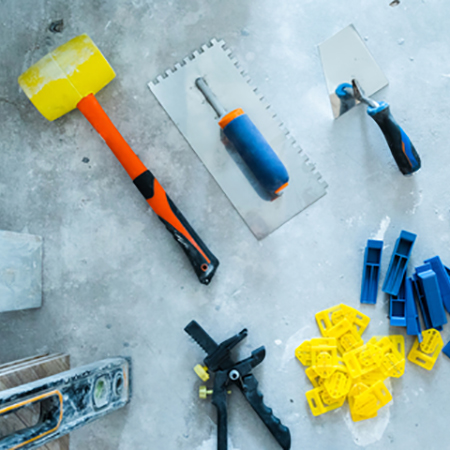
1. Everything on hand
Once you get stuck into a tiling project the last thing you want to happen is to have to stop because you need something. Make a checklist of everything that you will need: tools, materials, and consumables. This should cover all the tools you need to install tiles, enough tiles to cover the wall or floor - and extra for breakages and future damage, and tile adhesive, grout, grout sealer and any other products you need to include.
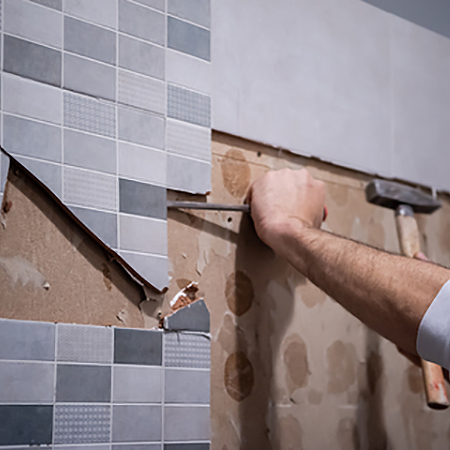
2. Start with a clean slate
If you are going to be tiling on a new wall or surface, you can skip this step unless there are areas of the wall that need attention. On a previously tiled wall, make sure to remove all traces of old adhesive that may have been left behind after removing the tiles, as this will affect how the new tiles will sit on the surface. Chip away any bumps and fill any dents before you start tiling.
3. Mix as you need
Both tile adhesive and tile grout need to be mixed with water in advance, but it is far better to only mix enough to work on a small area and repeat this process as you complete the project. Adhesive and tile are cementitious (containing cement) as the base and once mixed the process of hardening will start. The longer you leave the mix - the harder it will become. Working with only the required amount will ensure that the mix is still wet enough to work with.
4. Understand the techniques
Tiling is just the same as any other DIY or home improvement task, you must have a basic understanding of what is involved. The Internet makes it much easier to gain knowledge and you can simply go online to research the various methods to complete a DIY or home improvement project. For example, tiling is more than just applying adhesive and slapping on the tiles - there are tried and trusted tricks that you can employ for a better finished and more professional project:
Buttering refers to covering the back of a tile to leave no air gaps that can cause breakage when the tiles are bumped or stood on.
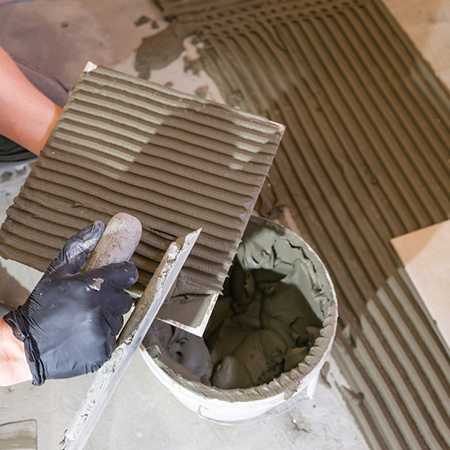
Buttering tiles
We are lucky that we can employ casual labour for many of our work-intensive projects but beware that many of these do not have the skills they claim to have. One such failure is the process of applying tiles to the wall. Professionals advise that 'buttering' the back of a tile is preferred to simply slap on a few blobs in the corners. Why? Because buttering covers the entire back of the tile and leaves no air gaps or gaps which can cause breakage when the tiles are bumped or stood on.
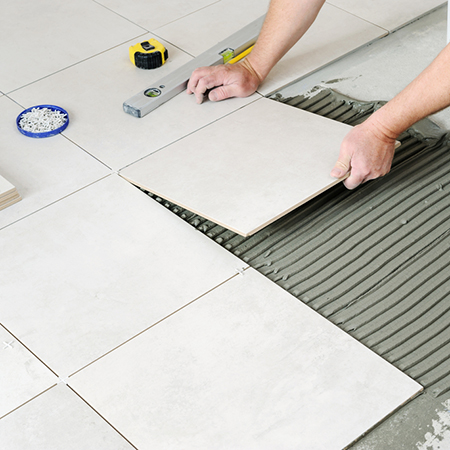
Laying tiles
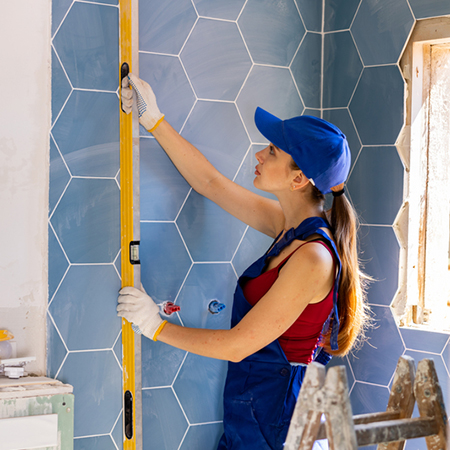
When placing tiles onto the tile adhesive, tilting and pressing down on one end of the tile forces the adhesive to move and create bumps and ridges which makes it harder to achieve a level tile. Rather gently position the tile and tilt without pressure to keep the adhesive flat and gently tap the top of the tile with a rubber mallet, checking with a spirit level against bordering tiles as you work.
Roll on mosaics
This one I have been guilty of in previous tiling projects when using mosaic tiles. It is far easier to place the mosaics onto the wall and then go over the area with a low-nap paint roller - an easy way to ensure the mosaics are level and bedded into the adhesive.
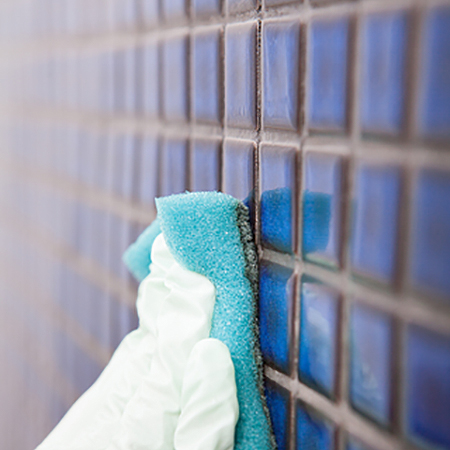
Using a sealer after tiling protects the grout lines around the tiles and makes it easier to keep these areas clean.
Use recommended additives
There is a wide selection of additives that can be incorporated with tile adhesive or grout and these additives provide additional benefits such as waterproofing, easy clean sealer, better adhesion, and so on. If you are tiling a wet room or shower, for example, using a waterproofing additive will prevent damp or mould problems later on. If you are not sure, pop into your local Builders store or go onto their website to see what is available. This is of particular importance if you need to tile over existing tiles or tile on a substrate other than walls or floors.
Sensible and practical tips
Experts love to share information and any tips you garner from the web can be useful in your own tiling projects :
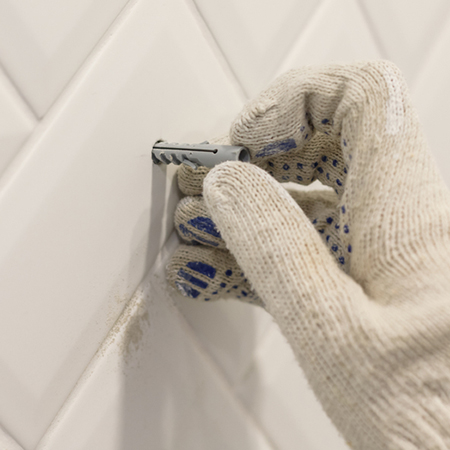
Installing bathroom accessories
Now that you have finished the tiling it is time to mount the accessories on the wall and drill into the tile. While it is a good idea to drill into grout lines rather than tile, sometimes that isn't possible. DO use masking or painter's tape to 'X' the spot where you need to drill to prevent the drill bit from slipping or scratching the tile surface.
Another handy tip to prevent damage to tiles when using wall plugs is to drill the hole 5mm deeper than the length of the wall plug. This is recommended for two reasons: 1) It ensures that the wall plug fully pops open to support the screw and accessory and,2) The wall plug can be pushed into the wall and away from the tile itself to prevent the tile from cracking when tightening the screw.
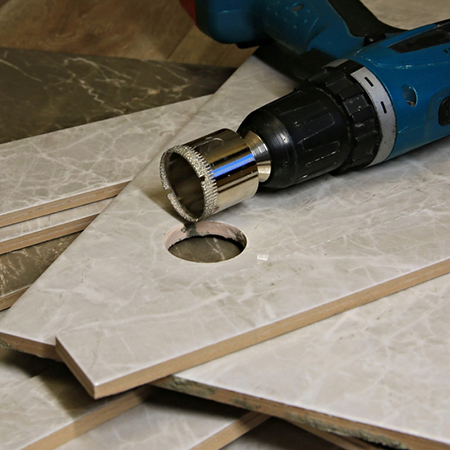
Use a diamond-tipped hole saw when drilling for pipes for installing sanitary ware. The diamond-tipped hole saw provides a clean cut and professional finish.