
Make a Caddy Tool Storage Organiser
A well-organised workshop is a pleasure to work in and with good organisation you will know where everything is, and this storage caddy lets you organise all your storage cases.
05/11/2021
family handyman
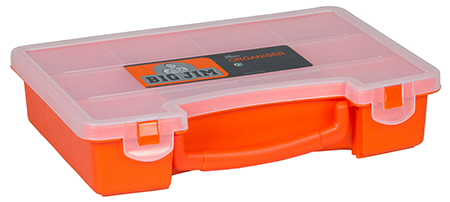
The plastic storage containers shown in the project above couldn't be found locally, so I modified the dimensions to fit a Big Jim 26cm storage container as shown below. These are available in different sizes and you can modify the length of the caddy to accommodate the size of storage container you prefer.
The Big Jim storage organiser is available at more than a few stores around the country and we sourced the 26cm version at Makro @ R59.
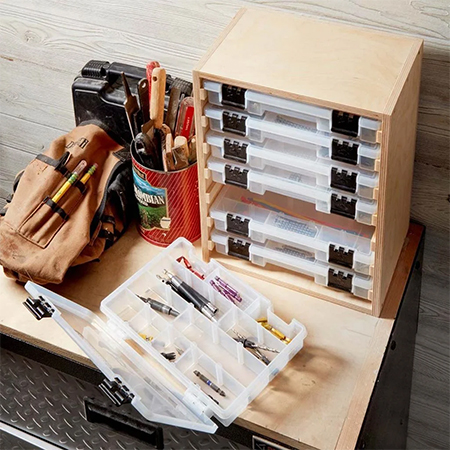
I keep most of my workshop and DIY tools in Big Jim containers and especially smaller pieces that usually get lost. I have a Big Jim for all my screwdriver bits, wall plugs, hangers and such, and one that I use for screws. The more Big Jim organisers you have - the better your workshop storage. Making this caddy will only take about 30-minutes and you can make it as wide or as high as you need to storage all your oganisers. I haven't given any measurements here because it all depends on the size of your storage organisers and the thickness of the board product you use. However, it doesn't really make that much difference as the assembly steps are so easy.
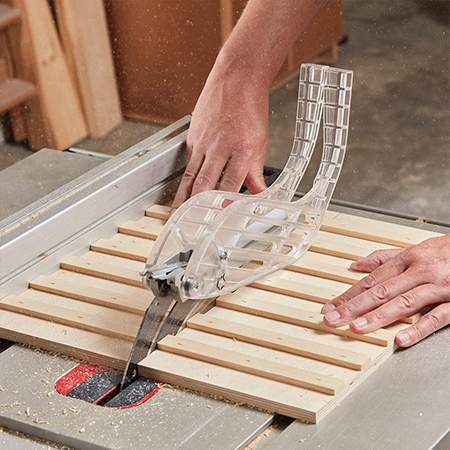
To make the storage caddy you can use plywood or SupaWood for the top, bottom and sides. The diagram below is drawn with 16mm SupaWood in mind but you can easily alter the dimensions if you buy 15mm or 18mm plywood. Other than the board to make the frame for the caddy, you will also need some 12mm-thick board for the dividers. Before you purchase, measure the lip on the containers to ensure that 12mm is enough or if you need a wider strip.
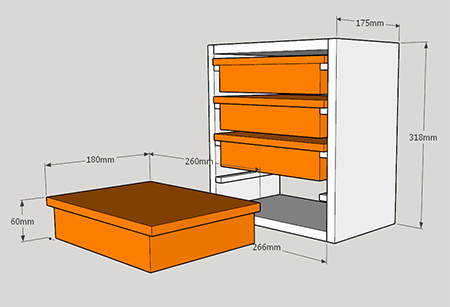
Measure and mark all the dimension onto a single piece of plywood or SupaWood, the Big Jim organiser that I used is 26cm (260mm) long, 18cm (180mm) wide and 6cm (60mm) high. Always double check your measurements to make sure you get the length, width and height perfect.
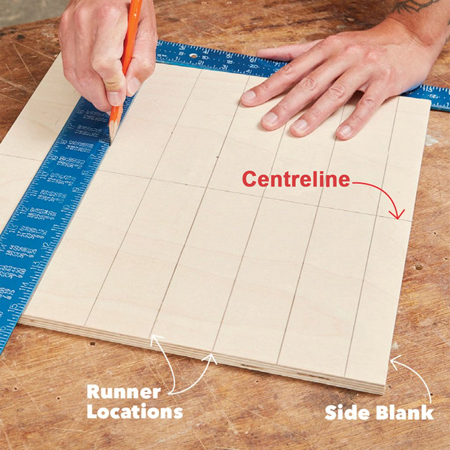
The divider strips can be glued onto the sides of the case and then nailed firmly in place or you can use a hammer and panel pins. Don't follow the image below as this project has been re-designed to allow for easily available organisers in this country.
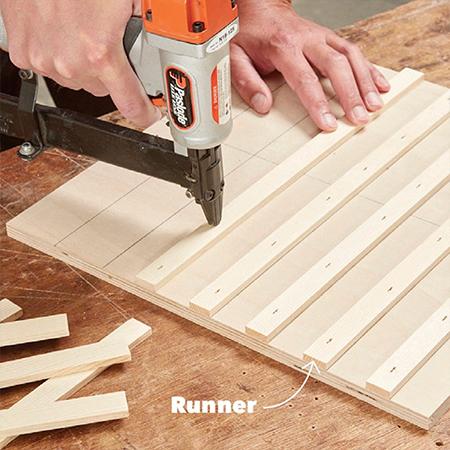
After mounting all the dividers, cut the sheet in half for the two side sections and then assemble everything together with wood glue and screws - or use a Kreg pocket hole jig - or use a Biscuit Joiner - it all depends on what tools you have to use.
What can you store in your Storage Tower?
These storage organisers can be used to store and corral so many items used in a workshop and will not only help keep your workshop space organised but also to make it easy to find whatever you need. Use the storage containers for the following items:
1. Hangers
Picture hangers, wall hangers, shelf pins - anything you use to hang items in the home and can stored in a single container.
2. Drill Accessories
I keep all my drill accessories in a storage organiser, items such as standard holders, countersink bits, screwdriver bits, dowel centres, etc. Drill bits don't quite fit into my organiser but I did manage to find one that had longer slots for these.
3. Hinges and Brackets
If you make a lot of projects, you probably have assorted hinges and brackets lying around. Organise these in a single container that is handy when you are looking for what you need.
4. Screws and Nails
If you make a project and have leftover screws and nails, put these into a container so that you have them ready when you next start a project.
5. Craft Supplies
If you don't need to organise your DIY bits and bobs, you can always use this storage tower to organise your crafts or hobbies.