Plans To Build A Floating Media Console
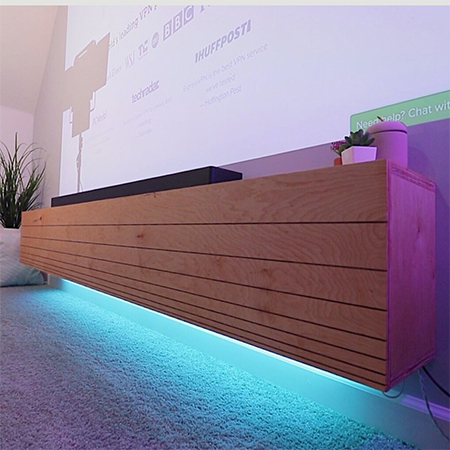
Every TV room needs a media unit and this floating media console takes up minimal space, has plenty of storage and built-in LED lighting.
12/03/2024
modernbuilds.com
This stunning floating media console is perfectly designed for any room. Small lounge? No problem, this unit is narrow enough to take up a limited amount of floor space. Open plan living room? You can modify the dimensions of this floating console unit to make it deeper/wider and as long as you need it to fill up the space. If you want to make it out of a single sheet of plywood or board product, modify the length of the board to that of the product and you should be able to cut everything out of one sheet - saving you plenty of bucks. Or, you may want to use marine or veneered plywood and can only afford a single sheet to splurge on.
Not only can you make this floating media console using plywood, but you can also use SupaWood (MDF) with a painted finish or adjust the cutting list to make it using pine or your choice of hardwood.

modernbuilds.com
The design does not look as simple as it is and the finished media console has a modern look that is deceptively easy to make, one that incorporates a French cleat as the hanging method. So easy, you could probably make the entire thing in an hour or so if you have all the tools and materials ready to go!
If you need more information than that provided by the instructions below, you will find a detailed video from modernbuilds.com at the bottom of this page or pop onto their website for more information and other projects you can make.
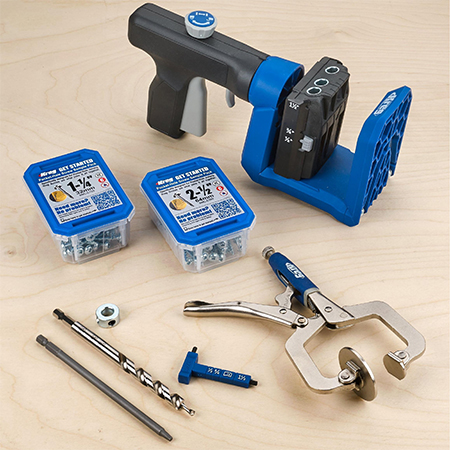
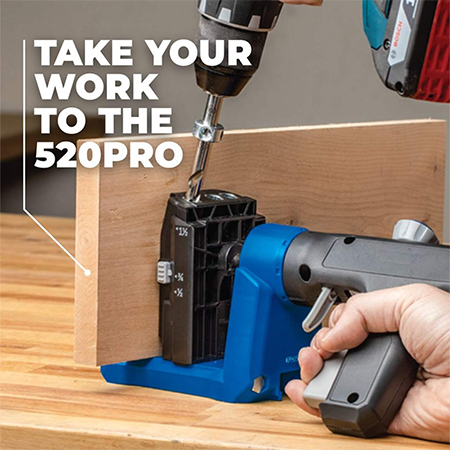
The Kreg 520 PRO Pocket Hole Jig retails from around R2300.00 from retailers around the country or online suppliers. Make sure to stock up on all the necessary attachments you will need to complete your DIY projects. For more information on the Kreg range of pocket hole jigs, visit www.VermontSales.co.za.
How to make a floating media console
YOU WILL NEED:
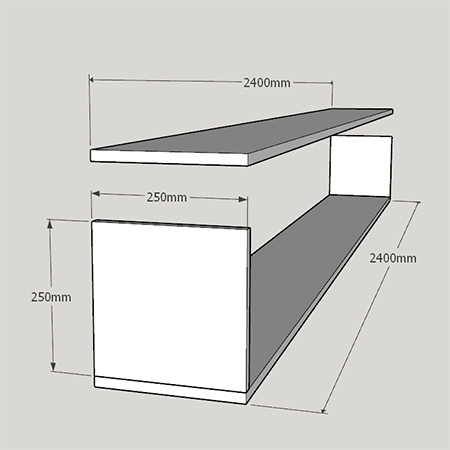
2 of 250 x 2400mm plywood - top and bottom
5 of 250 x 250mm plywood - ends and dividers
1 of 286 x 2400mm plywood - front
2 of 100 x 2386mm plywood - French cleat components
Coarse-thread pocket hole screws or chipboard screws
Wood glue
Euro or concealed hinges plus screws [4]
TOOLS:
Drill plus assorted bits
OPTIONAL: Kreg pocket hole jig
Orbital sander plus assorted sanding pads
Jigsaw plus clean-cut jigsaw blades
Table saw or circular saw
Quick or corner clamps
Tape measure and pencil
Safety gear
HERE'S HOW:
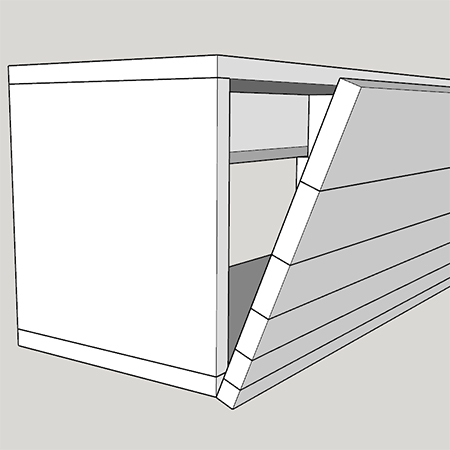
Step 1 - Assemble the frame
If you have a sheet cut to size at your local Builders assembly will be quick and easy. Use wood glue and screws to join the ends to the top and bottom sections. To assemble you can use a pocket hole jig, biscuit joiner or simple butt joints keeping in mind that the two former options will leave a screw-free finish on the outside whereas you will need to fill screw holes on the outside with butt joints.
Step 2 - Insert the dividers
You can incorporate this as part of Step 1 above or you can add the dividers now but it is easier to assemble the bottom and end sections and then insert the dividers, securing these to the bottom section before adding the top. Cut a 20 x 100mm slot using a jigsaw from each of the [3] dividers. This will allow the Top Section of the French Cleat to be fitted in place as shown in Step 3 below.

The French cleat system of mounting and hanging is what makes this project so quick and easy.
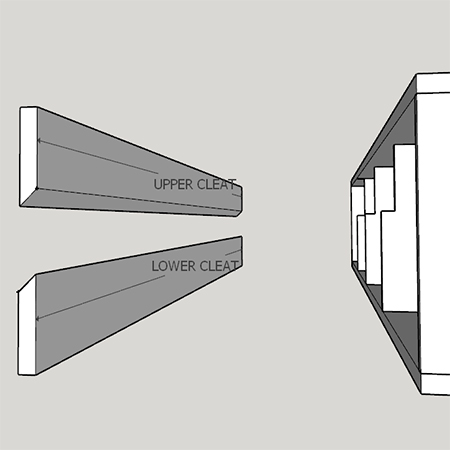
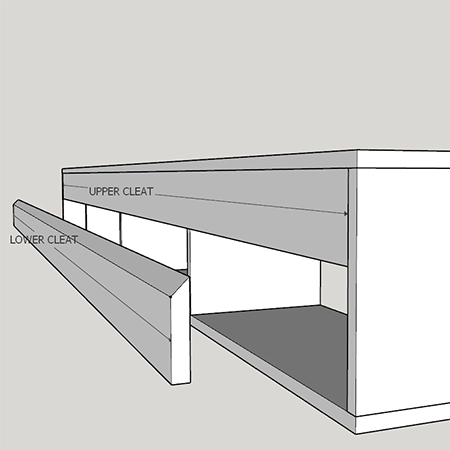
Step 3 - Attach the French cleat
Rather than have to repeatedly measure and mark for mounting the unit directly onto the wall, the Bottom Section of the French cleat is screwed onto the wall and the Top Section (now fitted to the back of the media console) simply gets lifted and fitted on top of the Bottom Section of the French cleat.
Step 4 - Adding grooves to the door panel
For those using a sheet product for the door, grooves have been cut into the front panel that gives the door the appearance of being made up of several pieces. If using pine or hardwood for this project, the individual pieces are cut as per the measurements below and then laminated (glued) together to create a single panel.

Step 5 - Fitting the door
The door is mounted using [4] concealed hinges. These are relatively easy to fit using these instructions and you can even use soft-close hinges for that luxury finish. This type of hinge will also keep the door closed without any catches, but you can add these additionally if you wish.