Step-by-Step Instructions for an Elegant Coffee Table
Grab your tools and materials to make an elegant coffee table for your living room with these step-by-step instructions.
23/10/2023
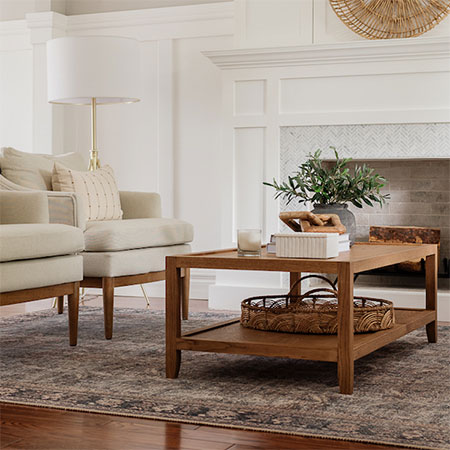
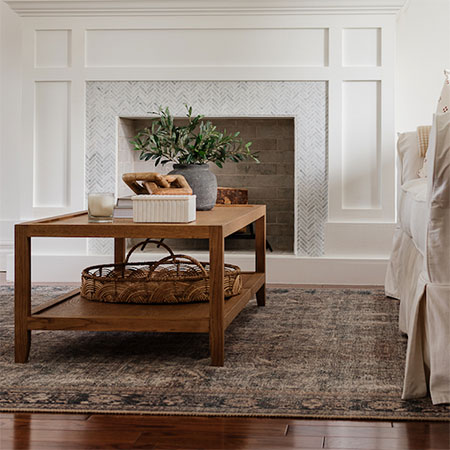
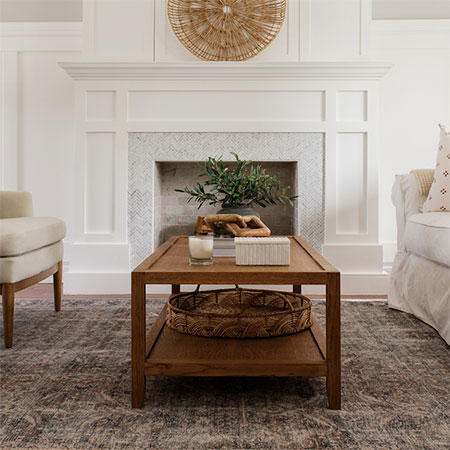
An elegant coffee table for a living room
might cost you around R3000 upwards, especially
one that incorporates wood like this one, but if
you make it yourself, you will only end up
paying half that cost and you get to make it any
size you want, or you can make two for the same
price.
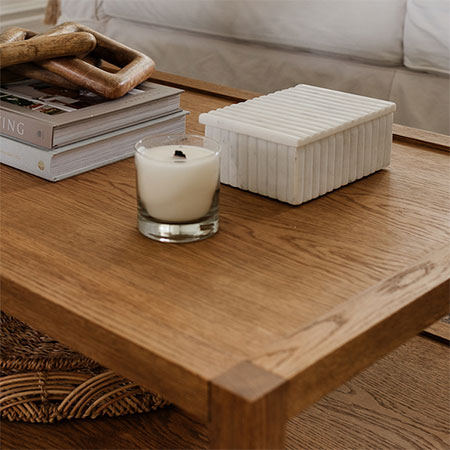
The trick is to use veneered plywood that,
while a tad more expensive than the cheap
plywood available, has the quality and look that
you need for an elegant coffee table. Once you
have selected the veneer finish, you can use a
gel or wood stain to achieve the look of other
hardwoods and very few will know the difference.
At the end of the day, you can make a custom
coffee table that looks like it is made using
expensive hardwood and costs a fraction of what
you would pay to buy at a furniture store.
This project is brought to you by Kreg Tool in collaboration with nickandalicia.com
Looking at the coffee table, it is hard to
tell the difference between plywood and wood
simply because the plywood is used for the
tabletop and shelf and is surrounded on all
sides - and the legs - using PAR pine or your
choice of wood. Since most plywood boards only
have a quality veneer on the face, the underside is
hidden out of sight.
Birch veneered plywood has a sheet size of
1220 x 2400mm with a thickness of 15mm and
should cost around R2500 per sheet. A sheet this
size will allow you to make two tables or use it
towards other projects you have in mind. Not all
suppliers offer a cutting service, so check this
beforehand if you do not have the tools to cut a
sheet to size.
Use a tinted wood or gel stain to achieve the finish you like and apply a matt polyurethane sealer if you want a look that is similar to the coffee table shown in this project. Not only will it give the table a natural look, but it will also protect the wood against spills.
Making the coffee table is easy if you have a Kreg Pocket Hole Jig and it is a worthwhile investment if you haven't yet added one of these tools to your collection. There are plenty of kits available in the range and prices range from as low as R1000 upwards depending on the kit you decide upon.
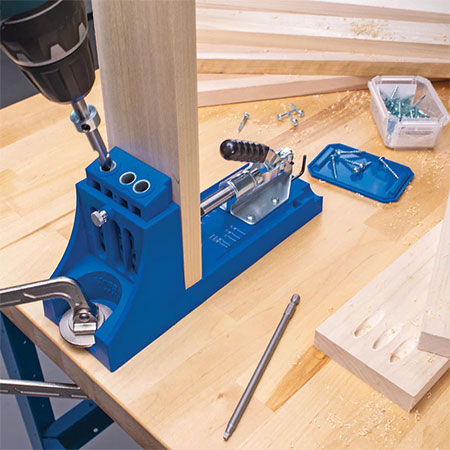
Using a Kreg Pocket Hole Jig is so easy that even a beginner will master the technique of using pocket holes to assemble furniture quickly, and once you start using your pocket hole jig, you will realise the potential for other projects that you might have in mind.
YOU WILL NEED:
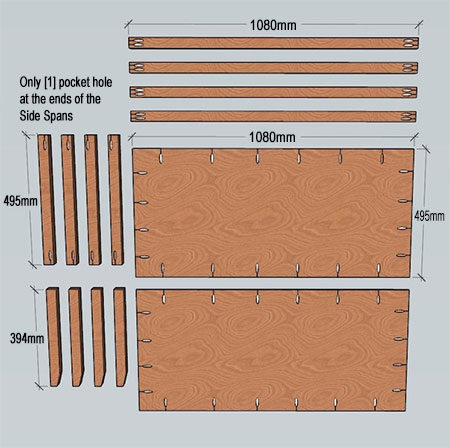
4 of 44 x 44 x 394mm PAR pine - Legs
4 of 44 x 44 x 1080mm PAR pine - Long Spans
4 of 44 x 44 x 495mm PAR pine - Side Spans
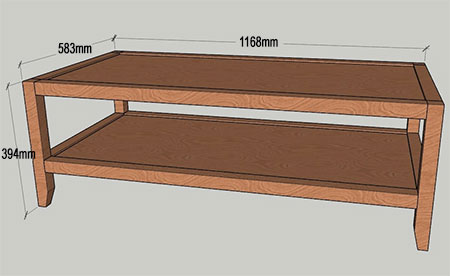
2 of 15 x 495 x 1080mm birch or maple veneered plywood - Top and Shelf
32mm coarse-thread pocket hole screws
Wood glue
Tinted wood stain
Clear polyurethane sealer or varnish
TOOLS:
Kreg pocket hole jig
Drill with assorted bits
Orbital sander plus 120- and 240-grit sandpaper
Face clamps
Tape measure and pencil
Safety gear
HERE'S HOW:
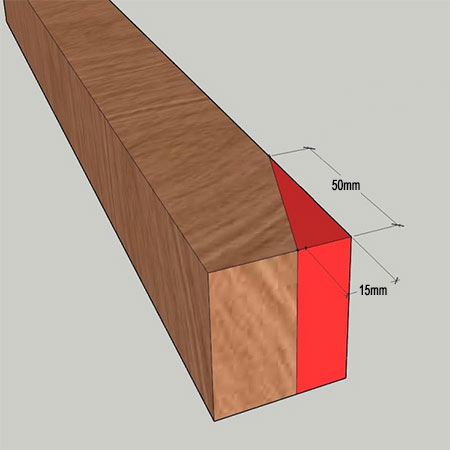
Step 1 - Cutting the pieces
Have all the components cut to size as per the list above, or cut these yourself. For the angled cuts on the legs, measure in 15mm on the base of the Leg and 50mm up the Leg and draw a line between these two marks. This is the area to be removed. You can repeat this on what will be the inside of the Leg for more detail or leave it straight.
Step 2 - Sanding
Sand all the rough edges with 120-grit and then sand smooth with 240-grit. Do not round off any edges as this will show once the assembly is done. It is easier to sand the top and shelf before assembly. Any rouning-off is best done once assembly is finished.
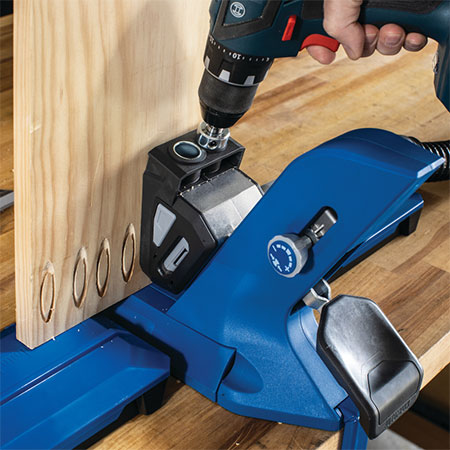
Step 3 - Drill pocket holes
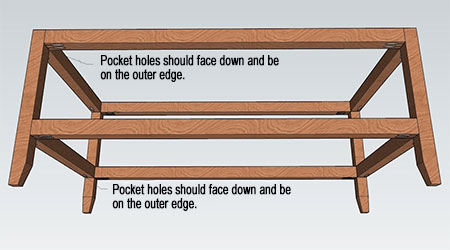
Use the diagram below to drill pocket holes in all the components. Note that the Side Spans only have [1] pocket hole at the ends close to one edge (inside edge) to prevent any collision when mounting the Long Spans on the Top and Shelf. The tabletop and bottom shelf have pocket holes spaced a regular intervals.
Step 4 - Assemble the frame
Begin the assembly process by securing the Legs to the top Side Spans using wood glue and pocket hole screws. Make sure that the pocket holes are facing down. The bottom Side Span and Long Span should be mounted at 115mm to 120mm up from the floor but you can modify this if you want a higher or lower shelf.
Step 5 - Attach top and shelf
The top and shelf are 5mm lower than the surrounding Spans but if you do not want a recessed look, you can keep the top and shelf flush with the top of the Spans. Use a 5mm spacer to ensure that the height is equal all around as you attach the top and shelf using wood glue and pocket hole screws.
Step 6 - Attach remaining spans
Now you can attach the remaining Long Spans to the edge of the top and sides using wood glue and pocket hole screws. Keep in mind the location of the screws used to attach the Side Spans to the Leg to avoid contact.
Finishing
This step is up to you but you have the option to apply a tinted wood or gel stain to the table before applying a clear polyurethane varnish with a matt finish - if you want the table to look like the one shown here - or you can use satin or gloss varnish.