
Make a Coffee Table or Side Table with Hairpin Legs
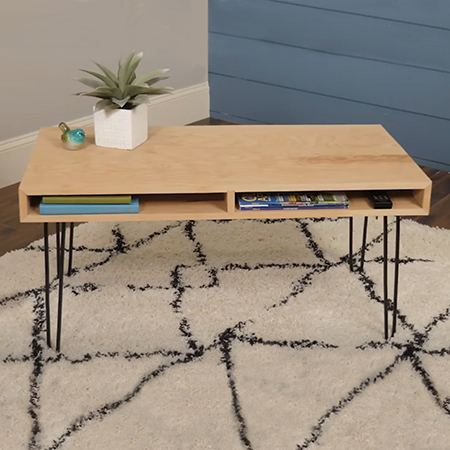
Furniture with hairpin legs continues to be popular and you will find them used on chairs, tables, and cabinets as a way to make a living room feel less cluttered with their lightweight and open design.
23/01/2022
family handyman magazine
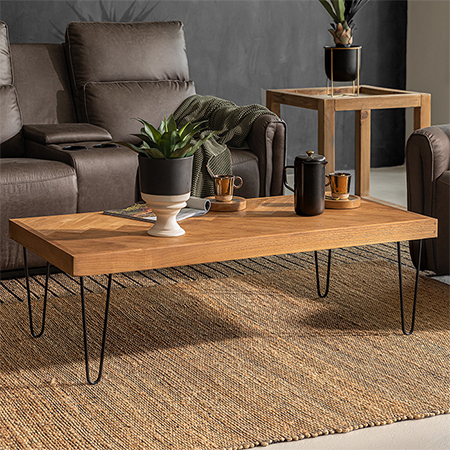
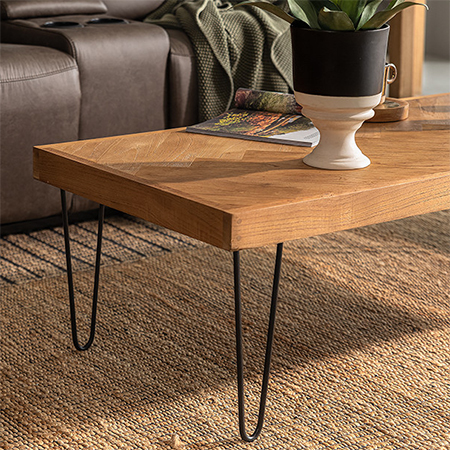
Using hairpin legs on a coffee table, side table or console gives the furniture an elegant look that is trendy and fun. Plus, the profile of the hairpin legs is minimalist, and perfect for a living room on the smallish side. Making furniture with hairpin legs is also easy and you don't have to worry about complicated joints, brackets, or any other type of fastening.
Hairpin legs are priced from around R120 each and upwards, but when you consider that buying a readymade table with hairpin legs can cost anywhere from R2000 upwards for a small-sized table, you really do save money by making your own and you get to make it in your personal style and the perfect size for your room. You can source everything you need by searching online for suppliers close to you, including hairpin legs, and while this table is made using birch plywood, which is difficult to come by, you can substitute with other board product or hardwood.
cielo.co.za
cielo.co.za
YOU WILL NEED:
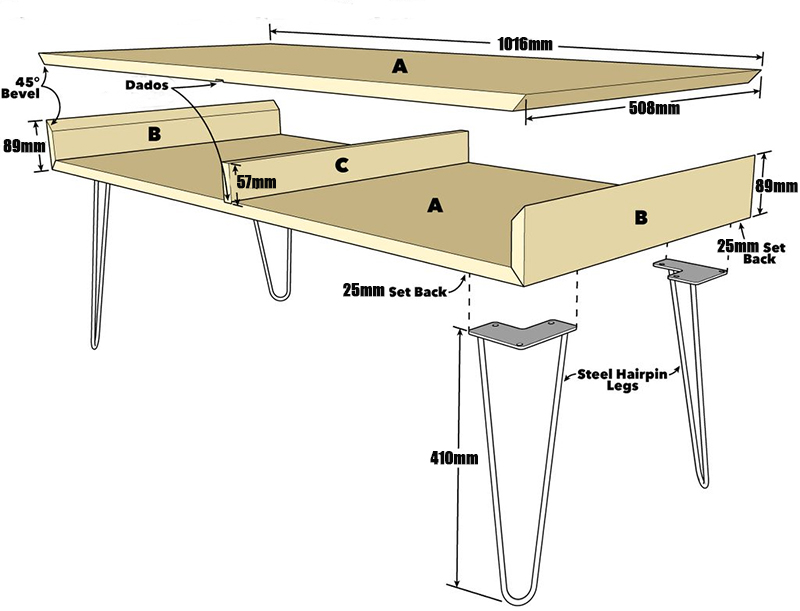
2 of 19 x 58 x 1016mm plywood (or other) - top and bottom
2 of 19 x 89 x 508mm plywood (or other) - sides
1 of 19 x 57 x 508mm plywood (or other) centre divider
Edging strip to match material used
4 of hairpin legs and 16 screws
Wood glue
Painter's tape
Wood filler
300-grit sandpaper
TOOLS:
Drill plus assorted
Table saw or circular saw
Orbital sander plus assorted sanding pads
OPTIONAL: Pneumatic nail gun or hammer and panel pins
Clamps
Tape measure and pencil
Safety gear
HERE'S HOW:
Step 1
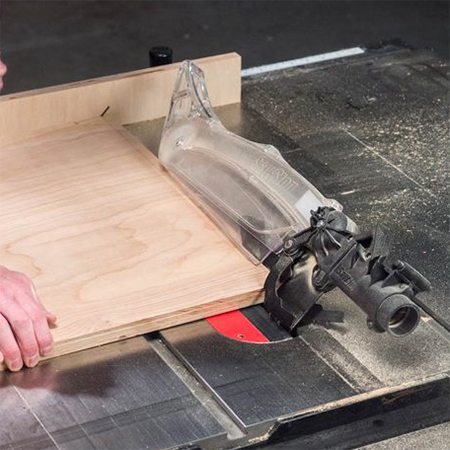
You need to cut 45-degree mitres on the ends of the top, bottom, and side pieces. You can do this using either a table saw or circular saw.
Step 2
Sand all the cut edges smooth before assembly.
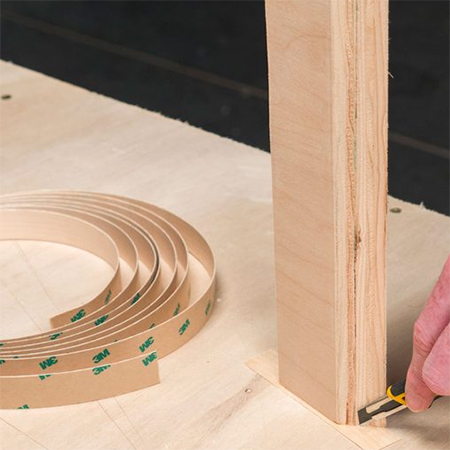
Step 3
If you are using plywood to make this coffee table, purchase edging strip to match and apply this to the front face of the top, bottom, and side sections. You should be able to by pre-prepared edging that has adhesive on it and is applied using a warm iron, or you will use contact adhesive to stick the edging onto the edge of the boards.
Step 4
Mark the centre of the top and bottom pieces for fitting the centre divider. The slot needs to be the thickness of whatever material you are using, and the depth should be 3mm for both dadoes.
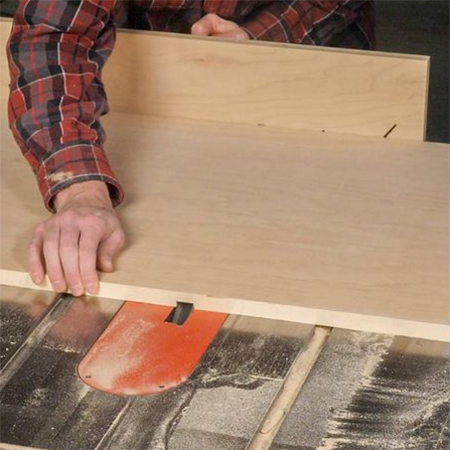
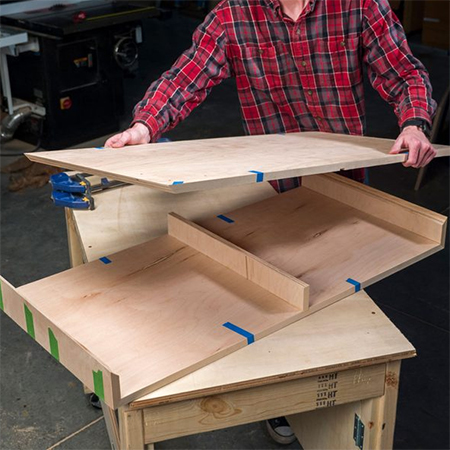
Step 5
Starting with the bottom and side sections, lay the sections flat over pieces of painter's tape. Apply a bead of wood glue along the edge and fold the side sections up to make a perfect corner. Next, use wood glue to secure the centre divider into position.
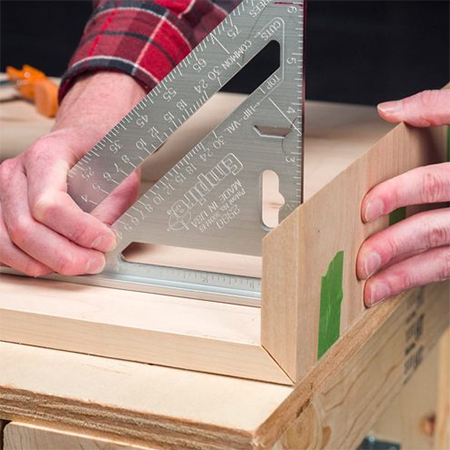
Step 6
Repeat Step 5 above to add the top section, using wood glue and painter's tape. Clamp securely and leave overnight. For additional strength, you can use a pneumatic nail gun or hammer and pins along the bevelled edges. Nail or pin through the side sections so that the fasteners will not be visible on the top or bottom of the table.
Step 7
Measure and mark the placement for the hairpin legs and secure these in place with 16mm screws. Use wood filler to cover any nail holes in the side sections, let dry and then sand smooth.
