How to Treat Rising Damp in Exterior and Interior Walls
When left untreated, rising damp can cause serious problems to the structure of a home and below we offer instructions for suitable products to treat rising damp.
25/04/2023

When left untreated, rising damp can cause serious problems to the structure of a home. Paint and plaster will fall off the wall, and brickwork eventually becomes saturated with moisture and can lead to structural damage. We asked Cemcrete, a leading supplier of cementitious and waterproofing products, to provide us with instructions for suitable products to treat rising damp.
YOU WILL NEED:
PermaStop waterproofing products, or similar, and SiliconSeal
Chalk line
Rubber gloves
Dust mask
TOOLS:
Drill plus 20mm masonry bit
Hammer and chisel
Whitewashing brush
Angle grinder with diamond blade
Plastic funnel and length of pipe
Bucket and clean water
Steel and wood floats
Buy tools and materials for this project at your local Builders Warehouse. Cemcrete products are available from Cemcrete or their agents.
HERE'S HOW:
This project will take around 2 days to complete and you should always wear gloves when working with any cement-based products.
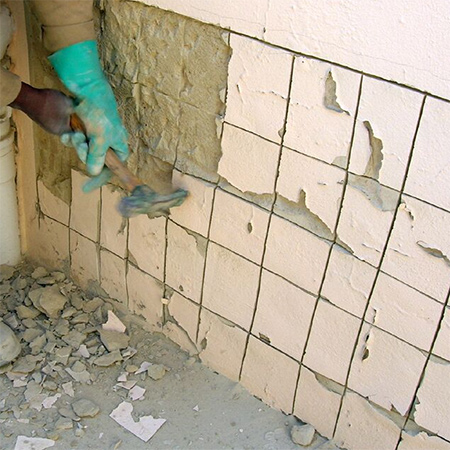
1. Before getting started, shoot a chalk-line 100mm above the affected area to ensure a straight line to finish against. Where there are tiles on the wall, remove these with a hammer and chisel.
2. For a plaster wall use an angle grinder and diamond blade to cut back to the brick. For proper application any covering should be removed down to the brick.
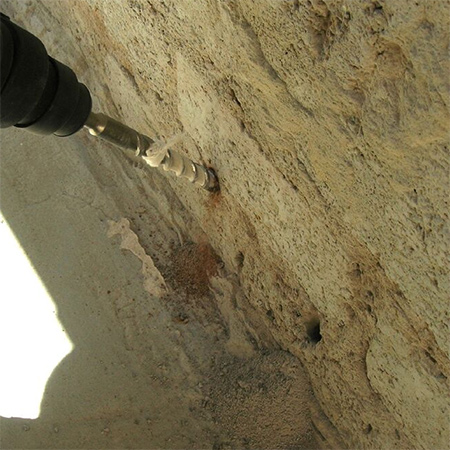
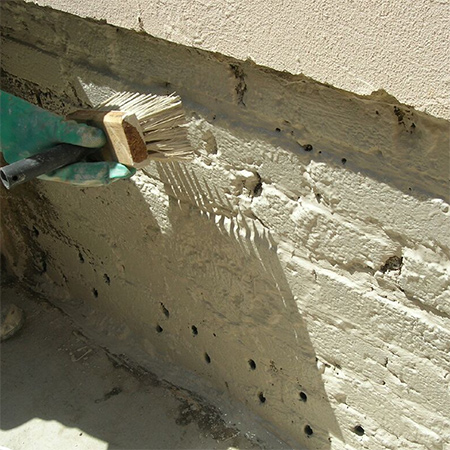
3. Use a 20mm masonry bit to drill holes two-thirds of the depth of the brick, into each brick immediately above the faulty damp proof-course. Use a brush to clean thoroughly, ensuring that no dust remains before moving on to the next step.

4. Using a funnel, pour SiliconSeal into the holes until it bleeds back through the face of the brick.
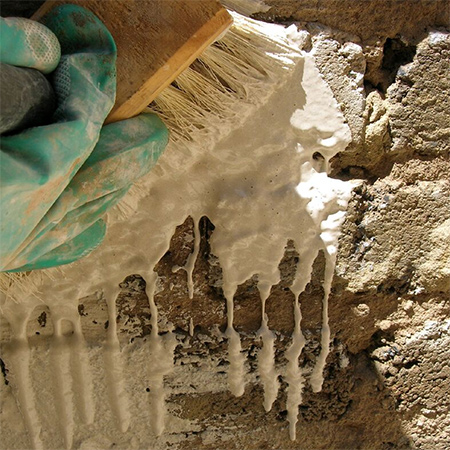
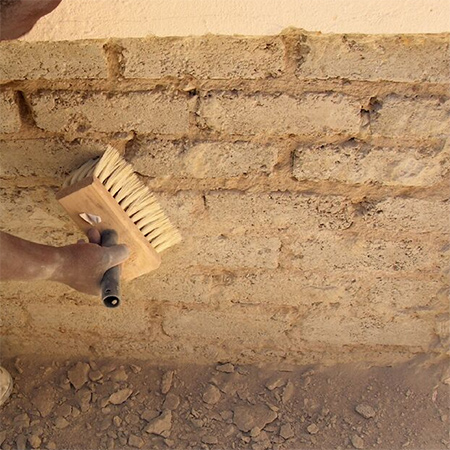
5. Combine 2 parts PermaStop with 1 part water and mix to a paintable consistency. Damp down the surface and then apply a liberal coat of PermaStop over the wall, using a whitewashing brush to ensure that the surface is completely covered.
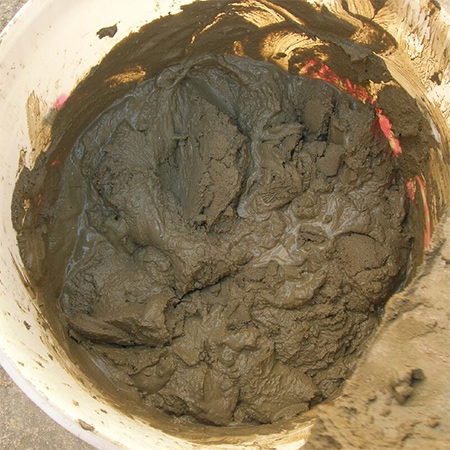
6. To plaster the wall combine 1 part water-repellent cement, 3 parts clean plaster sand and 1 part clean river sand. Only add enough water to obtain a plaster (thick porridge) consistency.
GOOD TO KNOW: Begin the plastering the wall while the PermaStop is still wet.
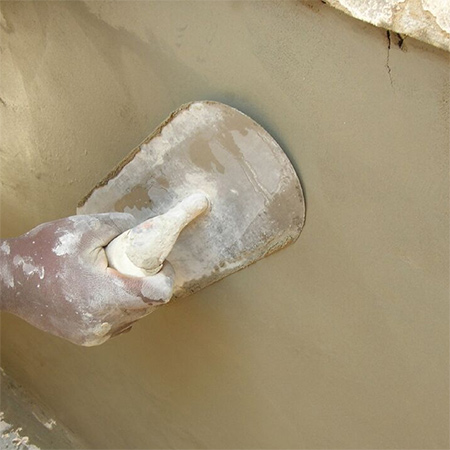
7. Use a trowel to apply the plaster to the wall and then use a wood float to smooth the finish.
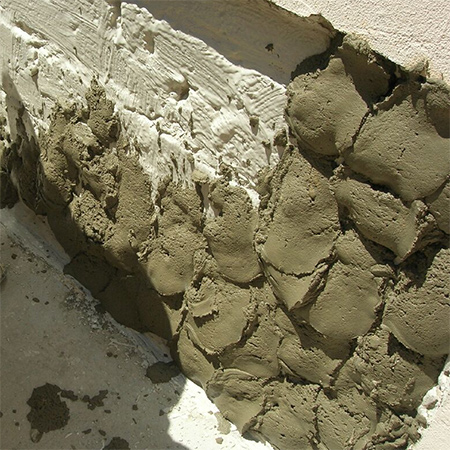
8. Finish off with a steel float to smooth finish, using a ruling tool to create a neat joint with the old plaster. Let the plaster dry for at least 24 hours.
GOOD TO KNOW: As the plaster starts to dry, aid the curing process by wetting with water 3 times during the day following the day of application. Leave to dry for 28 days so that proper hydration can take place. After this, the surface may then be coated as desired.