
Deal with damp
As wonderful as the rain has been and the downpours have been cause for celebration after months of drought - plenty of home owners will have discovered leaks and possibly even developed damp as a result of the excess moisture.
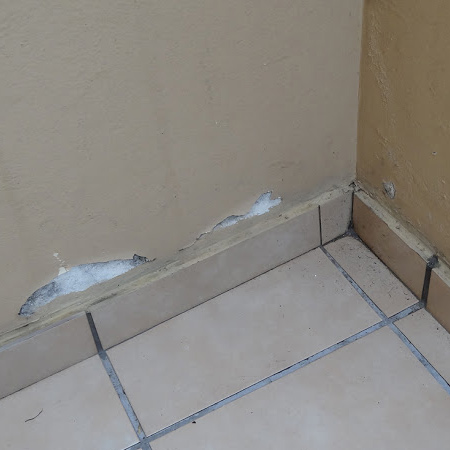
Very often you can smell and sense damp before you can see it. When it does appear it’s an expensive and unhealthy nuisance that cannot be ignored. Damp can lead to deterioration of plaster, masonry, cause timber decay and it looks terrible. Not only that – it’s a fungus and can have serious health consequences – particularly for people with allergies and asthma.
Managing damp is a process and merely painting over it is the worst thing to do – this causes it to spread further, as the moisture simply diverts to other areas. The good news is that most, if not all damp problems are correctable. To avoid DIY damp disasters take stock of the situation now and do a quick spot check of your home to make sure there are no indications of damp.
INDICATIONS OF DAMP:
These are sure signs that something is not right with the moisture levels in your home:
• Mouldy bricks
• Peeling paint
• Mildew on the walls
• Tide marks
• Discoloured grout
• Efflorescence
Take a close look at the area affected and inspect the surrounding walls and areas to determine the source of the damp and where it’s occurring: lower or middle wall, and whether the other side of the wall is interior or exterior. If it’s inside the house, consider what’s on the other side - a bathroom for instance. If exterior, check if there are pipes running in or on the walls or taps.
POSSIBLE CAUSES:
• Leaking roofs
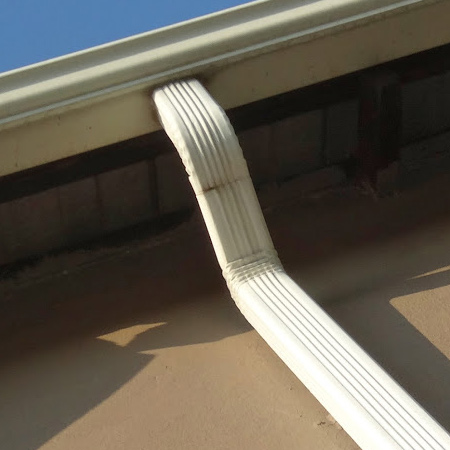
• Defects in gutters and down pipes
• Penetrating dampness through walls, around windows, window sills, parapet walls and cracks in plaster
• Rising damp
• Groundwater and capillary movement
• Leaking pipes
SOLUTION:
Painting over damp areas without fixing the problem is a fruitless exercise. It’s advisable to consult your Prominent Paints distributor or Prominent Paints technical department for the correct advice to resolve the damp problem before proceeding with the painting process. Some mandatory steps to be followed when treating damp include:
• Strip all the existing paint off the wall and put a proper water proofing system in place.
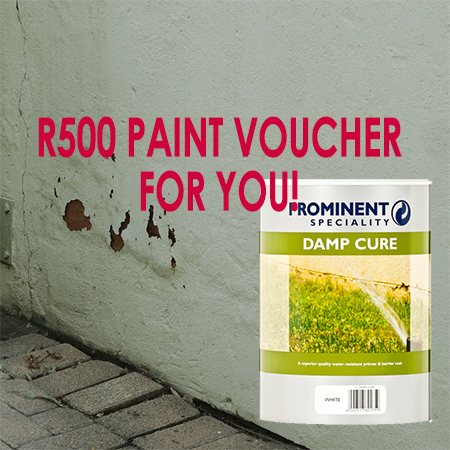
• Apply Damp Cure from Prominent Paints – an ideal solution for rising damp on interior walls when applied correctly and onto bricks to prevent rain penetration.
• Apply a primer to all the surfaces that need paint.
• Seal the cavity between the window frame and plaster with a Polyurethane expansion joint sealer to prevent moisture penetration.
• Apply two perpendicular coats of Fibre Seal to the window sills.
• For interior and exterior walls - finish with a quality exterior paint like Prominent Premium Satin - two coats is mandatory.
PRODUCT INFORMATION:
Prominent Paints Damp Cure is a 100% lead free, water resistant solvent-based coating. It’s microporous to allow water vapour to move out of walls which makes it an ideal barrier against rising damp and penetrating rain. Stir before using and occasionally during use and apply with a brush or a roller. When using it on cement plaster with rising damp, use one thinned coat (diluted up to 20% with ProGold Mineral Turpentine) and two thick undiluted barrier coats. One coat serves as a primer, with two to three coats as the waterproofing barrier.
Damp Cure has a six hour drying time and this must be observed. Recoating should not happen for at least 18-24 hours and if moisture levels are up to 40% then 48 hours will be needed before recoating. It can be left as a final coat, but will chalk over time and therefore best recoated with any conventional decorative coating. It’s available in white and best left untinted.
Damp Cure is available in 1L, 5L and 20L tins from Prominent Paints Paint Centres and leading paint suppliers nationwide.
Handy Tips:
• When assessing the wall to see if it’s damp or just condensation – take note that if the plaster is a dark grey colour, it’s a sure sign that the wall itself has become moisture logged and very wet.
• To test condensation levels - use a plastic sheet or cling wrap [about one metre in length] and fix to the wall with masking tape. Leave the plastic to stand overnight and if upon inspection in the morning there is condensation visible, there is a problem and the surface tested is still too wet. Moisture must be below 15% before painting can commence.
• Drill several small holes (10mm wide) into the plaster bit to allow some moisture to escape before beginning your DIY damp treatment.
• Always stick to the prescribed drying times for effective protection against damp.
• Be sure to consider the weather when you are trying to cure your damp: high humidity levels will decrease the specified drying times.