
Paint and Weatherproof your Roof
If you haven't taken a close look at your roof for some time, don't wait for leaks to fall on your head before you do - here's how to paint and weatherproof your roof.
18/01/2020
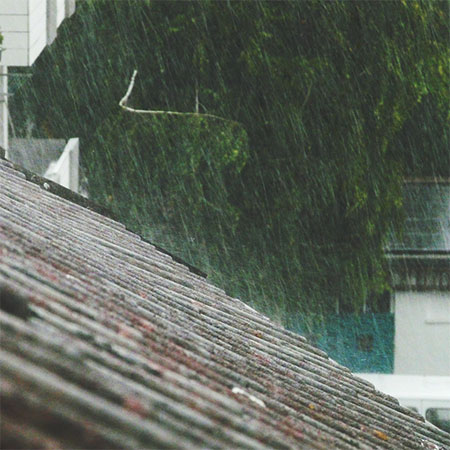
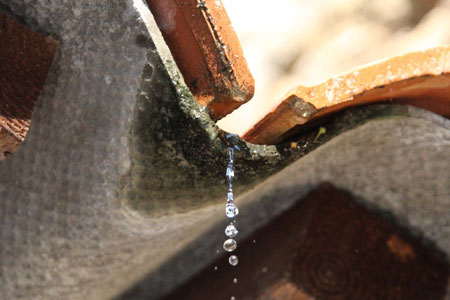
While roof inspection is not something most of us do on a regular basis, it is important to ensure that your roof is well insulated and waterproof and that your home is protected from our often harsh elements.
Wherever your home is located, the best time to do any work on a roof is in the in-between seasons, when it’s not too wet and not too hot. Autumn is ideal if you live in the Western Cape, while spring is better in places that receive rainfall during summer, such as Gauteng. However, if you know there is damage to the roof, there's no better time than the present to do urgent repairs.
Below, we discuss a 4-step plan that you can follow to paint and weatherproof a roof - all of which are important. From planning to cleaning to sealing and painting, these basic steps are essential to successfully protect your home.
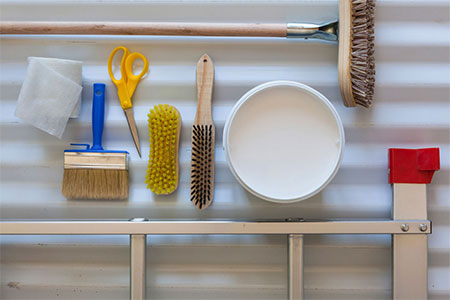
1. Gather your Supplies
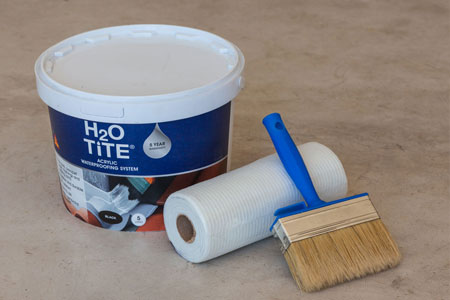
Before starting this project, you will need to work out the square metres of the roof so that you have enough paint and product to apply at least two coats. Most paint product will provide you with an expected coverage rate and from this, you can determine how much paint you will need.
YOU WILL NEED:
Weatherproofing roof paint
Assorted paintbrushes
Paint roller with extension handle
Wire brush
Stiff sweeping brush
120-grit sandpaper
Utility knife
SAFETY FIRST: Any job can be dangerous if you don't take safety precautions, and working on a roof requires additional safety gear in the form of safety shoes and hard hat.
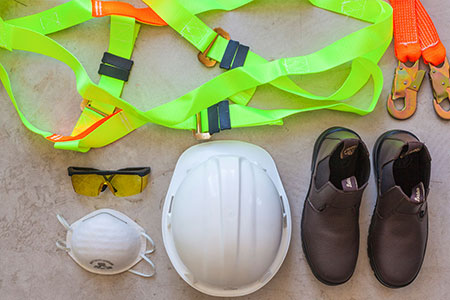
SAFETY GEAR:
Nylon strapping or safety harness
Hard hat
Safety shoes
Goggles
Dust mask
2. Prepare the Roof
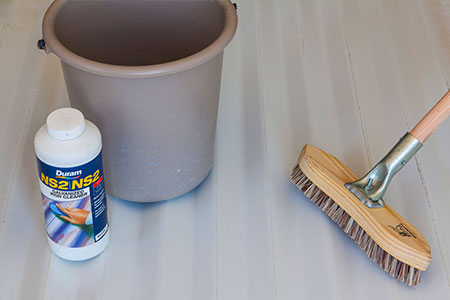
The first step before any painting takes place is to clean the roof with a high-pressure washer. This will remove any flaking or chipping paint and debris. If you don't have access to a high-pressure washer, you can clean the roof using a sweeping brush, hosepipe and Duram NS2 Galvanized Iron Cleaner or similar, to remove any mould from tin, IBR or other metal roof material.
3. Apply suitable Treatment
A clean surface is essential for the application of weatherproofing products, so after cleaning, make sure the area is free from rust or treat rusty areas accordingly.
No waterproofing or weatherproofing product has the ability to mend structural damage or bridge large gaps and cracks.
If you are tackling this project due to existing roof leaks, assess the damage inside your home for water damage on ceilings or walls. If you have access to your roof cavity, climb in and check the roof for any light shining through. If there are any gaps on the roof you can fill these with a sealant or filler. Choose a flexible sealant, which can expand or contract in the heat or cold. Broken or damaged slats and tiles should be properly replaced or repaired with a product such as Pattex FT101.
- What to look for:
• Broken or cracked roof tiles or along the capping
• Flashing (the joins between
roof tiles and parapet walls)
• Parapet walls
• Chimneys
• Gutters (remove all debris as poor
drainage can cause leaks)
• Overlapping of IBR
sheeting
• Buckled IBR sheeting
• Dusty spots
on your roof where water may have been pooling
•
Roof screws and washers
4. Paint the Roof
With the previous steps done you can get started on weatherproofing the roof. You have choices here; acrylic waterproofing coatings offer an effective DIY option if you want to do this project yourself and there are several products to choose from, depending on the type of roof you have on your house, In some instances, you will use a combination of products depending on the severity of the problem.
Waterproofing roof paint is best if you’re painting a roof for purely aesthetic reasons or there are no apparent issues with your roof. It is generally cheaper and application is much like a regular painting job. You can use a brush roller or even a compressor and spray gun to cover the area faster with this paint. Advancements in paint technology have led to the development of a variety of membrane-less products, some of which are thicker, more flexible and promise better UV protection than regular roof paint.
Weatherproofing paints with a built-in membrane are normally fibrous and appear thicker than other paints. It’s a good product to use when you have a large number of small cracks to cover. The disadvantage is that it is best applied with a brush, meaning the job will take longer.
Many waterproofing systems are dual-component systems that are sold in conjunction with a woven membrane. This type of product offers the most effective DIY roof waterproofing. It has the ability to bridge small gaps in IBR sheeting or overlapping roof tiles.
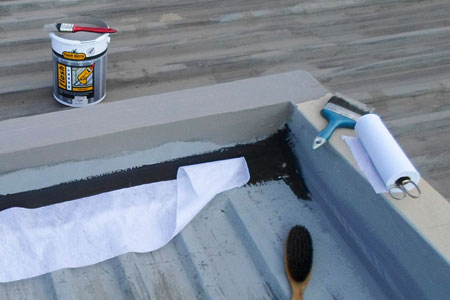
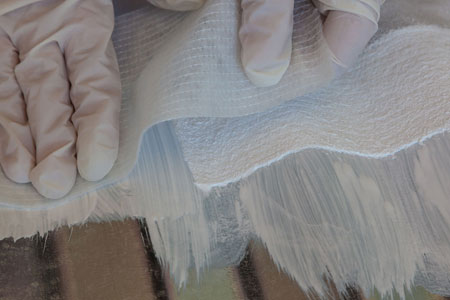
Applying Waterproofing Membrane
1. Cut a half-metre length of membrane. You will apply a generous coat of paint and then position the membrane before the paint dries. Carefully lay the membrane over the wet paint.
When using a weatherproofing, waterproofing product or membrane - always read the instructions as the method of application may differ slightly.
2. Working in from one side, press the membrane into the paint making sure it is absolutely flat into the paint all around. The membrane must be fully saturated by the paint coming through from underneath.
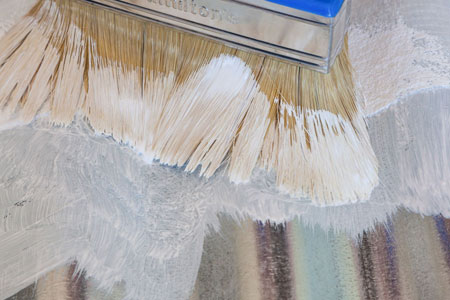
3. Apply another coat of waterproofing paint over the membrane before moving to the next area and repeating the process.
GOOD TO KNOW: When overlapping lengths of membrane, ensure the ends overlap by approx. 150mm.
GOOD TO KNOW: Allow approximately 5 hours for the paint to dry and apply another coat of paint over the membrane.
