
How Do You Cover Up Or Hide Ugly Tiles?
Now there is a product available {locally} that lets you cover up or disguise ugly tiles with a smooth wall that can be painted over.
24/03/2021
For a long time, we have been waiting for a product that can be used to cover up or disguise ugly wall tiles. Now there is a product that you can use in the bathroom or kitchen that applies easily over existing tiled walls, even cracked or slightly chipped tiles as well as grout lines to make tiles disappear.
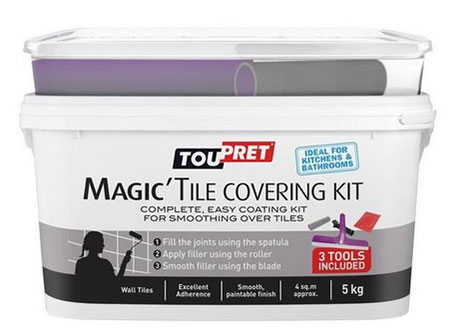
Toupret is a magic tile covering that is applied like a plaster finish and smoothed over tiles to provide a smooth finish that can be painted to let you create a beautiful bathroom. You can buy Toupret Magic Tile Covering Kit in South Africa at a cost of around R500 / 5kg.
Toupret is an easy coating product that is used for smoothing over the top of tiles. You can also use the kit for filling holes or cracks (no larger than 5mm) and it also covers us cracked or slightly chipped tiles. Toupret Magic Tile Covering Kit isn't just for tiles, it's also ideal for when you do home renovations. Use it to fill holes in ceilings and fix small cracks and holes in plaster walls.
The product has excellent adhesive properties, so it sticks well to existing tiles that have been scrubbed clean and dried. The kit comes complete with the tools you need to do the job including a filler spatula, roller and smoothing blade - all you have to do is use it.
HOW TO USE TOUPRET TO COVER UP TILES
PREPARATION
Before applying the smoothing plaster over the tiles, you need to give these a good scrubbing with sugar soap or a heavy-duty degreaser to clean away any dirt or grime on the tiles or grout. Use a scrubbing brush or scrubbing pad to go over the walls before rinsing clean and drying with a cloth. DO NOT exclude this step. It is important that the smoothing plaster be applied over a clean surface.
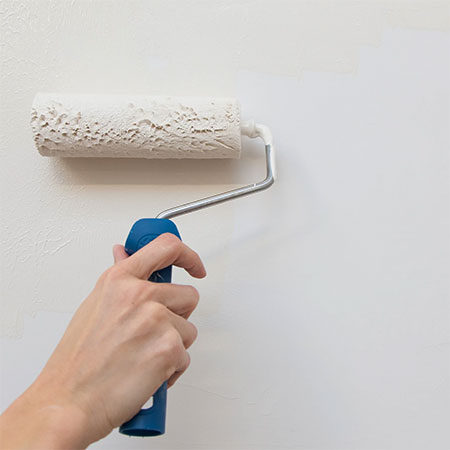
Step 1
Using the filler spatula, apply the ready-mixed product over grout lines. Do not apply too thick. Apply a small amount of plaster over the grout lines and smooth over with the filler spatula. You can see in the image below how the product should be applied. Let the product dry overnight or longer in high humidity or heavy precipitation areas.

Step 2
Sand the filler coat to ensure it is nice and smooth and there are no bumps or uneven areas.

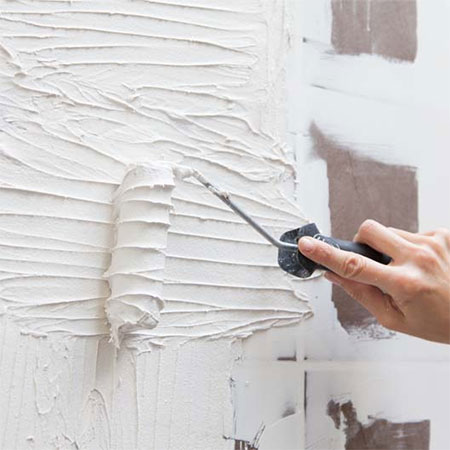
Step 3
Using the supplied roller, apply paint over the entire tiled area that is to be covered. It should be a fairly liberal application of the smoothing plaster, so don't worry if it looks a bit messy at this stage as you will remedy this in the next step.
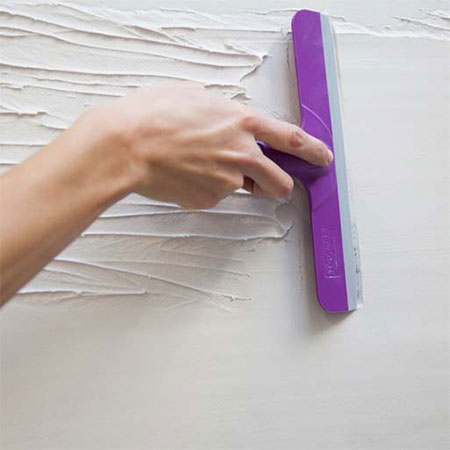
Step 4
Use the smoothing blade to go over the entire wall. Hold the blade at a comfortable angle of 45-degrees that lets you sweep the blade over the plaster finish to leave a layer of smoothing plaster on the tiled wall. Try to work as fast as you can but not so fast that you are in a panic to complete the job. Taking the time to do this step properly will be the difference between a perfectly smooth wall and a disaster! Leave this to dry overnight or longer if necessary.
GOOD TO KNOW: If there are any areas that are not smooth, you can apply a second thin skim coat over the top of the surface before leaving this to dry overnight.
Step 5
Let the applied finish dry for at least 48 hours before lighting sanding and applying plaster primer and paint.
For more information on the product and application procedure, take a look at the video below.