How to replace a broken tile
Chipped, cracked or broken tiles are a fact of life and that's why it is important that you always order extra tiles. Replacing a damaged tile is easy if you already have some spare.
When installing new tiles it is standard practice to order extra tiles, not only to allow for breakage during installation, but also to ensure you have tiles on hand in case damaged tiles need to be replaced. If you are replacing existing tiles for which there are no replacements, and the damage is not to extensive, an epoxy putty can be used to fill in dings or cracks - using only a tiny amount of artist's oil paints to match the colour. See at the bottom of this page for more details.
Ceramic tiles can crack through damage if a heavy object is dropped on them. Replacing a single tile is more cost-effective than retiling an entire floor.
HERE'S HOW:
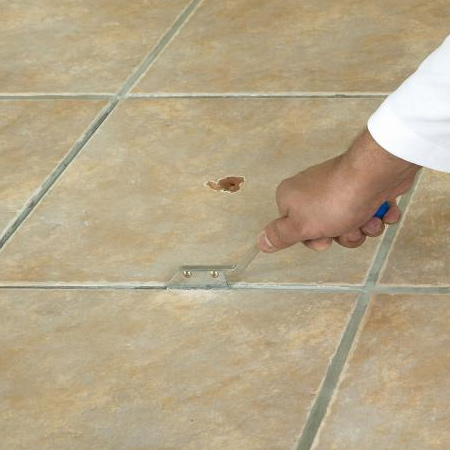
1. Use a grout rake to remove the grout around the damaged tile. You will find all the tools and supplies that you need for this project at your local Builders.
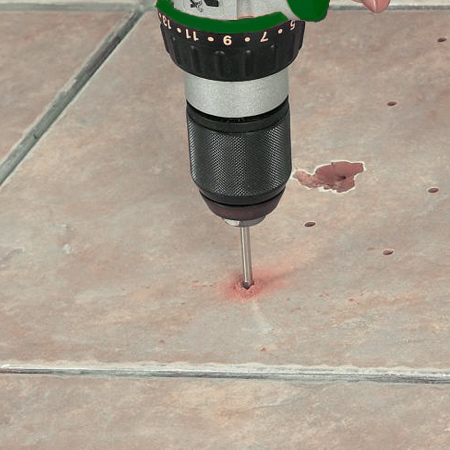
2. Using a drill / driver and HSS bit, drill a series of holes into the broken tile. Drilling holes will allow the broken tile to be easily removed.
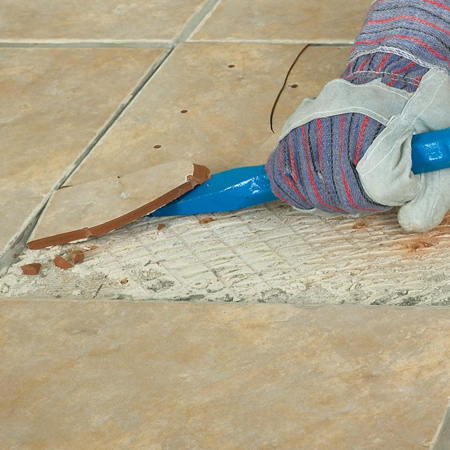
3. Use a heavy hammer and cold chisel to remove the broken tile.
Safety First: Wear goggles while drilling into the tile and wear gloves to protect your hands from sharp edges.
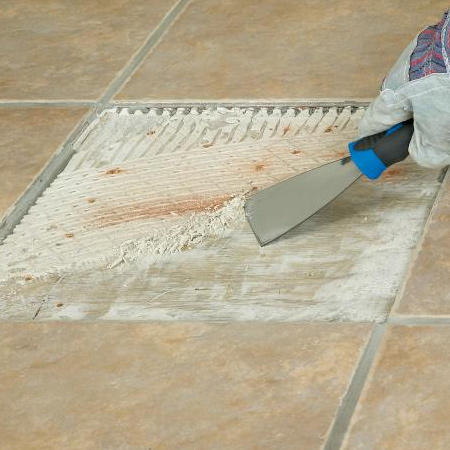
4. Use a paint scraper to remove any hardened old adhesive off the floor. Hard areas can be gently tapped with the hammer and chisel to loosen.
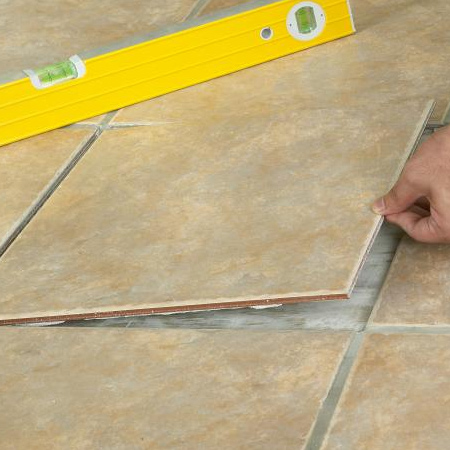
5. Mix tile adhesive according to the instructions and apply to the entire back of the replacement tile. Place the tile gently in the space and use a spirit level to make sure it sits flush with the surrounding tiles. A light tapping with a rubber mallet will assist in gently pushing the tile down to bed firmly in the tile adhesive.
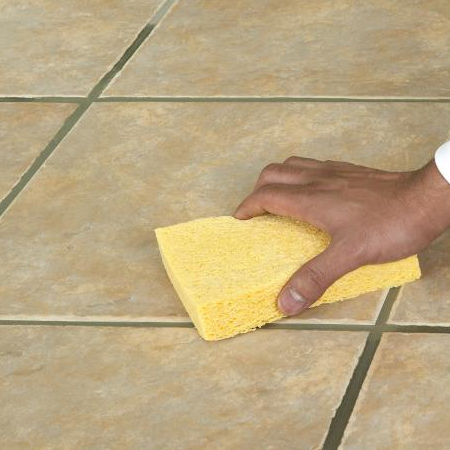
6. Allow time for the adhesive to dry and then apply grout. Leave for 30 minutes, then clean off any excess with a slightly damp sponge. Any excess dust can be removed after leaving the grout to dry overnight.
diynetwork.com
Fix small damaged areas on tiles
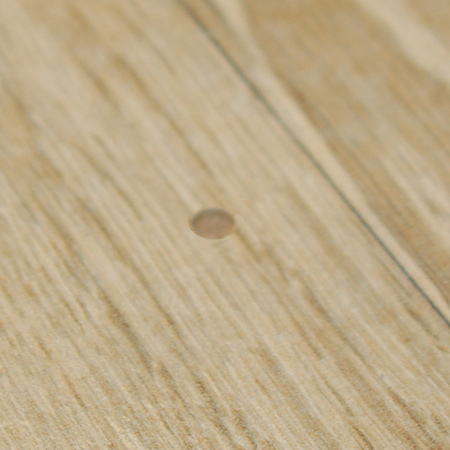
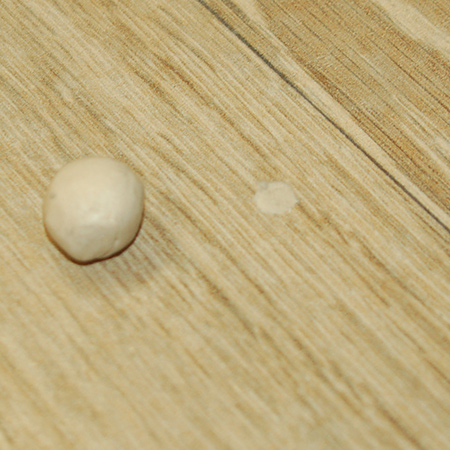
To show how you can repair tile using epoxy putty, I drilled a hole in a wood-look tile. Using Alcolin epoxy putty (QuikWood) I kneaded the product and applied to the hole. I used QuikWood because it already has a pale beige-like colour that resembled the tile colour, but you can easily tint the epoxy putty using a tiny amount of artist's oil paint.