
Is it Possible to Achieve Perfect Mitre Joints?
When it comes to DIY and woodworking, and sometimes even home improvement, there will be a time when you need to cut mitre joints, but is it even possible to cut the perfect mitre joint?
16/10/2021
I have been doing DIY projects for the past 40 years and during this time I have cut more than a few mitre joints. Mitre joints are commonly used if you are assembling picture frames, installing cornice or skirting boards, and for projects where you want a decorative corner finish.
Whatever the reason for cutting mitre joints, you want them to be as perfect as possible and I have come to realise over the years that this isn't always the case. There is no mitre saw on the market at this moment - or that I know of - that can cut 100% perfect 45-degree mitres for a 90-degree corner. No matter what mitre saw you use, there is always going to be that fractional difference between the two mating pieces and sometimes you just have to accept this and do what you can to disguise it.
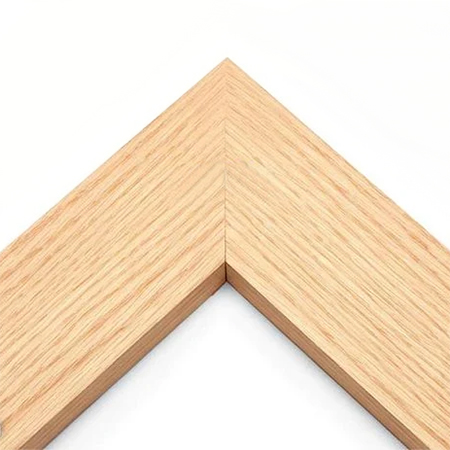
What is a Mitre Joint?
Imagine you are making a picture frame. To make the frame you need 4 pieces of wood for the top, bottom and sides. To make these 4 pieces into a square or rectangle, you need to cut 45-degree angles at the corners to make a full 90-degree corner - this corner angle is known as a mitre. It is where two angles join to create a corner. You will make mitre cuts on a vertical plane whereas a bevel joint mentioned below is cut on a horizontal plane.
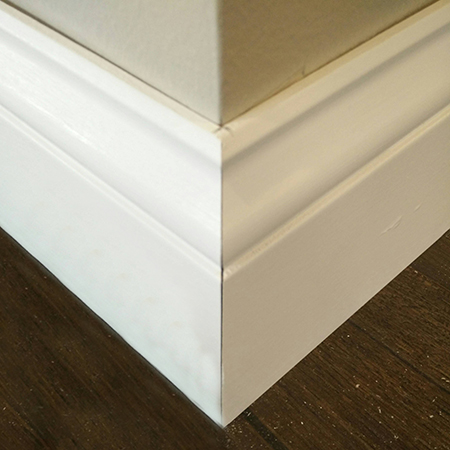
What is a Bevel Joint?
A bevel is different to a mitre joint in that the cut is horizontal as opposed to vertical. A good example of this is when you need to install skirting boards, crown moulding or cornice. If you have a compound mitre saw, this has the ability to not only cut mitres but also bevels and these joints are the cuts made to join two horizontal mating pieces together, as can be seen below.
Knowing the difference between these two jointing methods will let you better understand the process involved in cutting these two joints.
How to Cut the Perfect Mitre Joint
When you are wanting to make perfect picture frames or any type of frame, perfect mitre joints is a must if you don't want gaps to show between the two mating pieces. There are several ways of doing this:
Check the Wood
Make sure the wood is the same width and thickness on the top, bottom and side pieces. Too often, you purchase wood at your local Builders, hardware store or timber merchant where the planks purchased are not exactly the same width or thickness and this will affect the cutting angle and fitting together the corners.
Clean the Saw Table
Even the smallest quantity of debris on the saw table will affect the cutting performance and may even make a slight difference when cutting the 45-degree angle. It's a good time to make sure the mitre saw is clean and oiled for maximum performance.
Ensure Blade is Sharp
A dull blade will not only affect the cutting stroke, but it will also rip and tear along the cutting edge. If you see that the wood is burning along the cut edge or the edges of the cut are ripped, it is time to replace the blade.
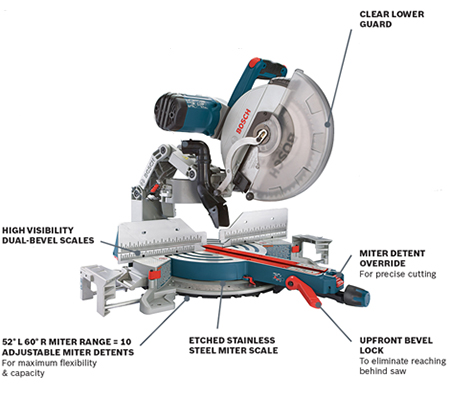
Set up the Mitre Saw
Setting up the mitre saw, or whatever sawing method you use needs to be exact. If you are using a mitre saw, you will have left and right adjustments for cutting the corner mitres. A good tip to remember is to ensure to set the machine for exactly 45-degrees.
Check the Cut Angles
Before assembling the piece, test that the angles fit together perfectly. There is still time to make any changes before you fasten everything together.
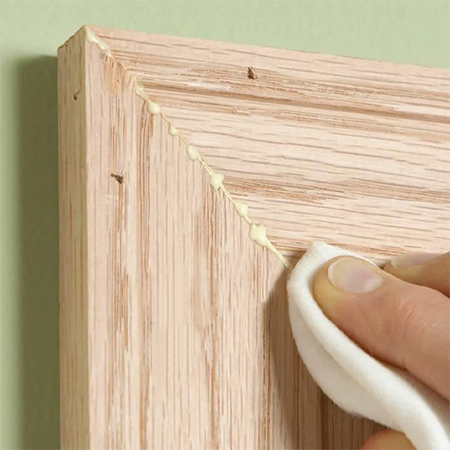
Wood Filler Fixes Everything!
If all else fails, apply wood glue to the joints, wiping away any excess that oozes out with a damp cloth and leave to dry. After that, you can apply tinted wood filler to match the finish being applied.
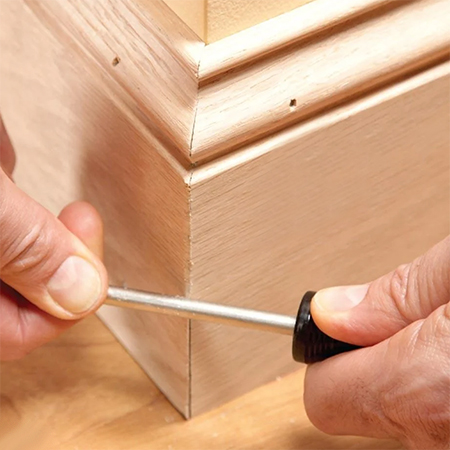
Quick Tip
If you are performing bevel cuts to install wood skirting boards, you can solve the problem of gaps by running a screwdriver down over the edges. This will flatten the wood fibres and close the gap for a perfectly - almost - executed joint.
all images family handyman