
How to Make a Solid Wood Dining Table
Here is a dining table that you can make over a weekend, and you can choose the material you want to make it with, whether it be Pine, Meranti, Saligna or other hardwood.
20/08/2022
instagram.com/angelarosehome/
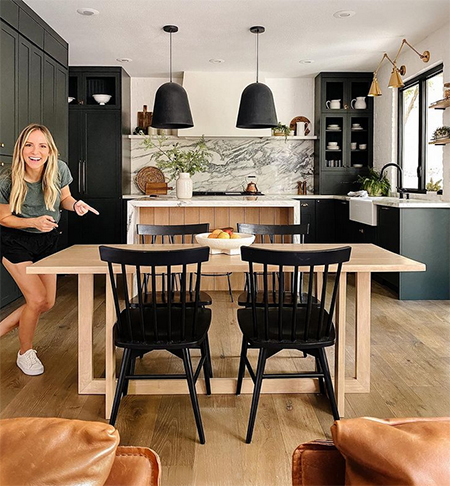
There are plenty of ideas out there for making a wooden dining table, but many appear too difficult at first glance or are just not what you want for your dining room. The dining table shown here by angelarosehome.com and the tutorial can be found on her website, or you can view lots more of her projects on Instagram.
Choose the wood you want to use for making this dining table. Pine is affordable, Meranti and Saligna slightly more expensive, or opt for hardwood.
instagram.com/angelarosehome/
The thickness of the wood can be easily achieved by using raw pine - unplaned or PAR- as this is usually much thicker - around 25mm in thickness - than PAR pine and just needs a bit more sanding. Unplaned pine is also more affordable, making the table cheaper to make.
instagram.com/angelarosehome/
YOU WILL NEED:
Choice of material to make the table
Wood glue
Screws based on thickness of wood used
TOOLS:
Drill plus assorted bits OR
Kreg pocket hole jig OR
Biscuit joiner
Orbital or random orbit sander plus assorted sanding pads
Quick clamps and bar clamps
Tape measure and pencil
Safety gear
HERE'S HOW:
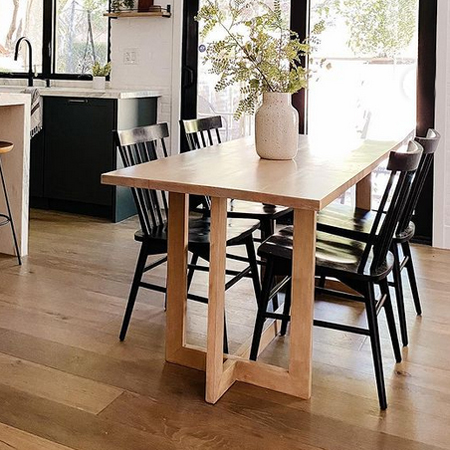
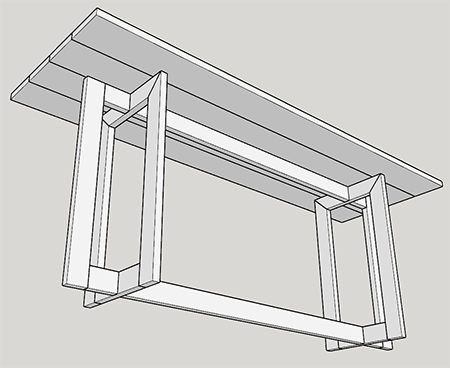
The beauty of this modern dining table is that you can make it any width and length. However, if you decide to go for a length longer than 1.8 metres, add a cross piece under the table to add extra support. You can create a Lap Joint so that the cross pieces intersect with the long table support or add another Leg Frame mounted in the centre.
GOOD TO KNOW:
Choose the wood for this project carefully. If you opt for pine, ensure that the planks have no cupping, bowing, warp, or twist. You ideally want planks without any knots. Do not try and substitute the laminated plank top with laminate pine shelving as this will not look as good. While laminated pine shelving has its use, finger joints are clearly visible, and it sometimes happens that the planks can split apart.
Step 1
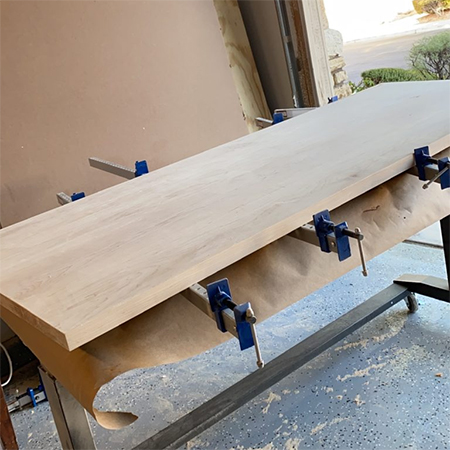
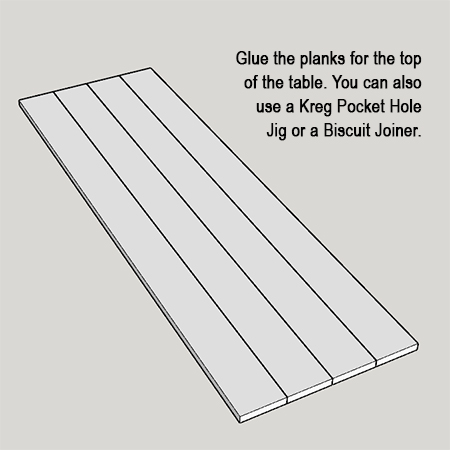
The table top is made by gluing together all the necessary planks to create the width that you want for the table. You can make the table as long as you wish depending on whether you want a 6- or 8-seater dining table, or even go up to a 10-seater. For this project maple was used but you can substitute with any soft or hardwood. The planks are glued and clamped together for 25 hours to create a strong bond.
GOOD TO KNOW:
For strength and durability, using a Kreg pocket hole jig or biscuit joiner will ensure that the planks do not warp or distort later. This can occur due to changes in ambient temperature and humidity. If you use only wood glue, apply liberally along the length of the plank, clamp and then immediately wipe away excess glue with a damp cloth. Any glue left on the surface will affect the finish applied.
Step 2
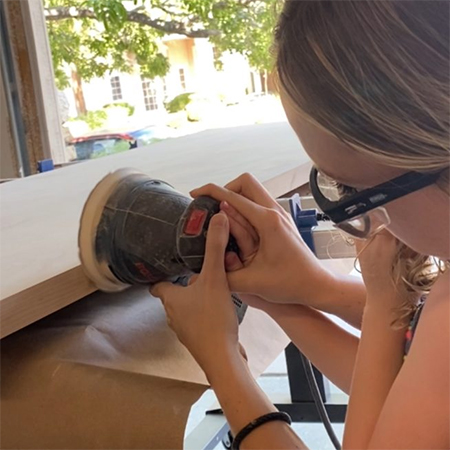
If you are using unplaned pine it is better to start with 100- or 120-grit sandpaper to remove as much of the rough finish as possible. Once this is reasonably smooth, switch to 180- or 220-grit sandpaper to finish. You ideally want the surface to feel silky smooth.
Step 3
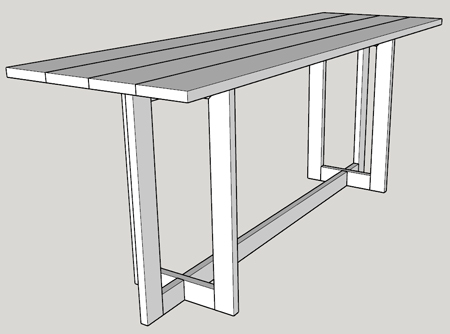
The top section of the Leg Frames and top of the uprights are cut at a 45-degree angle. The best method of assembly is to use a Kreg pocket hole jig and Kreg screws, as well as wood glue, or you can use a biscuit joiner. Both these methods are preferable to simply gluing and clamping and will give the table the support it needs.

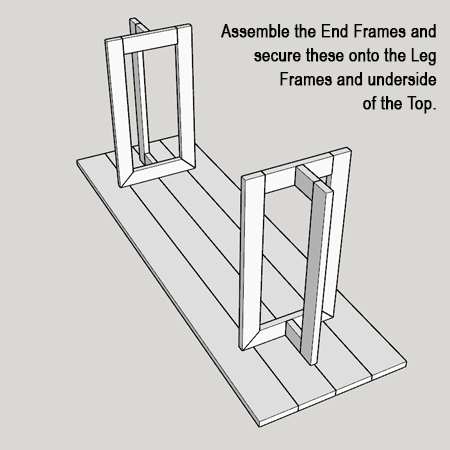
Step 4
Assemble the End Frames as shown below and using one of the methods mentioned above. These are secured onto the Leg Frames using wood glue and screws, preferably pocket hole, or biscuit joiner.
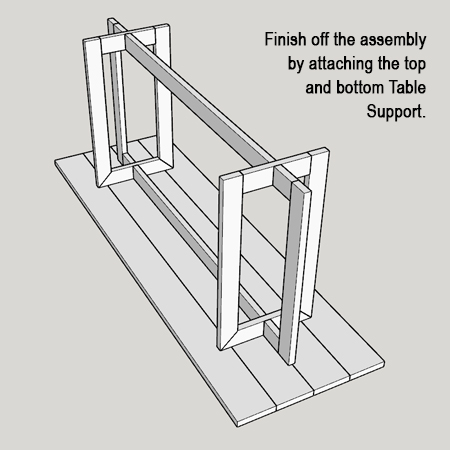
Step 5
The final step in finishing your new dining table is to attach the top and bottom Table Supports. These are secured to the Leg Frames with wood glue and screws. The top Support is also secured to the underside of the table top using Kreg pocket holes and screws.
FINISHING:
The finishing of the table is up to you and depends on whether you want to keep it natural, add a wood tint, oil, varnish, or apply sealer. All are good finishing solutions, but oil tends to be messy and has to be regularly applied.
GOOD TO KNOW:
If you decide to stain the wood, keep in mind the type of timber you are using to make the table. Stain looks different on pine than it does on hardwood, so be sure to check this before you apply the wrong stain.