
DIY to Make this Modern Bench for a Home
This modern bench made from PAR pine is one that you can start and finish in a couple of hours by following the instructions below.
05/06/2022
instagram.com/neatly.living/
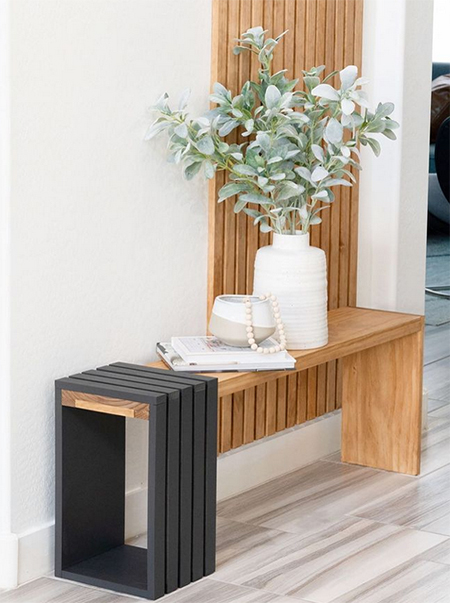
Don't you just love the clean lines of this modern bench made using PAR pine and laminated pine shelving that you can purchase at Builders AND have cut to the sizes required for easy assembly. You can adjust the length of the bench if you need it shorter or longer to fit in a specific space or you can apply a dark stain instead of paint. This is one of the easiest benches to make and using pine makes it relatively inexpensive when compared to the cost if you have to buy one.
instagram.com/neatly.living/
YOU WILL NEED:
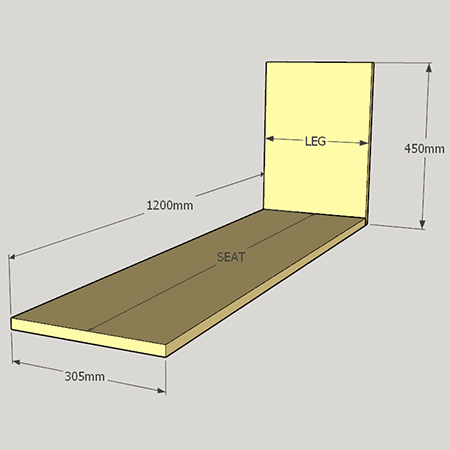
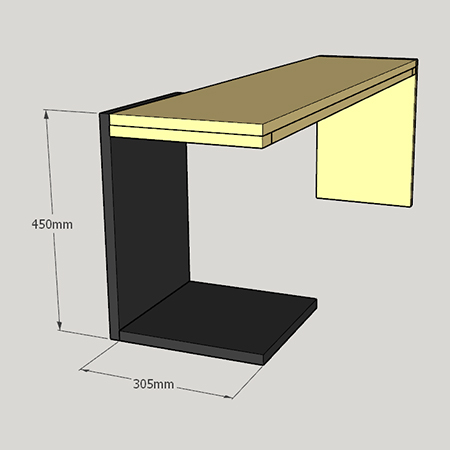
1 of 21 x 1200 x 305mm laminated pine shelf - seat
1 of 21 x 450 x 305mm laminated pine shelf - leg
1 of 21 x 450 x 305mm laminated pine shelf - box
1 of 21 x 305 x 305mm laminated pine shelf - box base
2 of 21 x 305 x 44mm PAR pine - short seat support
2 of 21 x 1112 x 44mm PAR pine - long seat support
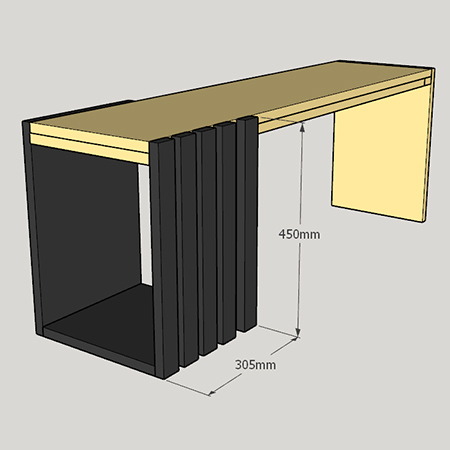
5 of 21 x 450 x 44mm PAR pine - front slats
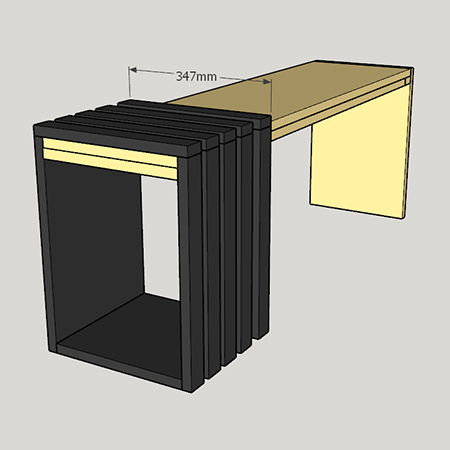
5 of 21 x 347 x 44mm PAR pine - seat slats
4 x 45mm cut screws
4 x 30mm cut screws
Wood glue
Wood filler
Varnish and paint to finish
TOOLS:
Drill plus assorted bits
OPTIONAL: Kreg pocket hole jig, Festool domino or biscuit joiner
Orbital sander plus 180-grit sanding pads
Tape measure and pencil
Have all the material cut to size as Builders for quick and easy assembly
HERE'S HOW:
Step 1
Attach the leg to the bench seat as shown below. You can do a basic butt joint, or you can use pocket holes, domino machine or biscuit joiner. Drill countersunk pilot holes and then use wood glue and 4mm screws to secure.
Step 2
If you are using pocket holes, pre-assemble the support frame, as shown below. If not, use wood glue and 30mm screws to secure the frame underneath the bench seat. This frame not only provides support but also gives the seat a chunkier look.

GOOD TO KNOW:
Before moving on to the next step, this is where you apply wood filler to all the screw holes, sand, and stain and/or paint the bench.
Step 3
Join the box back and base together using wood and screws and then attach this to the back side of the bench seat using wood glue and 45mm screws, as shown below.
Step 4
Secure the [5] slats to the front of the bench, spacing them equally along the 305mm span. Secure with wood glue and 45mm screws at the top and bottom.
Step 5
To finish off the bench, secure the top slats in position using wood glue and 45mm screws.
Finishing
If you have an instagram account, check out the video tutorial below on how to assemble and finish off the bench seat. If you don't, fill screw holes on the box frame with wood filler and sand once dry. Finally, paint the box with your choice of paint colour.