Build a Display Cabinet using Bought Cupboards
Aligning with my recent article on DIY built-in cupboards, this is an easy display cupboard that you can make and pick up skills for your built-in project.
30/01/2023
They say that practice makes perfect, and I do believe it is better to start off with small projects before moving on to the bigger tasks, so this easy display cabinet is a great introduction to assembling furniture using readymade kitchen carcasses to build a larger unit. It will introduce you to methods you can put to later use if you want to add built-in cupboards to your home. Click here to see our recent article "How to build built-in cupboards or cabinets".
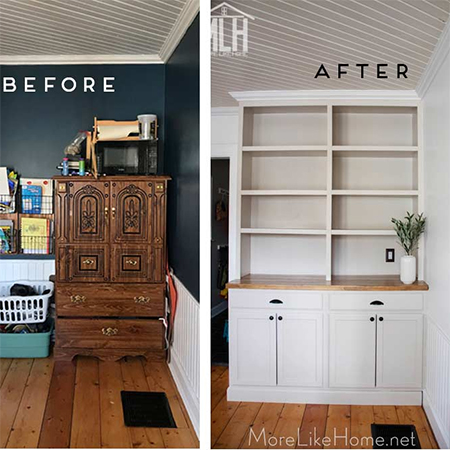
In this project, morelikehome.net shows how to take cupboard carcasses and turn them into a display cabinet that you can finish to match any decor style or room theme. All materials for the project can be purchased at your local Builders store and you can even have everything cut to size if you don't have larger cutting tools.
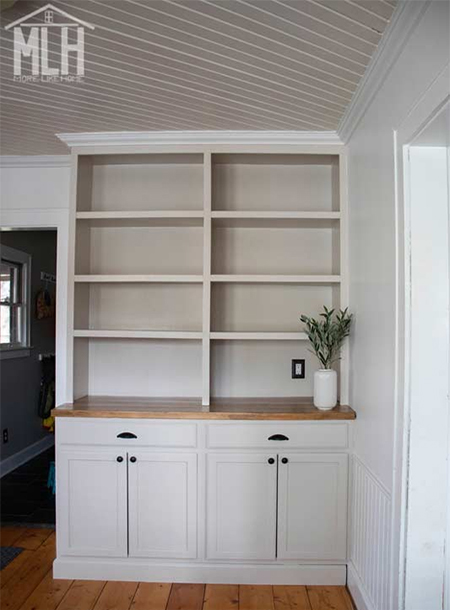
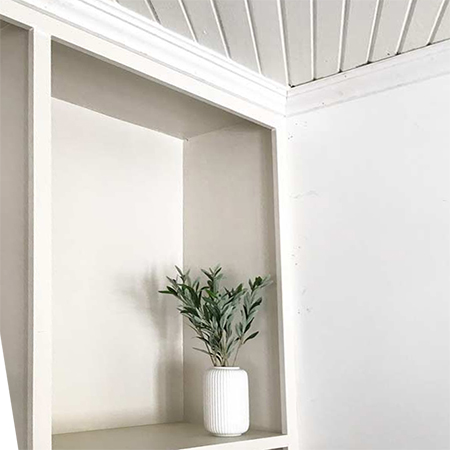
A small nook in the corner of a kitchen is fitted with a built-in display cabinet to match the design of the existing kitchen cupboards. What is nice and easy about this project is that it uses stock cupboards that you can buy from suppliers around the country. These stock cupboards are using manufactured using SupaWood that can easily be painted, although you could just buy doors separately if you needed a specific design or finish.
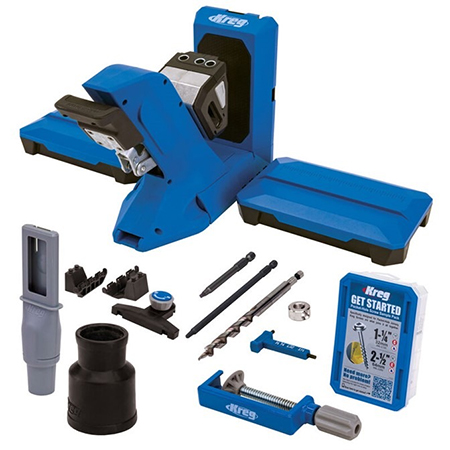
Invest in the Kreg 720 PRO Pocket-Hole Jig for consistent results and easy assembly. Kreg products are available online and at select dealers countrywide. Visit www.kregsa.co.za for full details.
HERE'S HOW:
Step 1
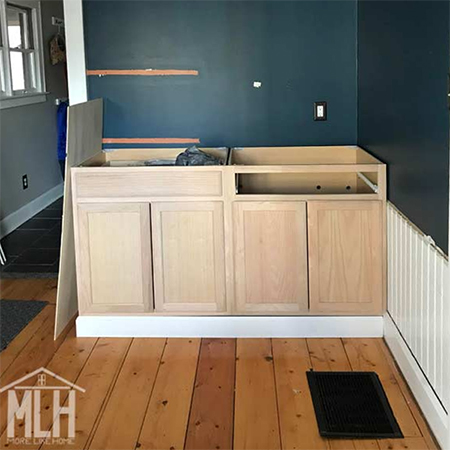
The first step is to measure up the area where you want to fit the display cabinet. Measure the width at different heights (to allow for any differences in walls) and the total height. With this information, you can go online to find a local supplier of kitchen carcasses or cupboards. The majority of suppliers provide full details on their website of all the sizes they stock, which will allow you to plan what cupboards will fit best in the space. You can incorporate open shelves, cupboards with doors, or even drawer units, depending on what you want and the space available.
Step 2
Floor units will be the first pieces to be installed and these should be joined together and then fastened to the wall using wall plugs and screws.
Note: Not mentioned in these steps is the addition of a piece of skirting or wood at the bottom of the cabinet.
Step 3
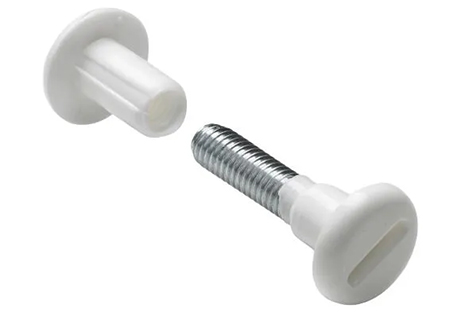
To fasten cupboards together use connecting screws similar to that shown below. These are available at hardware stores and are easily inserted. Clamp the two cupboards together and drill a hole through both that is the same diameter as the centre of the connector. Place one end of the connect on one side and the other end on the remaining side and screw these together. Use 2 connectors per join - one at the top and one at the bottom.
Step 4
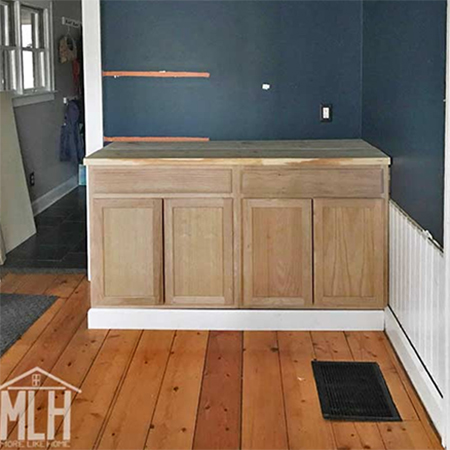
In this step, you will add the top for the base cupboards. The material you use for this is up to you. This display cabinet has a top comprised of PAR pine glued and screwed together with pocket-holes and trimmed to fit. It is best to fit this using a Kreg Pocket-Hole Jig where holes can be drilled in the underside and screwed to the sides. If you do not have a pocket-hole jig, add braces to the top of the cabinets that you can use to fasten the top in place. Drive screws through the undersides of the braces and into the top.
Step 5
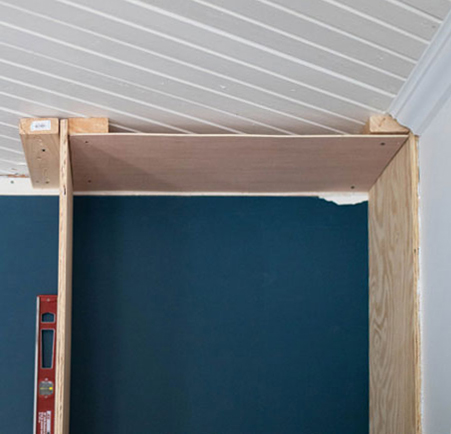
Measure from the top to the ceiling and have board or plywood cut to this length. Use pocket-holes to secure the uprights to the countertops and support blocks attached to the ceiling for the top.
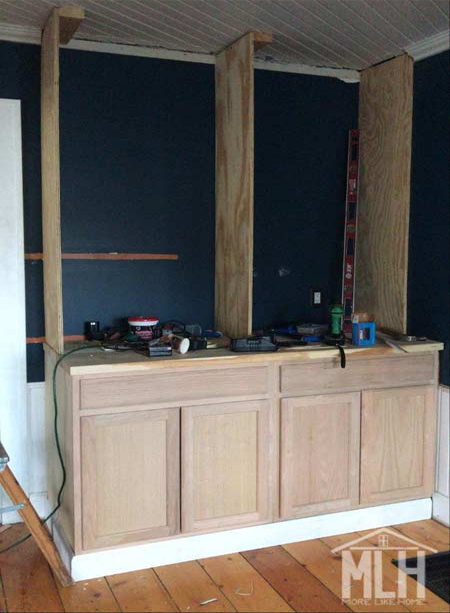
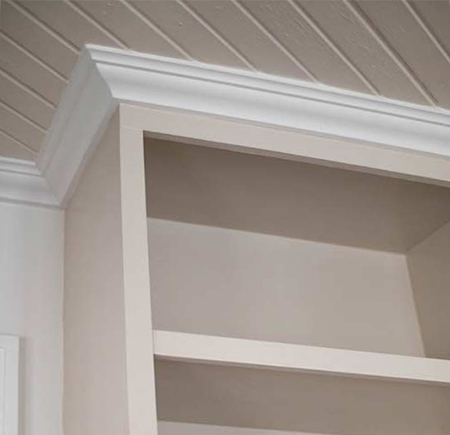
Note: A section of the cornice around the ceiling was removed so that the cabinet sits flush against the wall.
Step 6
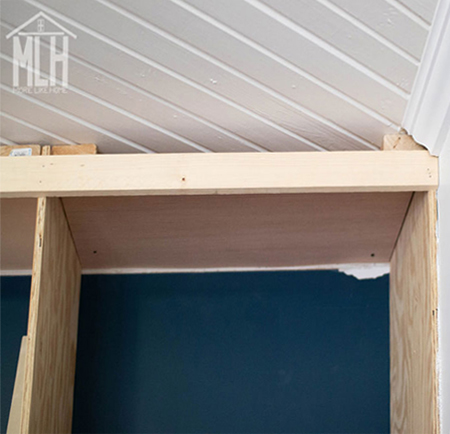
Measure the distances side-to-side in each section and cut a piece of board or plywood to attach to the ceiling supports, as shown below.
Step 7
Conceal the top by mounting an apron in front of the cabinet. This will also be used to support any moulding or detail that you want to add.
Step 8
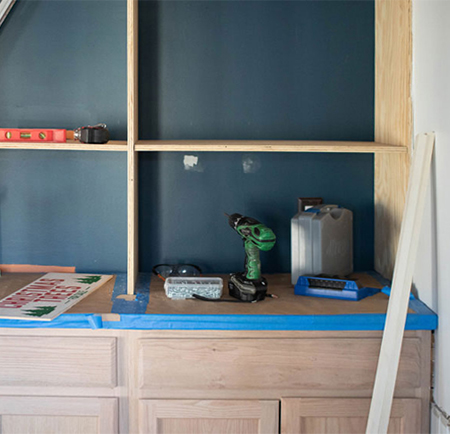
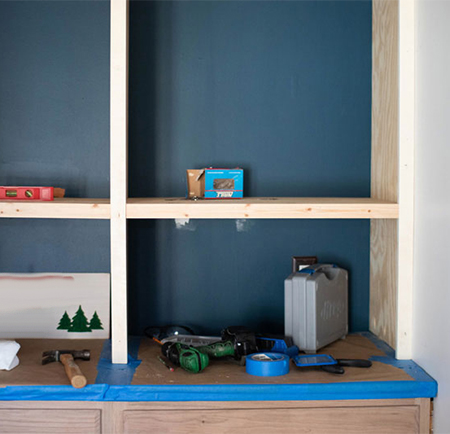
Measure and cut board or plywood for the shelves and secure these in place with pocket-holes on the underside of each shelf.
Step 9
Thin strips of board or plywood - or you can use pine or meranti moulding - pinned onto the edge of the uprights give a more finished look to the cabinet.
Finishing
For this project, it is the finishing details that make the difference.
• Trim
Add cornice or moulding around the top of the cabinet to hide the fastenings and bring extra detail and dimension to the unit. Builders have a range of polystyrene, urethane, and board mouldings in different styles that you can choose from.
• Fill
Use wood filler on any holes or defects on the unit and acrylic (paintable sealer) around the top and side edges to fill any gaps.
• Prime and Paint
Take the time to sand the unit before painting, sealing, or varnishing.