Easy to Make Bicycle Storage Rack that Saves Space
This simple bicycle storage rack keeps your bicycle safe and is so easy to use that even the kids can use it for storing their bicycles.
22/10/2023
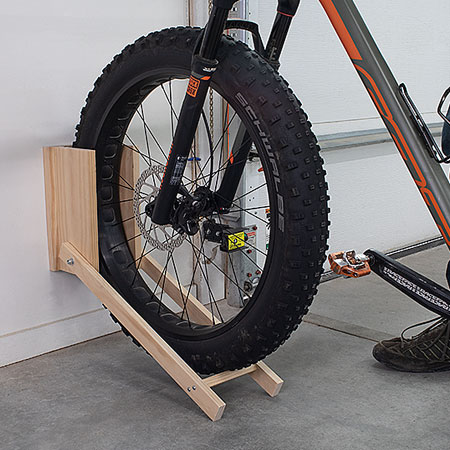
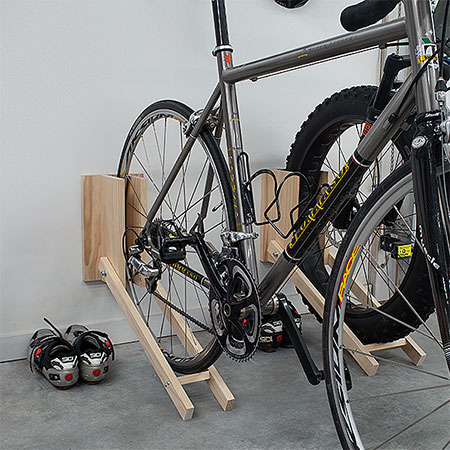
It might look simple, but this space-saving rack is excellent for storing and keeping bicycles safe when not in use. It is so easy to use that the kids don't have to drop and leave their bicycles anymore - they can store them in the bicycle rack themselves. The bicycle storage rack is made using PAR pine and a piece of shutterply, plywood or laminated pine shelving that you will find at any Builders store and, of course, to make this project quick and easy you can use a Kreg Pocket Hole Jig. Stock up on the supplies you need and keep a couple of hours spare to make one or more of these bicycle storage racks.
We found this plan for the bicycle storage rack on the build something website and it is ideal for the whole family to use. Before you start building the storage rack, determine the perfect place to mount the rack for storing your bicycles.
The design of this bicycle storage rack is so simple that even a young child can make use of it.
Once you have made the bicycle storage rack, take the time to remove any rough edges and sand smooth before applying a wood sealer or varnish to protect and extend the lifespan. If the bicycle storage rack is to be mounted outdoors, apply several coats of exterior sealer according to the manufacturer's recommended guidelines for proper application.
YOU WILL NEED:
1 of 19 x 140 x 300mm pine - back
2 of 19 x 140 x 300mm pine - sides
2 of 19 x 44 x 600mm PAR pine - arm
1 of 19 x 12 x cut to fit - wheel stop
120-grit sandpaper
32mm coarse-thread pocket-hole screws
4 of pan-head screws
2 of hex bolts
8 of washers
Wood glue
TOOLS:
Drill/Driver plus assorted bits
Kreg pocket-hole jig
Clamps
Tape measure and pencil
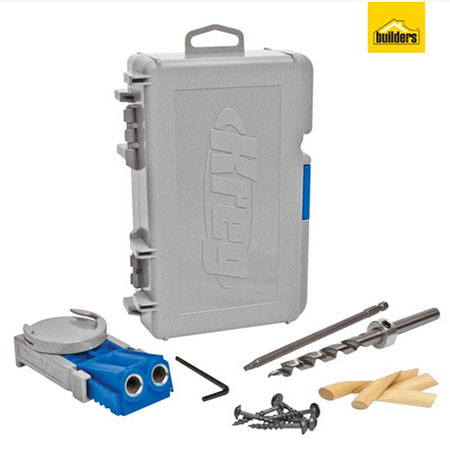
Add the Kreg R3 Pocket Hole System to your DIY workshop. Available @ Builders or online suppliers.
HERE'S HOW:
Step 1 - Side pieces
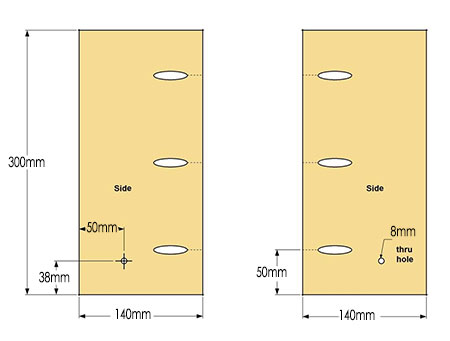
Take both of the Side pieces and use your pocket hole jig to drill pocket holes using the dimensions shown in the diagram below. At the same time, you can also drill the bolt holes that will be used to attach the Arms later.
GOOD TO KNOW
Place the [2] Sides together with edges flush and drill an 8mm hole through both pieces.
Step 2 - Back pieces
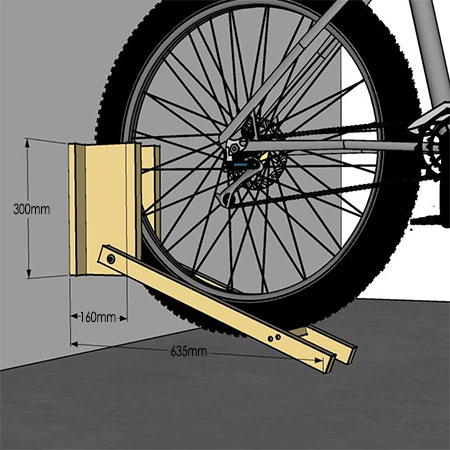
Use your bicycle to measure the distance required between the [2] Side pieces. With the tyre in place, measure the tyre thickness and then add 12mm to the measurement. With that measurement, you can position the [2] Side pieces against the Back - with the tyre thickness plus 12mm between them - centred on the width of the Back and attach the Sides using wood glue and pocket hole screws.
GOOD TO KNOW
For a bicycle with skinny tires, and due to the tight fit, you will need to have the pocket holes face outward on the Sides to get to them with a driver bit. For wider tires, you can face the pocket holes inward. For skinny tires, you’ll also need to slip the arm-mounting bolts (with a washer) into the holes in the Sides before you attach them.

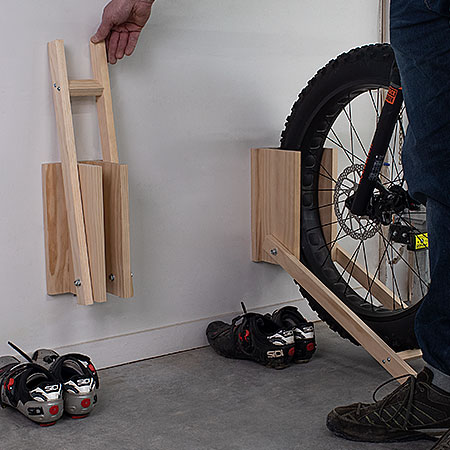
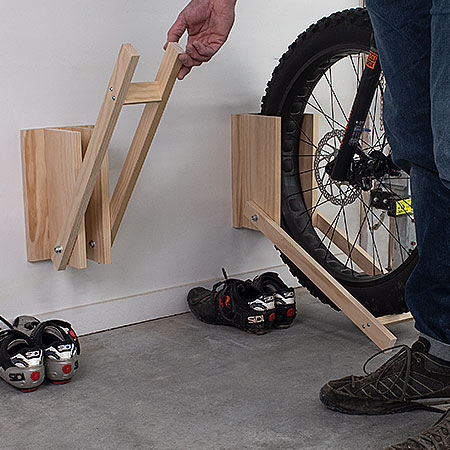
Step 3 - Arms
Using the same method as you did for the Arm pieces, drill holes through both and slip the bolts and a washer into the holes in the Sides. Add a second washer on the outer face of each side before slipping a Ram on each bolt. Finally, slide a third washer on each bolt, as shown, and the hex nut as indicated in the diagram below.
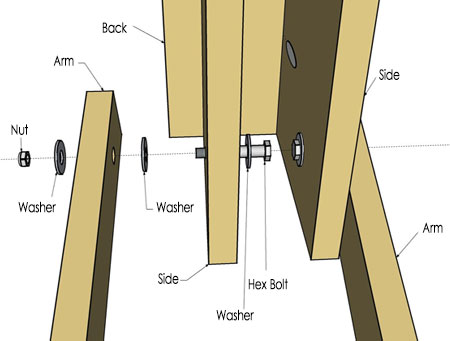
GOOD TO KNOW
Use a wrench or spanner to tighten each nut until the Arm pivots on the bolt with little resistance, but has no excess play.
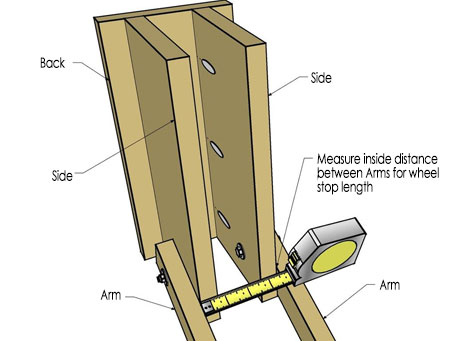
Step 4 - Wheel stop
To get the spacing right for the length of the Wheel Stop, use a tape measure to measure the space between the Arms at the edge of the Sides. Cut [1] Wheel Stop to that length.
Step 5 - Mount the bicycle stand
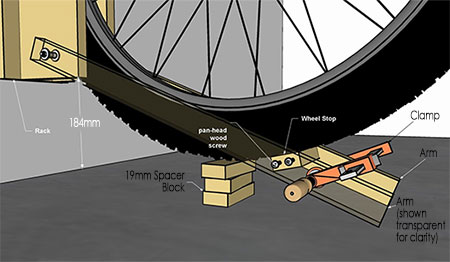
Use wall plugs and screws to mount the bicycle storage rack on the wall. It should be mounted 184mm off the floor.
Step 6 - Wheel stop
Using scrap pieces of timber, preferably about 19mm in thickness, stack these as shown in the diagram below to raise the tyre of the bicycle and allow for the correct placement of the Wheel Stop. It should sit flat against the bicycle tyre, as indicated below. Clamp the Wheel Stop in place, and then move the bike out of the way. Drill [2] 2mm pilot holes through each Arm and into the ends of the Wheel Stop. Remove the clamp, spread glue on the ends of the Wheel Stop, and then put it back in place and attach it using [4] pan-head screws.