
DIY Console Table for Entrance or Hallway
Make this attractive console table using PAR pine and laminated pine and place in an entrance or hallways.
06/09/2020
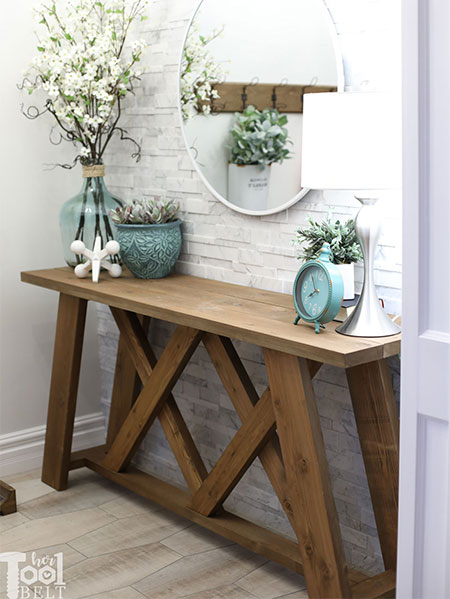
This stunning console table design is courtesy of Her Tool Belt and you can pop on over to her website for hundreds more DIY projects. Keep in mind that the website offers projects in Imperial measurements, so you will need to convert to metric using a conversion calculator. The console table is made using PAR pine and laminated pine shelving and you can buy everything you need for this project at Builders Warehouse.
GOOD TO KNOW: Some of the sizes listed below are not standard sizes. If you prefer to use standard PAR pine sizes, you will need to adjust the cutting list accordingly. Downloading the free version of SketchUp will let you draw up your own plans and make the necessary adjustments.
YOU WILL NEED:
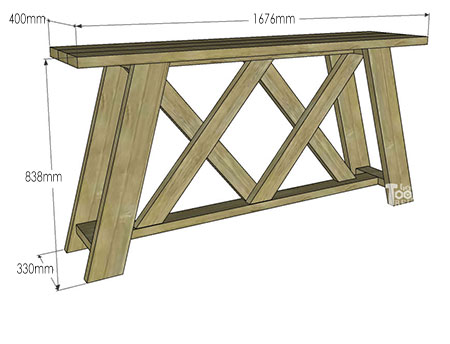
3 of 38 x 133 x 1676mm – Top - you can substitute this with a piece of laminated pine shelving
4 of 38 x 133 x 830mm – Legs with 15° mitre cuts on the ends
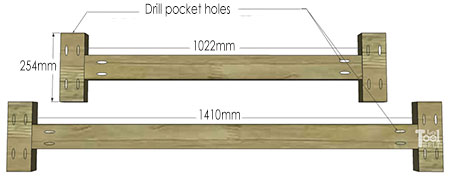
1 of 38 x 89 x 1410mm – Lower support
1 of 38 x 89 x 1022mm – Upper support
4 of 38 x 89 x 845mm – X’s with 40° mitre cuts on the ends
4 of 38 x 89 x 254mm – Spacer
63mm pocket-hole screws
50mm nails (or replace with screws)
Wood glue
120-grit sandpaper
Wood stain
Gloss or matte polyurethane sealer and paintbrush
TOOLS:
Kreg pocket-hole jig
Drill/Driver plus assorted bits
Mitre saw
Orbital sander plus 120-240-grit sanding pads
Hammer
Tape measure and pencil
HERE'S HOW:
Preparation
Sand all the cut pieces with 120-grit sandpaper. It is easier to do this before assembly and a further sanding with 240-grit sanding pads can be done after assembly.
If you are staining the wood, now is a good time to do this as it can be both messy and tricky to apply wood stain once everything is assembled.
1. Set up your pocket-hole jig for 38mm thick material and drill pocket-holes in the ends of both the upper and lower supports as well as the spacers.
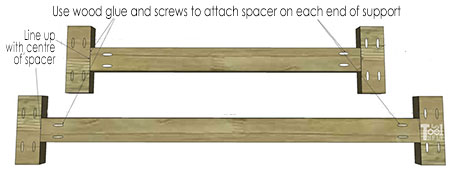
2. Measure to determine the centre of the spacers and mark.
3. Use wood glue and screws to secure a spacer to each end of a support, as shown below.
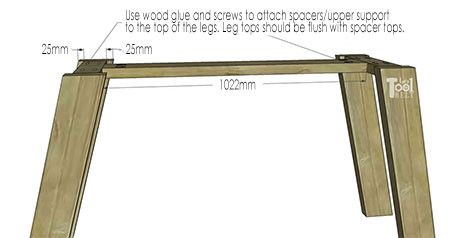
4. To assemble the base for the table, measure and mark in just under 25mm in from both sides on the top of the legs.
5. Use wood glue and pocket-hole screws to secure the spacers/upper support to the top of the legs, making sure the leg tops are flush with the spacer tops.
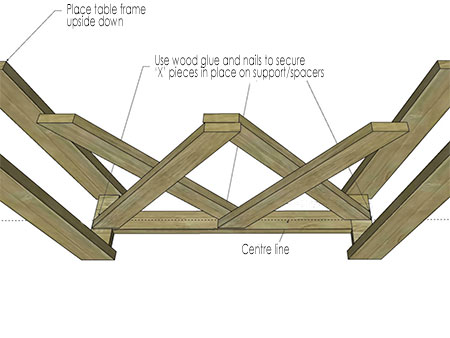
6. Flip the table base upside down to attach the X pieces. Measure and mark the centre of the upper support and also measure and mark at 536mm from both ends for placing the X pieces in the middle of the table base (upside down).
7. Use wood glue and 50mm nails (or replace nails with screws) to secure the X pieces onto the spacer/upper support. Make sure to line up one X piece on the edge of the spacer and another at 536mm, as is shown below. Repeat for the other side.
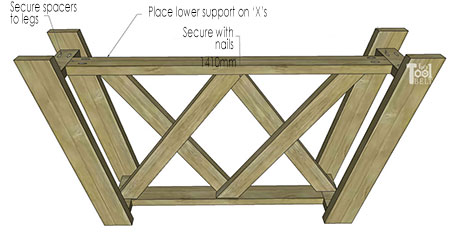
8. Apply wood glue to the ends of the spacers and position the lower support/spacer piece on top of the X pieces. Attach the spacers to the legs with screws.
GOOD TO KNOW: For this particular step you need to use a shorter square bit to drive in the screws, but it can be done otherwise with a bit of angling of the drill/driver.
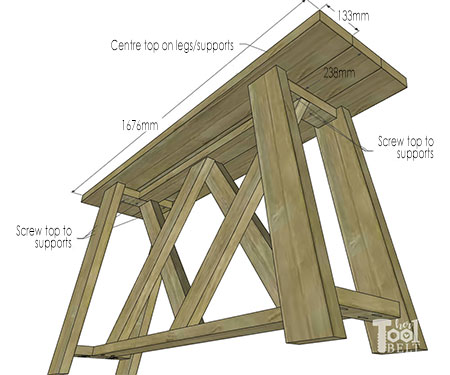
9. Now you are ready to attach the table top. Centre the top all the way around before securing on the table base with wood glue and screws.
Finishing
If you followed our preparation instructions, sanding and staining would have been done before assembly. With the table assembled you can now give it a further sanding with 240-grit sanding pads and re-apply a coat of sealer (if required). After that, apply at least 2 coats of a gloss or matte polyurethane sealer to protect the console table.