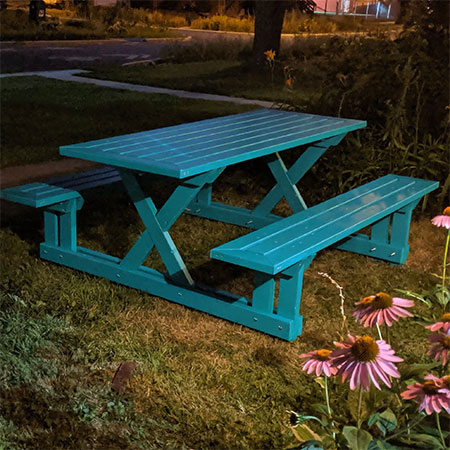
Make A DIY Wooden Picnic Table For Summer Dining
The hotter months of the year make it perfect to dine outdoors and this wooden picnic table will seat an entire family.
13/09/2020
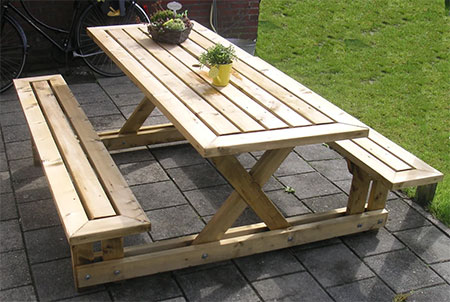
This outdoor picnic dining table is casual enough for family dining in the garden and it's made using affordable PAR pine that you can get at any Builders Warehouse or timber merchant. You have the option to make the table using 19/22mm thick PAR pine or 38mm PAR pine. The latter option will create a far sturdier and longer-lasting picnic table, but you can choose which is best for you according to your budget or what you have to spend on this project. This project is made using 38mm-thick PAR pine.
You could also make the table using reclaimed pallet wood, but keep in mind that you won't be able to get long lengths for the benches or table and may have to locate reclaimed flooring planks for these pieces.
Once the table is finished, you have the option to stain and seal in your choice of wood tint, leave it unstained and simply apply an exterior sealer, or painting it using Rust-Oleum spray paint in your favourite colour.
While it might look difficult to make, it is actually a very simple plan and you should be able to finish the assembly in a weekend if you have all the timber cut to size.
Use 38mm-thick PAR pine for a sturdy, long-lasting table.
Remember that you will be using pine for this project, so an annual application of an exterior sealer is essential if you want the table to last a long time. Or make sure it is covered in the event of rain.
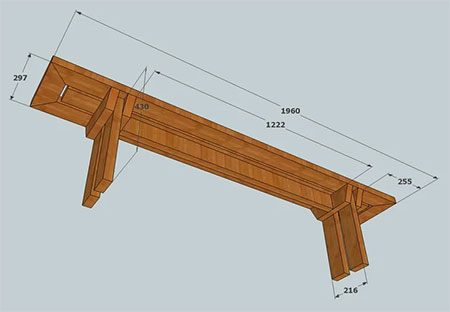
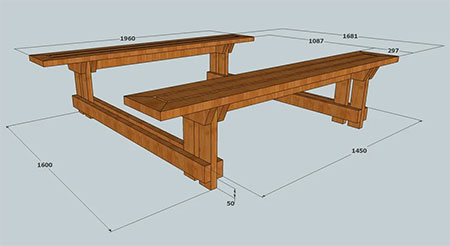
All the measurements have been provided in the diagrams for you to have everything cut to size but you will also need a few extra items:
YOU WILL NEED:
Download layout for cutting here
Download assembly diagram here
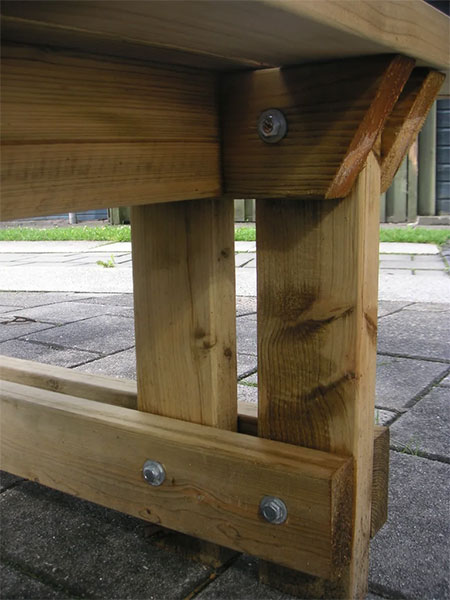
2 of M8 threaded rods with nuts
6 x 75mm screws
5 x 55mm screws
TOOLS:
Drill/Driver plus assorted bits
Hacksaw or angle grinder
Mitre saw or jigsaw
Orbital sander plus 120- and 240-grit sanding pads
Tape measure and pencil
HERE'S HOW:
Assemble [2] Benches
Use M8 8mm threaded roads to assemble the legs on the benches. Cut off any extra with a hacksaw or angle grinder. Any additional fastening can be done with 75mm screws.
Assemble the Table
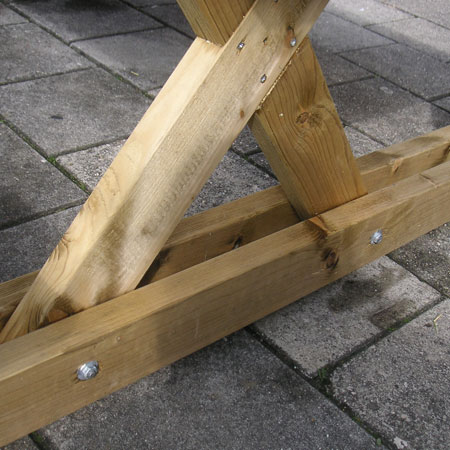
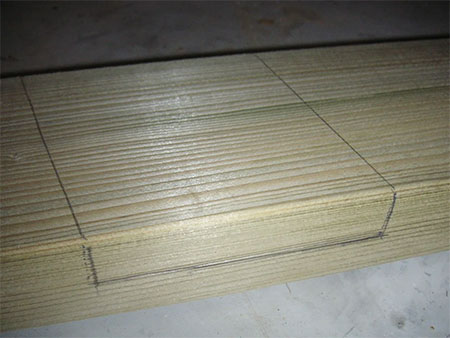
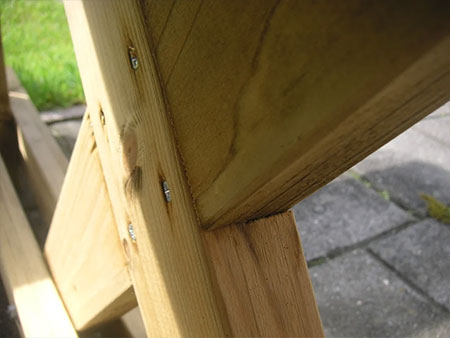
Assemble the table section using the diagram below. For the legs, you will need to cut half-lap joints to create the 'X' shape of the legs.

The image below shows how the 'X' leg sections are screwed together to create a strong joint on the table legs.
Assemble the Table to the Frame

Joining the table to the benches and main frame is done using M8 threaded rods through the main frame into the 'X' legs.