
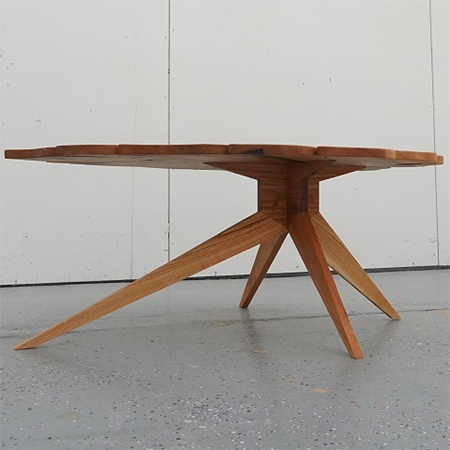
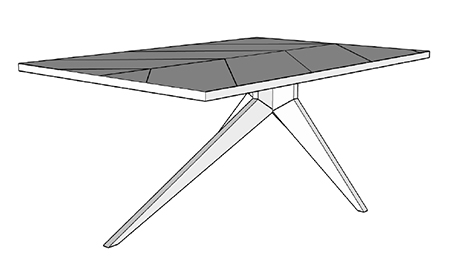
DIY Wood Coffee Table with Leaf Design
Readymade coffee tables are either square, rectangular, or circular, but this unique leaf design coffee table is one that you can easily make yourself.
03/03/2023
kreg tool
Let's be honest, coffee tables that you buy at most furniture or home decor stores can be a bit boring; they are either square, rectangular, or round and leave much to be desired when it comes to a unique look that will become a statement piece in the living room. This leaf design coffee table is anything but boring and is sure to be a conversation piece. While this leaf design coffee table is made of oak, you can substitute this with more affordable pine, go for meranti or saligna, or splurge on any hardwood you prefer for this project.
The video for this coffee table was recently featured on the home page, but all the requests I received asked that I place the project permanently on the website, with metric measurements, so here it is! The step-by-step instructions for this project are detailed below as well as a video that shows how to coffee table is assembled. The main tool used to assemble the coffee table is a Kreg Pocket Hole Jig System and you can find several models at tool and hardware stores around the country, or shop online for delivery to your doorstep.
kreg tool
The leaf design coffee table has a mid-century design, but this can be easily modified simply by re-designing the base for the table.
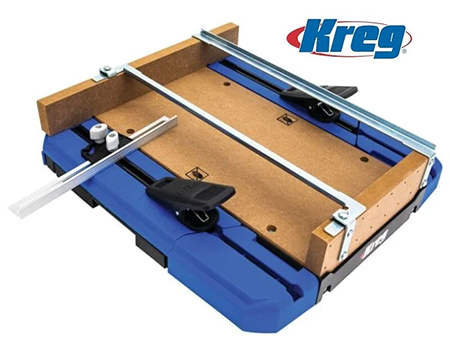
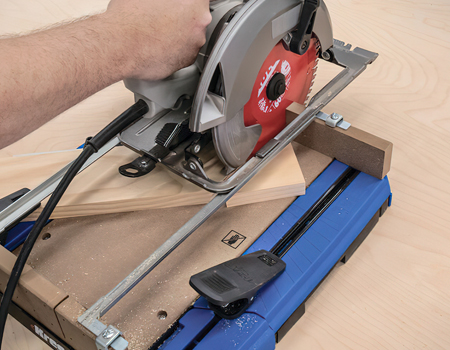
Kreg's Crosscut Station eliminates the need to purchase an expensive mitre saw for your DIY workshop and you can turn your circular saw into a mitre saw to perform a variety of mitre cuts, angle cuts, and crosscuts. The Kreg Crosscut Station has a solid MDF base as well as a sacrificial backboard that provides splinter-free cuts. Available online and at hardware stores countrywide.
YOU WILL NEED:
1 of 25 x 100 x 250mm choice of timber or board
2 of 25 x 200 x 2500mm choice of timber or board
Cut the following as per the diagrams shown below:
- 12 pieces to assemble the top. Mitre cuts at 45-degree angles for the chevron design
- 1 of centre hub - see diagram below
- 2 of side hub pieces - see diagram below
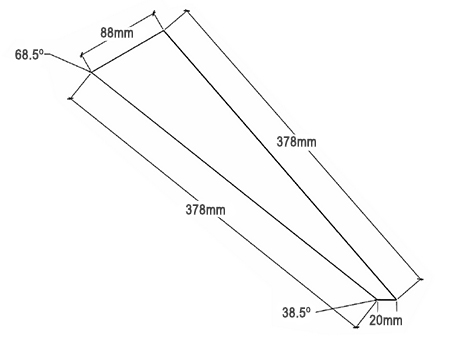
- 3 of short legs, base - see diagram below
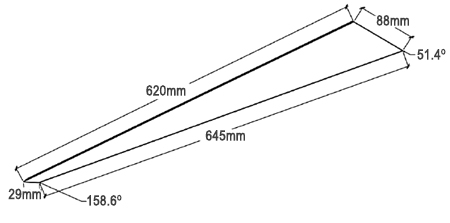
- 1 of long leg, base - see diagram below
Wood glue
Kreg pocket hole screws, assorted
Wood plugs
Choice of finishing
TOOLS:
Drill plus 90-degree driver plus assorted bits
Kreg pocket hole jig - any system
Kreg crosscut station
Jigsaw plus clean-cut blade
Circular saw
Japan saw or flush-trim saw
Orbital sander plus 80-,120- ,and 240-grit sanding pads
Clamps
Tape measure and pencil
Safety gear
HERE'S HOW:
Step 1 - Legs
Use the diagram for cutting the [3] short legs. Make note of the angles involved. Also, cut the [1] long leg as per the diagram supplied. Sand these pieces smooth so that they are ready for assembly.
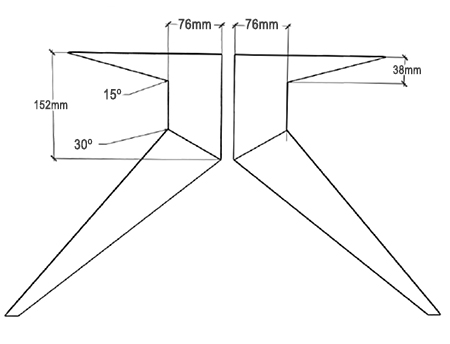
Step 2 - Centre hub
This essential piece secures all the components together. Check that the angle [30-degrees] is accurate or the legs will not sit properly. Attach the long leg and [1] short leg to the centre hub using wood glue, pocket holes and screws.
Step 3 - Hub sides
Complete the hub section by attaching the sides using wood glue, pocket holes, and pocket hole screws. If you are unsure about the process of joining together the hub, take a look at the video at the bottom of this page for a more detailed view. Sand all the components for the centre hub.
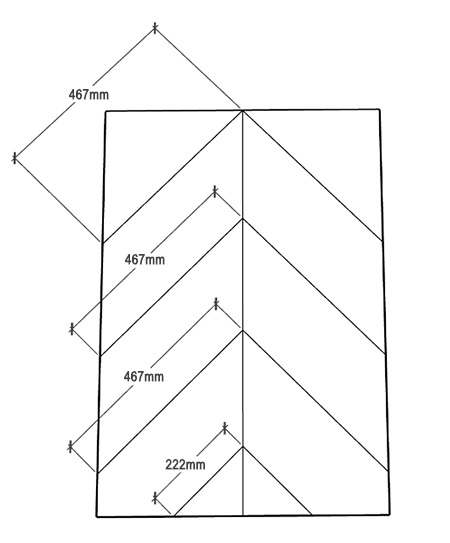
Step 4 - Tabletop
Lay out all the pieces for the top of the table using the above diagram. All the individual pieces are cut at a 45-degree angle to give a 'chevron' effect that looks good on the finished table. Before securing the pieces together, print out the enlarged leaf pattern and outline this on the tabletop. You will want to do this before joining the table pieces together to know where to drill for pocket hole screws for securing everything for the tabletop.
After marking out the leaf design, you can now drill the required pocket holes and join the pieces together using wood glue and pocket hole screws.
MY TIP: Place the assembled table top on a level surface and weigh it down or press flat overnight. This will ensure a strong bond for all jointed sections.
Step 5 - Leaf design
Using a jigsaw and clean-cut blade, carefully cut out the leaf design. Sand all the edges smooth after cutting.
Step 6 - Assemble
With the base and tabletop completed, join the two together using wood glue and screws.
Finishing
For a professional finish for the table, cut plugs for all the pocket holes and glue these in position. Let the glue dry overnight and then proceed with the sanding. Start with 120-grit sanding pads for rough areas and finish with 220-grit pads for a silky smooth finish.
To protect the table, you can apply an oil, polyurethane varnish, wood wax, or your choice of finish.